So todays post is a little bit different ! It is a pregnancy Vlog ; for all of you that didn’t know I am pregnant! I am currently 22 weeks but I am catching up on these !
How Far along? I am 19 Weeks
Weight gain/measurements:
Stretch Marks: No new ones!
Symptoms: It is getting so hard for me to sit up crunch style! I have to roll over if I want to sit up , I also feel like I can’t lie on my back anymore. I am also so thirsty for water, no soda or juice.
Sleep: Its been going good so far!
Exercise : walking a lot at night with my son, I would go to the gym but I don’t have a babysitter!
Exciting news / event: I learned what the gender was! I went to an independent Ultra sound place and the experience was amazing! The lady was so nice , she gave us pictures on a disk and I got to see babes face! But I am not telling yet ! I want to do a gender reveal for my family before I tell!
Miss anything? Miss sleeping on my belly!
Cravings? I Have been craving blueberries in everything! So weird I wanted Blueberry Th rolls! I also have been craving Chocolate teddy grams, it is so crazy but so delicious!I also have been craving fruit which is great for my diet! I mostly have been loving oranges with salt on top ooo delicious!
Gender? Its a surprise for now!
Movement? I haven’t felt a movement yet ..
Labour signs? I have not had labour sounds thank goodness !
Belly button in or out? Belly button Is in!
Wedding ring on or off? On
Mood? I am happy most of the time !
Looking forward to? To telling my family back in AZ!
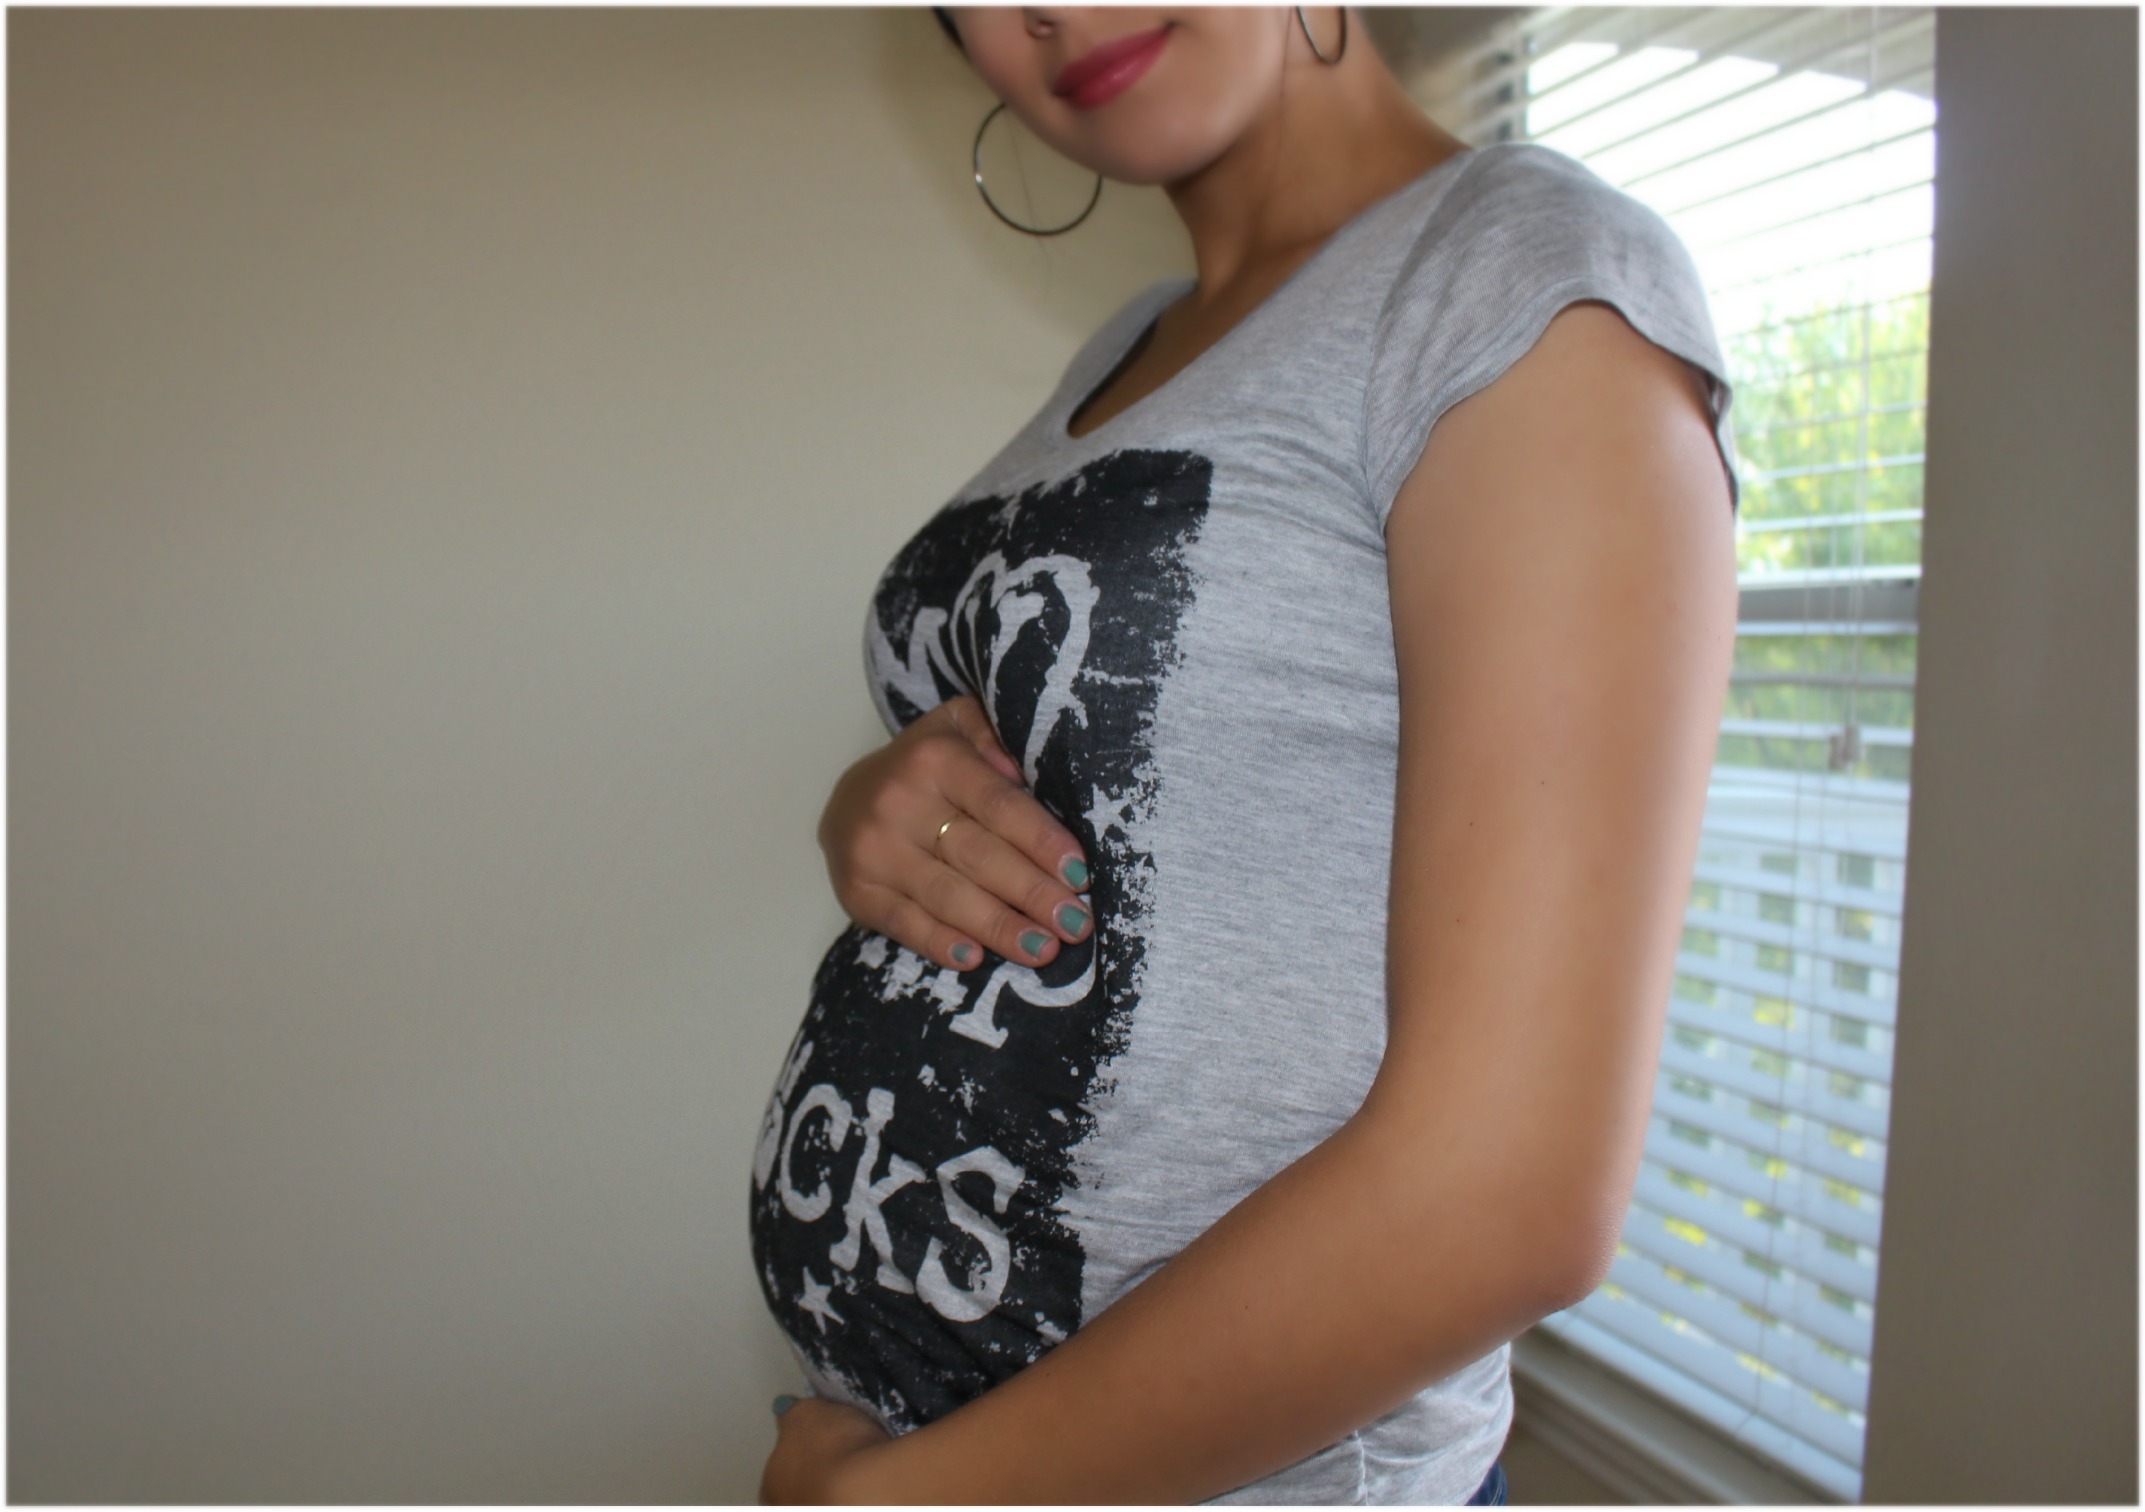
So here is a picture of my belly bump…
I feel like my belly has definitely popped , what do you think?
Thank you guys for taking time to read about my pregnancy , leave any comments bellow!
Remember, Beauty comes from within, so let yours shine!
So Im a little late with this post, but at the end of each month (or beginning of the next month) I like to post my Monthly makeup/beauty favorites. October was such a fun month for me because of all the Halloween stuff going on! So there are a little random favorites this month because of Halloween.
Like always you can watch the video to see the products , but here on my blog I like to get into more detail about why I like the products etc.
Favorites:
Covergirl Outlast Stay Fabulous Foundation- This is one of my favorite foundation in the drugstore because of its full coverage capability’s and its staying power. I have never had a problem with the staying power; I put it on in the morning and its on all day. I also never had a problem with it oxidizing ; which basically means it never changed colors on me throughout the day.
Wet N Wild Eye palette : Poster Child- Wet N Wild has some of the best eye shadows out at the drugstore right now! These palettes especially are amazing , this is a newer palette that has only bright, mostly matte, shades. I love the pigmentation , the eye shadows feel soft and smooth. I used this palette for all my Halloween looks this year and really enjoyed it!
Kirkland Eyeshadow Palette- This palette is from Cosco and I decided to pull it out last month because I wanted to do a lavender bridal look for on of my blog posts. A lot of you may have already read this post and if not I encourage you to do so. I posted pictures showing you step by step how to achieve the look. This palette really surprised me , the eye shadows felt smooth and almost like velvet.
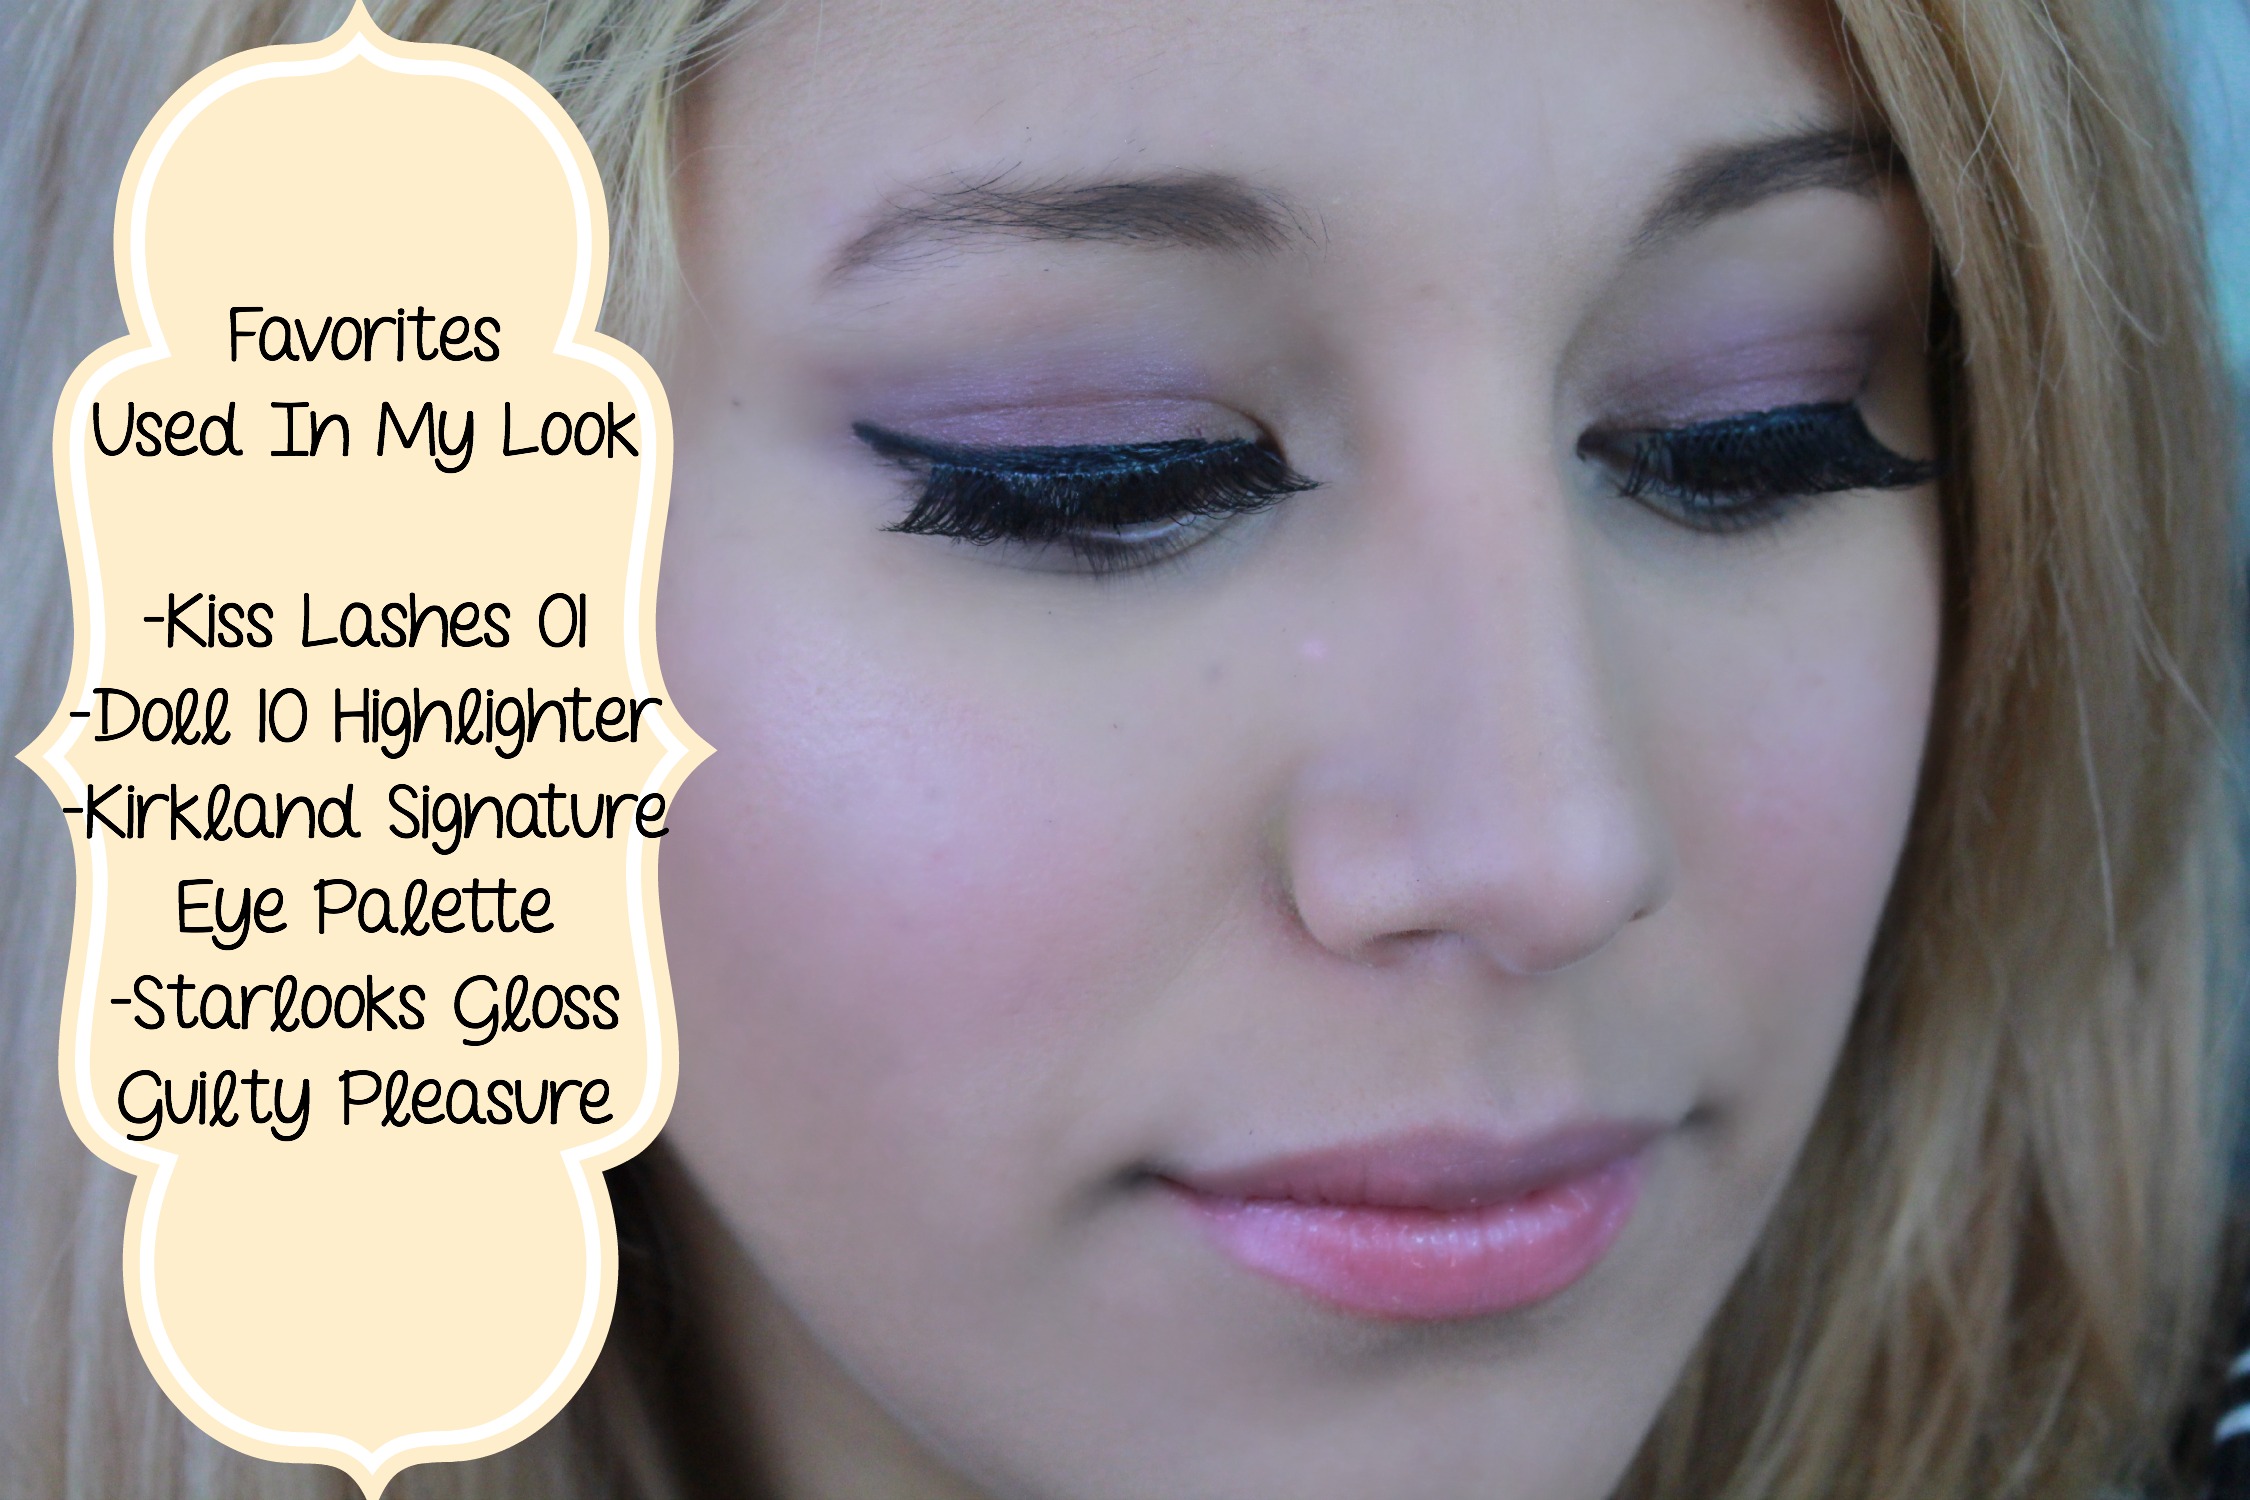
Doll 10: Highlighter- This is a cream Highlighter that is very subtle. Sometime we see pictures where the woman has a glow on her cheek bones , that is all because of a highlighter. Where some highlighters are very glowy and can make you look oily this one is more natural ; which is perfect for everyday use.
Kiss Eyelashes 01- Im not one to where eyelashes everyday because its so hard to find natural looking ones. But with that said I have been loving these ones, and you can find them at Walmart or any drugstore.
Wet N Wild Color Icon Lip Liner: Cherry Red – This is the lip liner that I used for Halloween and for some of my tutorials as well . It works amazing for only being $1 it stays on all night even when I eat and talk all night.
Wet N Wild Lipstick: Cherry Frost $1- This is the lipstick I paired up with the lip liner and like I said before for only $1 it works like magic , very impressive.
Wet N Wild Fantasy Lipstick : Black- I Used this lipstick for my Harley Quinn Blog/ Tutorial and I loved it perfect for Halloween.
Starlooks Lipgloss: Guilty Pleasures- This lip gloss is a nude lip gloss that I have used all month long. It is not sticky , it is instead very comfortable on the lips and the color pay off is pretty good . I got this in recent Ipsy bag and have really enjoyed it.
I am wearing some of these October Favorites on today so you can see how they look on! I love favorites because then they give you an idea of some good makeup products that are in stores right now!
Thank you guys for all your support I really do appreciate it!
So what is a makeup product that was your favorite for October? Let me know in the comments!
Don’t Forget Beauty Comes from within so let yours shine!
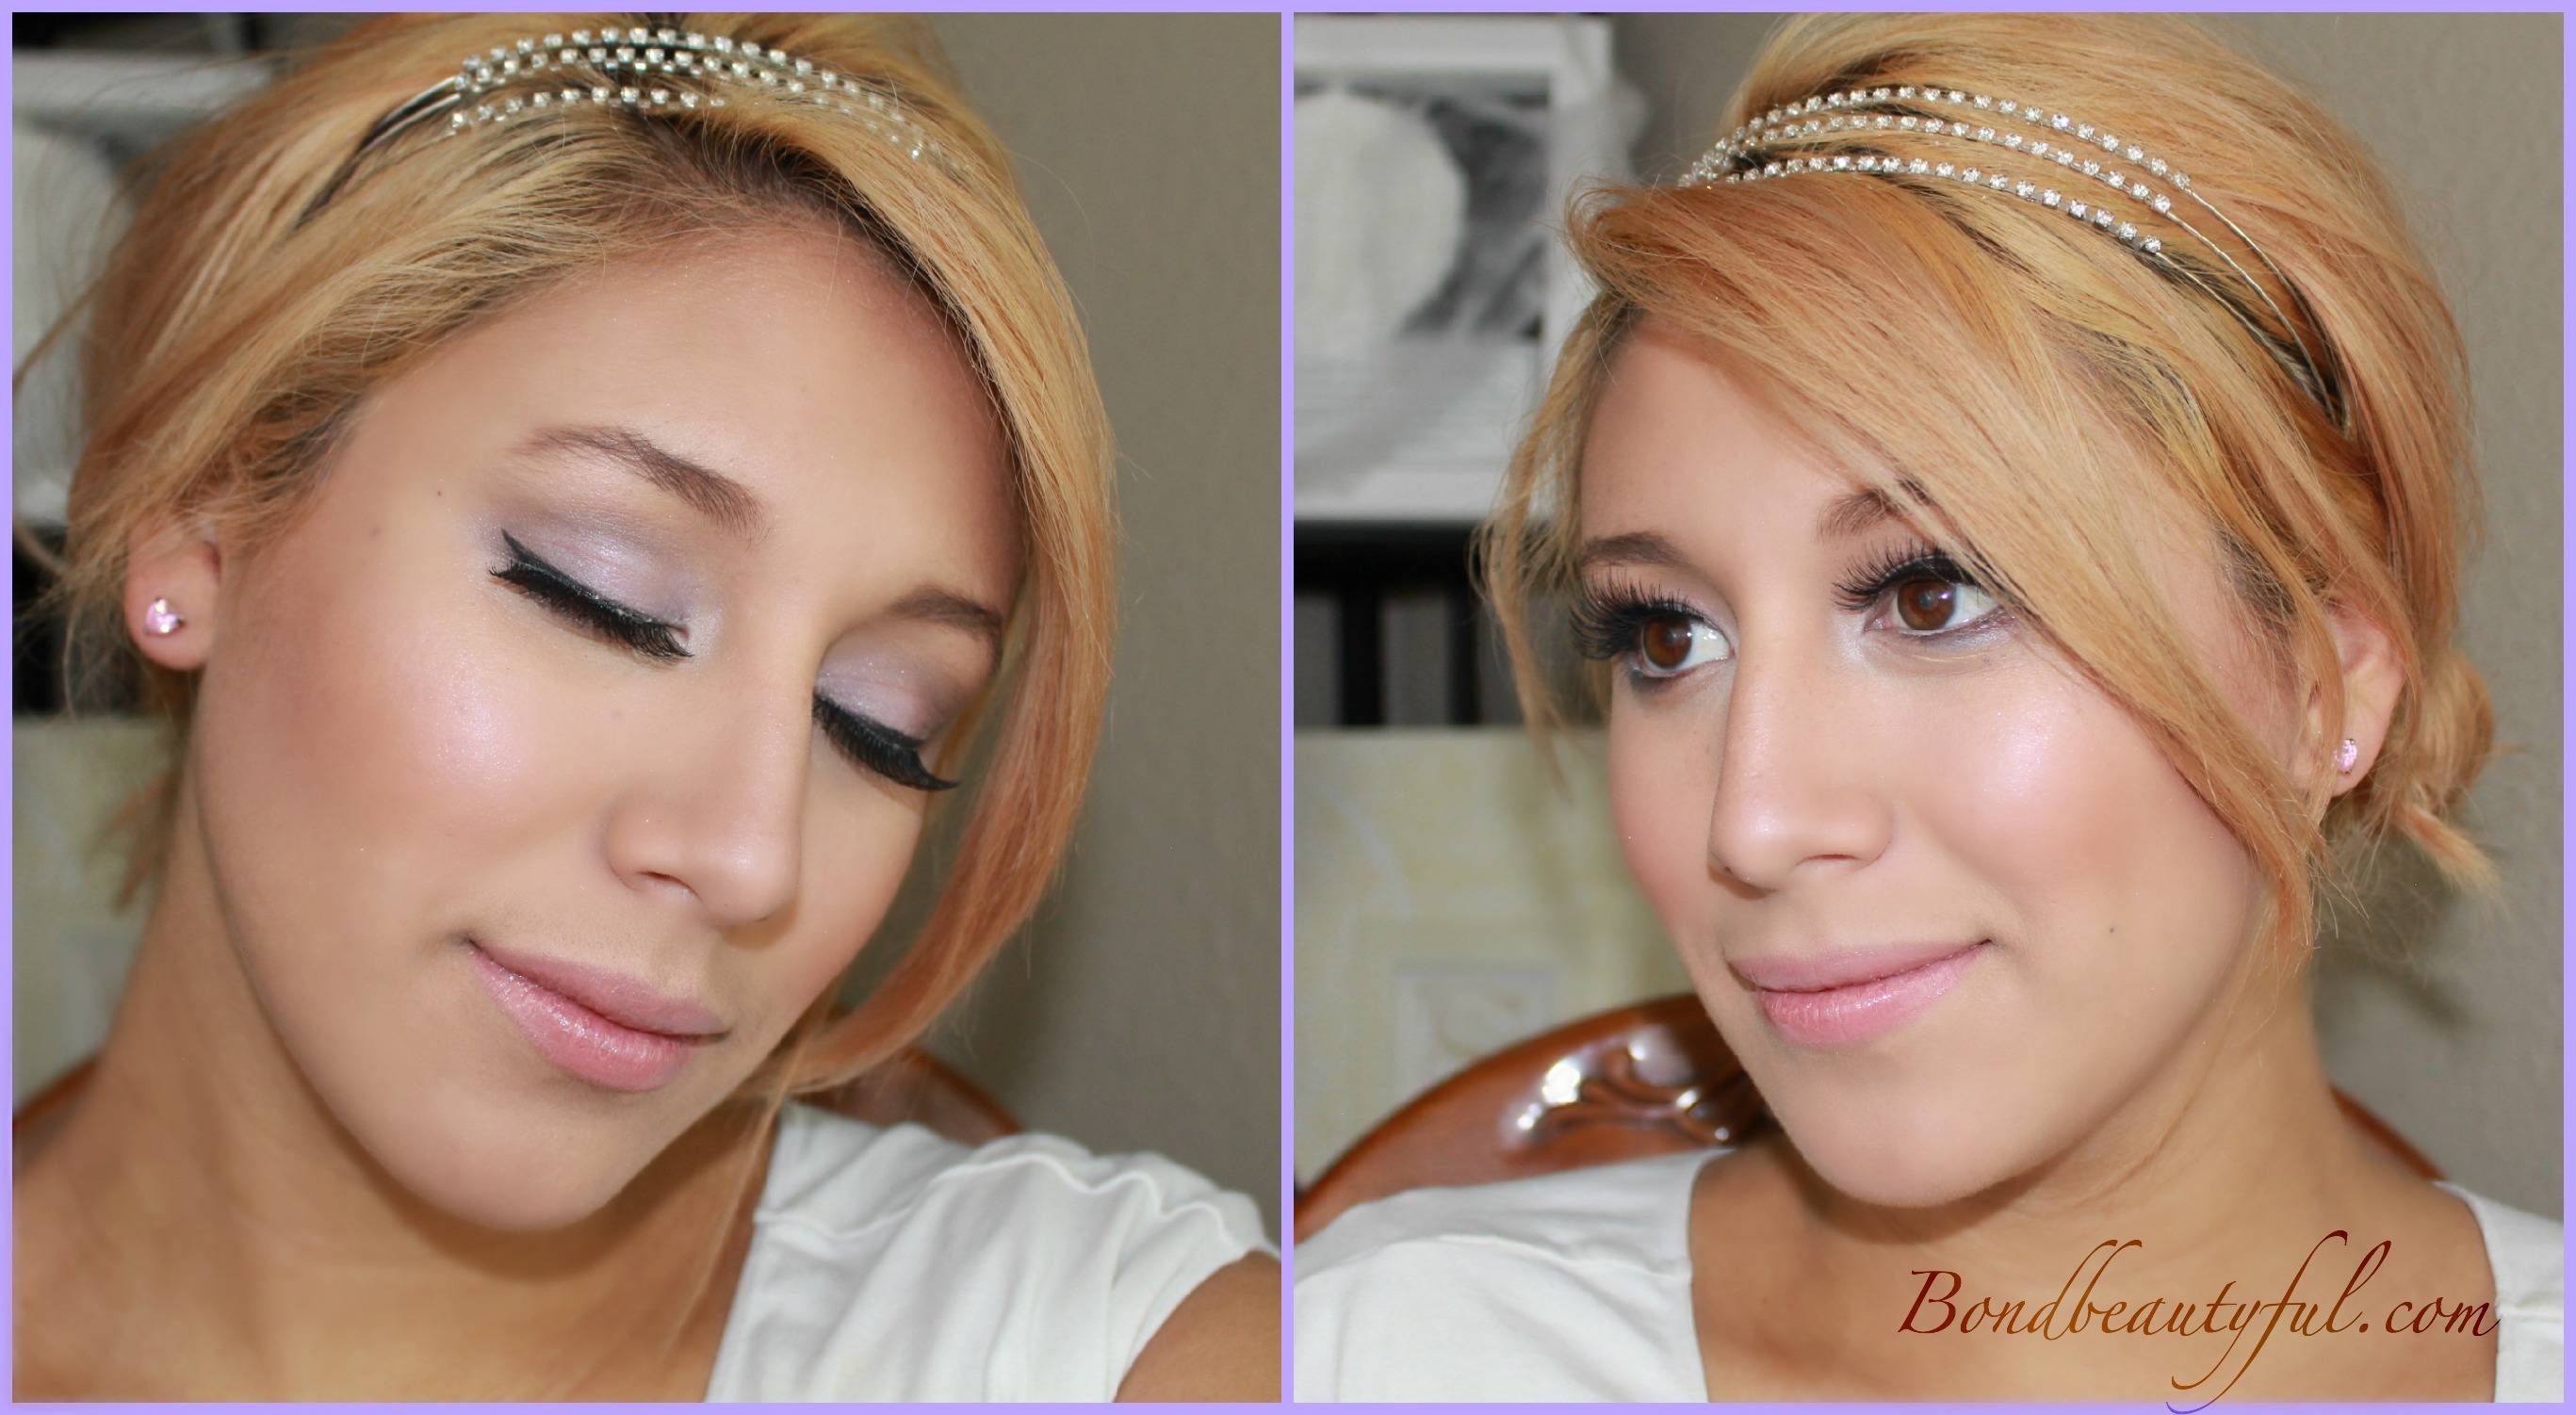
I am so excited to share this Bridal Makeup Look with you guys ! For this look I paired up with Lover.ly , which is a online one stop shop for brides. I was really surprised when I visited their website, it really is a one stop shop! I wish this was around when I got married it would have made wedding planning a whole lot easier!
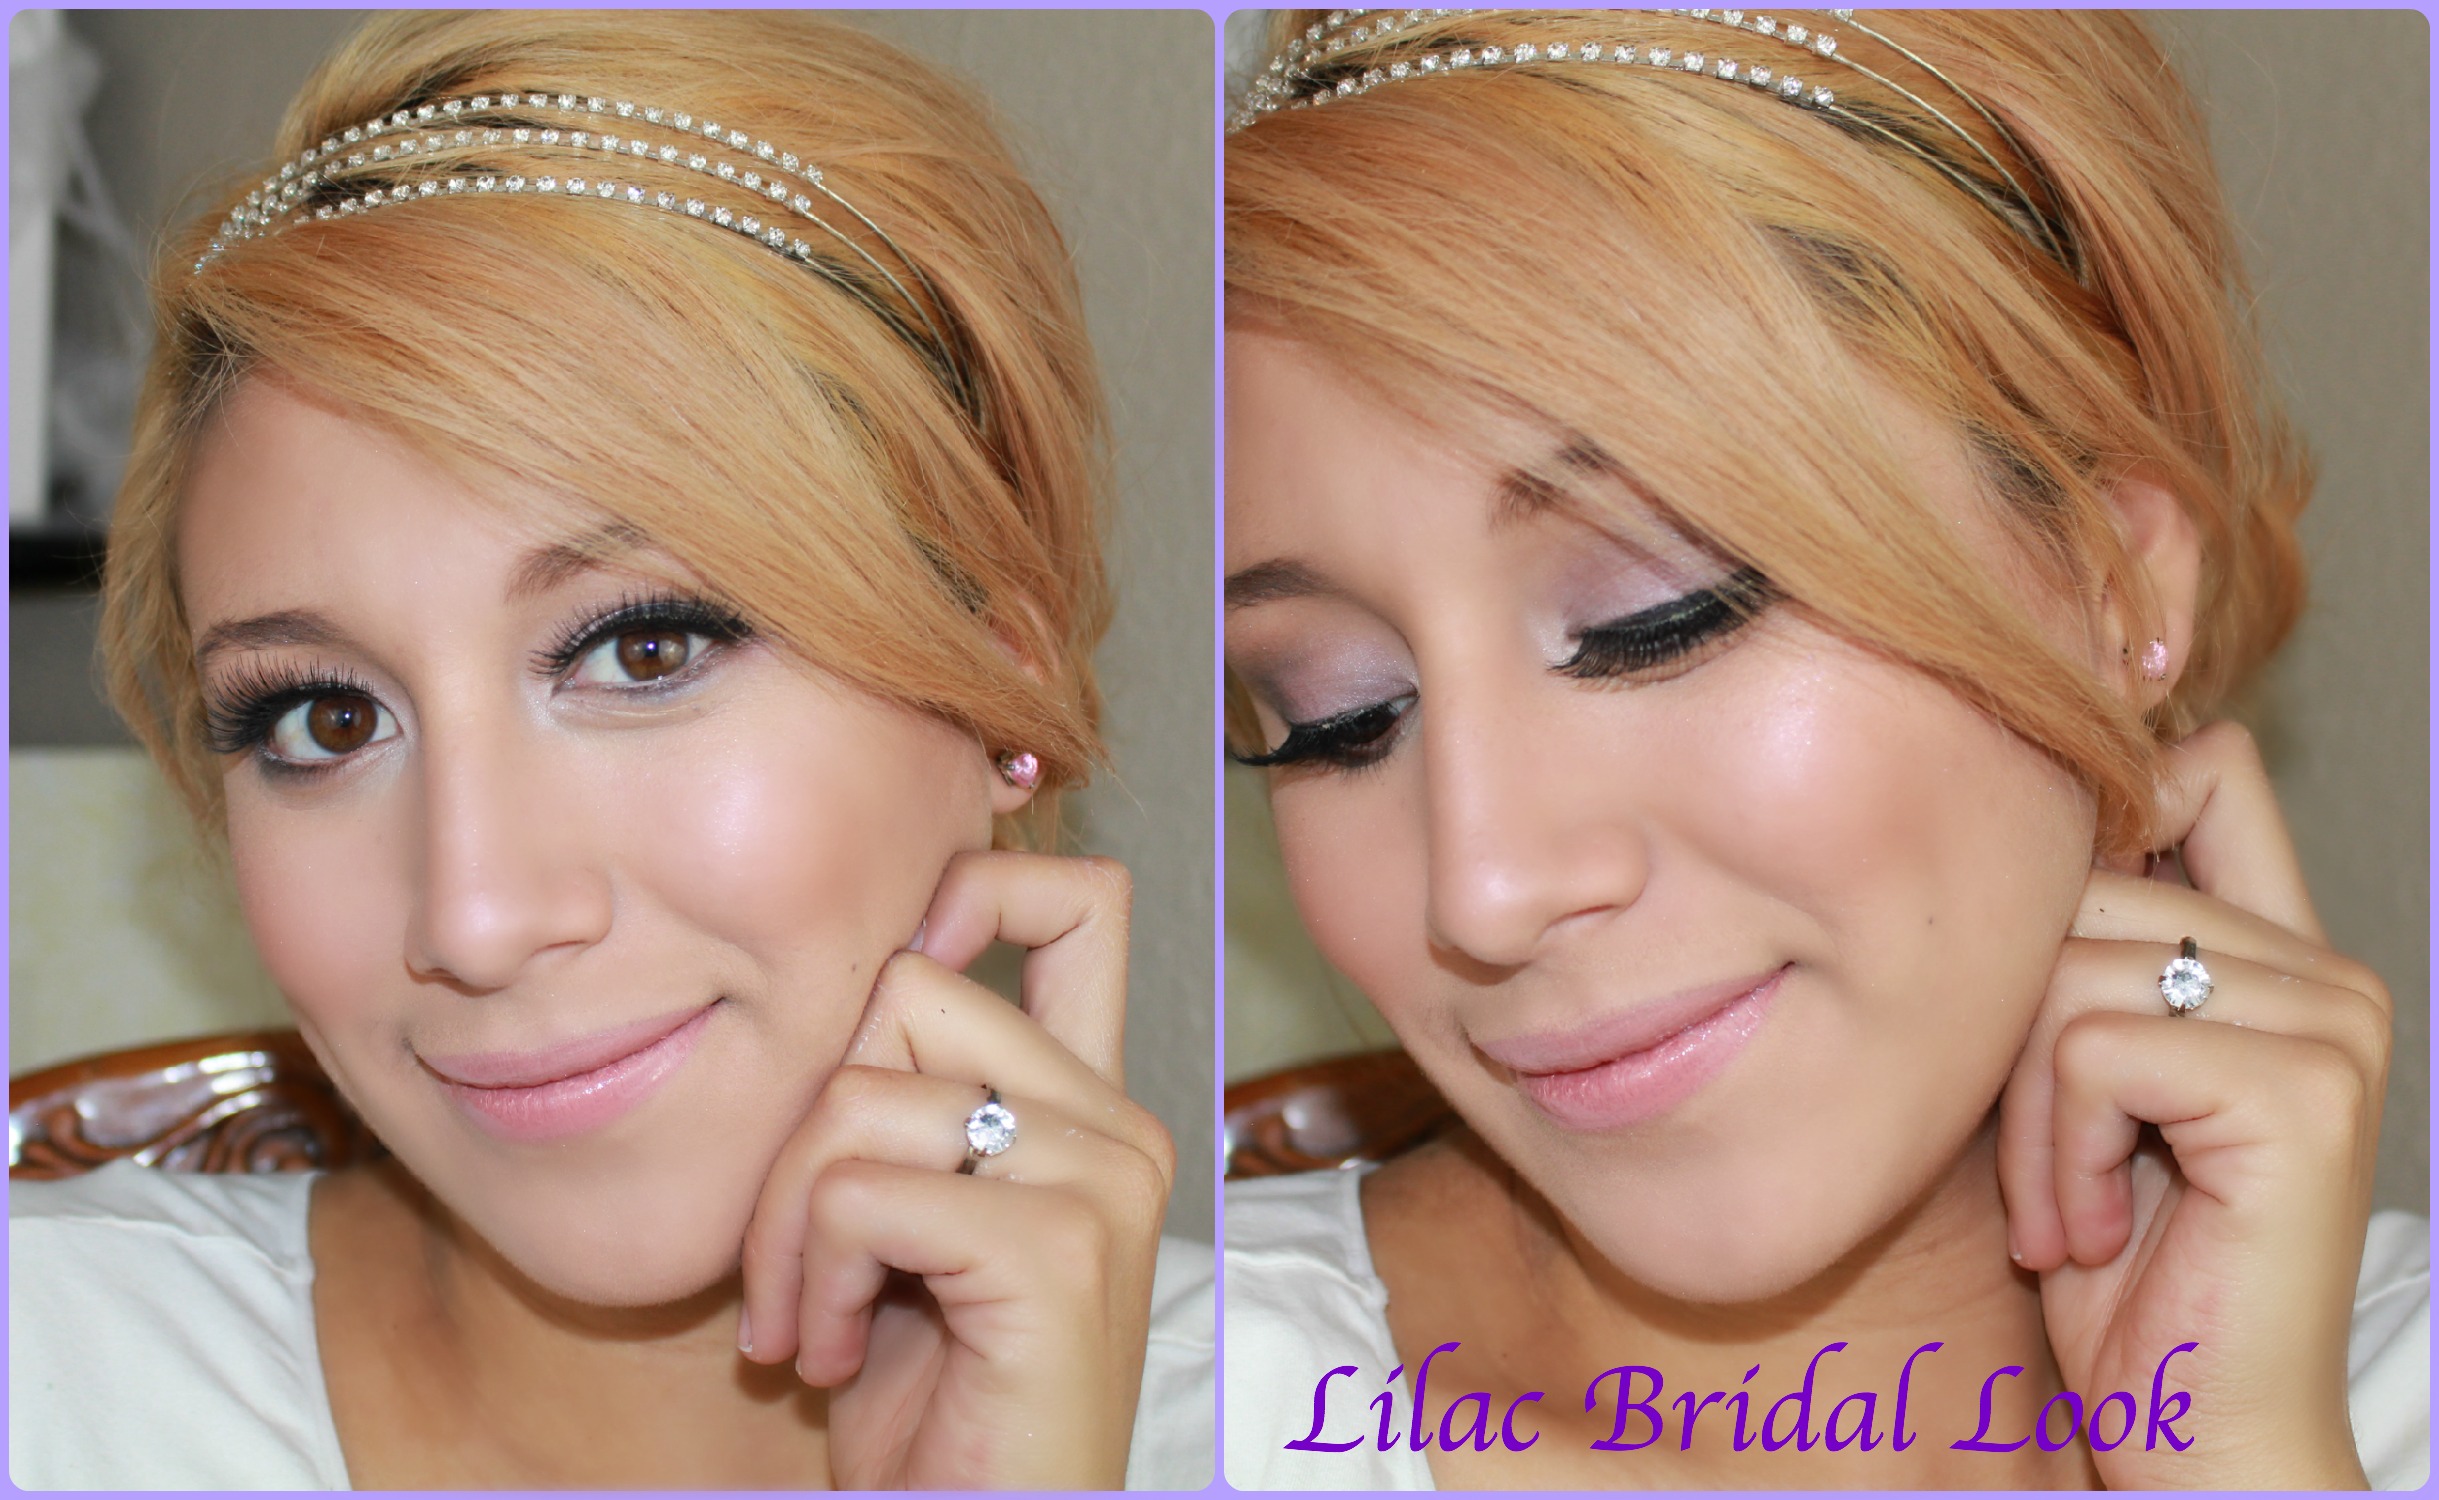
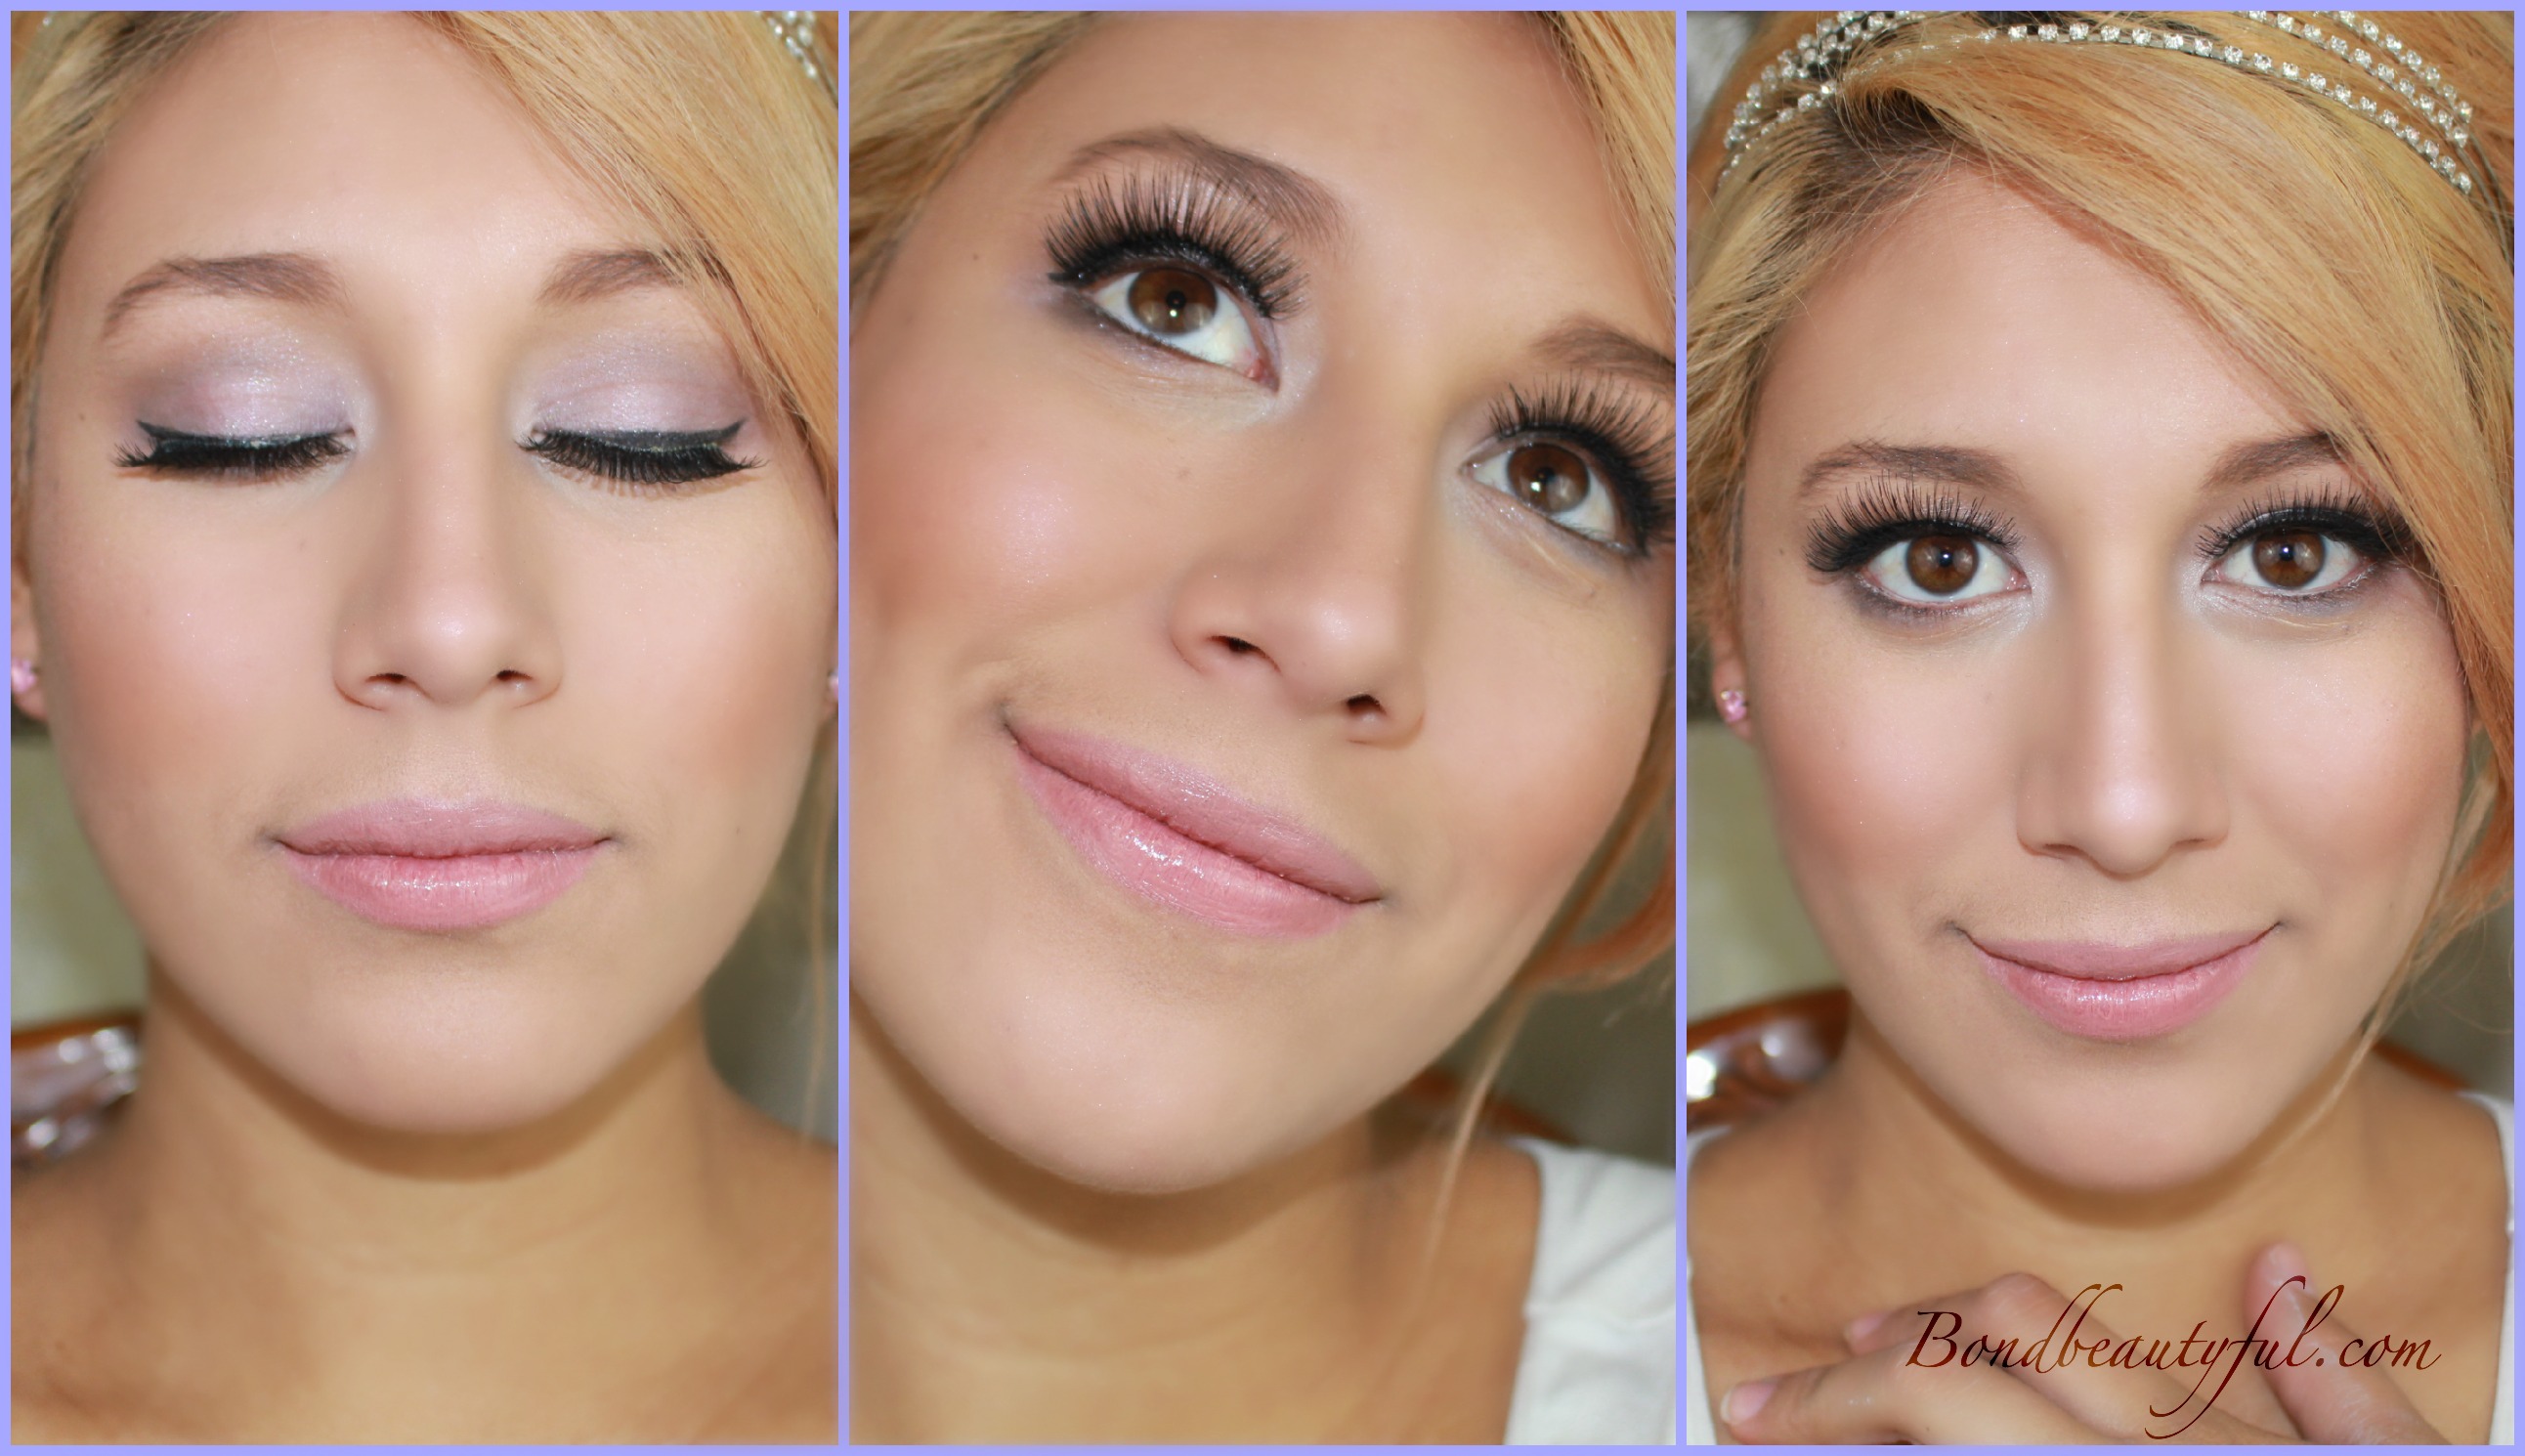
They sent me pictures of three different dresses and I immediately got inspired by the beautiful strapless dress with purple detailing at the bottom. The first thing I noticed on this dress was the beautiful ombre fabric on the dress. It turned this dress into a non- traditional wedding dress. This gave me lots of leg room for what type of makeup to do. Usually bridal makeup is more neutral and natural; but for this look I wanted to add a modern twist by having lilac eye makeup instead of the usually browns. It added flavor and a modern twist to this bridal look without making it look informal. The sweetheart neckline gave me even more of a reason to use a such a feminine color on the eyelid.
This Lilac Bridal Look that I have created for you will compliment this dress perfectly. The Lilac eye makeup really ties the makeup and the gown together nicely. I wanted this look to be fun and flirty but still elegant. I wanted you to notice the makeup but I didn’t want to take away from how stunning the dress looks. So enough of all the blabbing lets get started with how to accomplish this look. (List of the products used will be below).
First I applied a white cream eyeshadow base to the Eyelid area. (to help the lilac color show up more vibrantly.)
I then applied a cream matte shade to the brow bone for a subtle highlight. (because the dress is so eye catching I didn’t want to distract with shimmery makeup!)
Then I applied a matte Lilac Shade to the Eyelid. (Using patting motions for the most color payoff).
Next I applied a Light Cranberry Shimmery Shade on the outer half of the lid. (Blend the two shades together)
Apply a Medium Brown shade to the crease with a crease brush.
To deepen the crease I used a Matte Grey shade in the crease and lightly to the outer third of the lid. Then make sure to blend with a fluffy blending brush.
I Also added that same Grey in the lower lid. I also added a pearly white shade to the inner corner of the lid. (doing this opens your eyes more and it looks stunning in pictures)
Next is winged liner. I also added a dark eyeliner to the tight line and in between the upper lashes to add volume. Then in the waterline I added a white eyeliner pencil to open up the eyes even more!
No Bridal look is done without adding lashes! (Lashes really show up beautifully in pictures so even if you are not a lashes girl I would highly recommend them for your wedding pictures).
Since the dress is a strapless dress it adds a sexy vibe to the bridal look ; so I wanted to incorporate that into my eye makeup with a winged eyeliner. Having your eye makeup done is only half of it, next is having flawless face makeup.
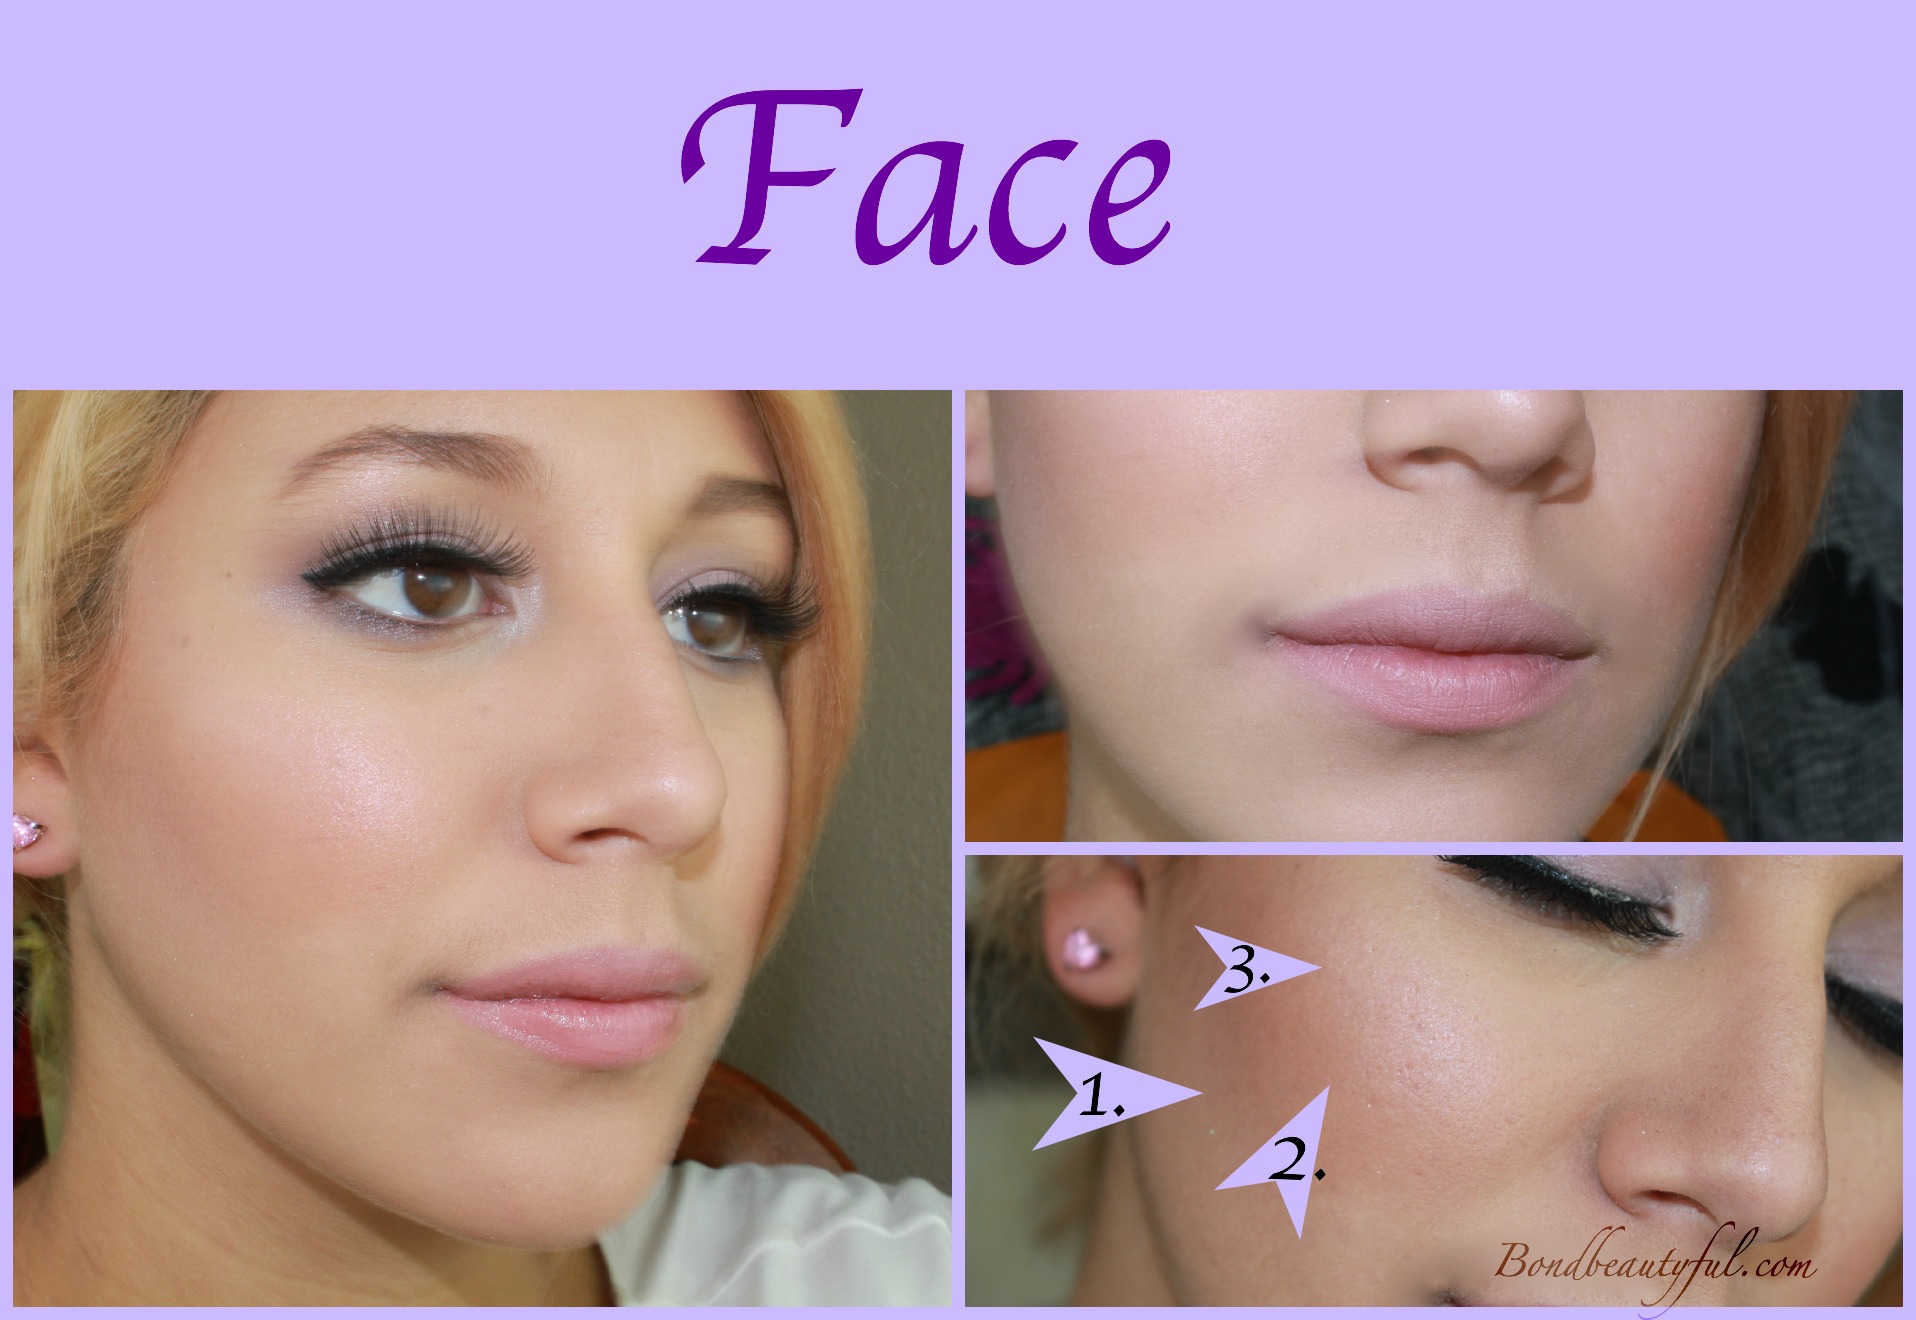
First I applied a Matte Bronzer underneath the cheek bone for a nice contour. (Even if you never contour or highlight your face doing so on your wedding will make such a difference in your pictures. Don’t you want that bridal glow?!)
Next I applied my blush, I chose a blush that is more of a natural Pink shade. (you don’t want to much purple or it won’t look natural and will take away from the dress.)
Last I applied a pink highlight shade to the tops of my cheek bones, nose & cupid bow.
For the Lips I decided to do more of a nude pink shade . I used a matte lipstick and then later added a lipgloss for that shiny finish. (Matte or Shiny is up to you, they both photograph beautifully).
This makeup look is so easy you can do it at home. If you are getting it done by a makeup artist make sure to do a trial run. I hope you guys like this look, if you do feel free to pin these pics on your Pinterest for later! Thank you so much for all your support and also thanks to Lover.ly for featuring me on their website! Make sure to check out their website!
Products I Used:
Face:
Covergirl Stay Fabulous Foundation
Rimmel Stay Matte Powder
Instant Age Rewind Neutralizing Concealer (Under the eyes inverted triangle shape)
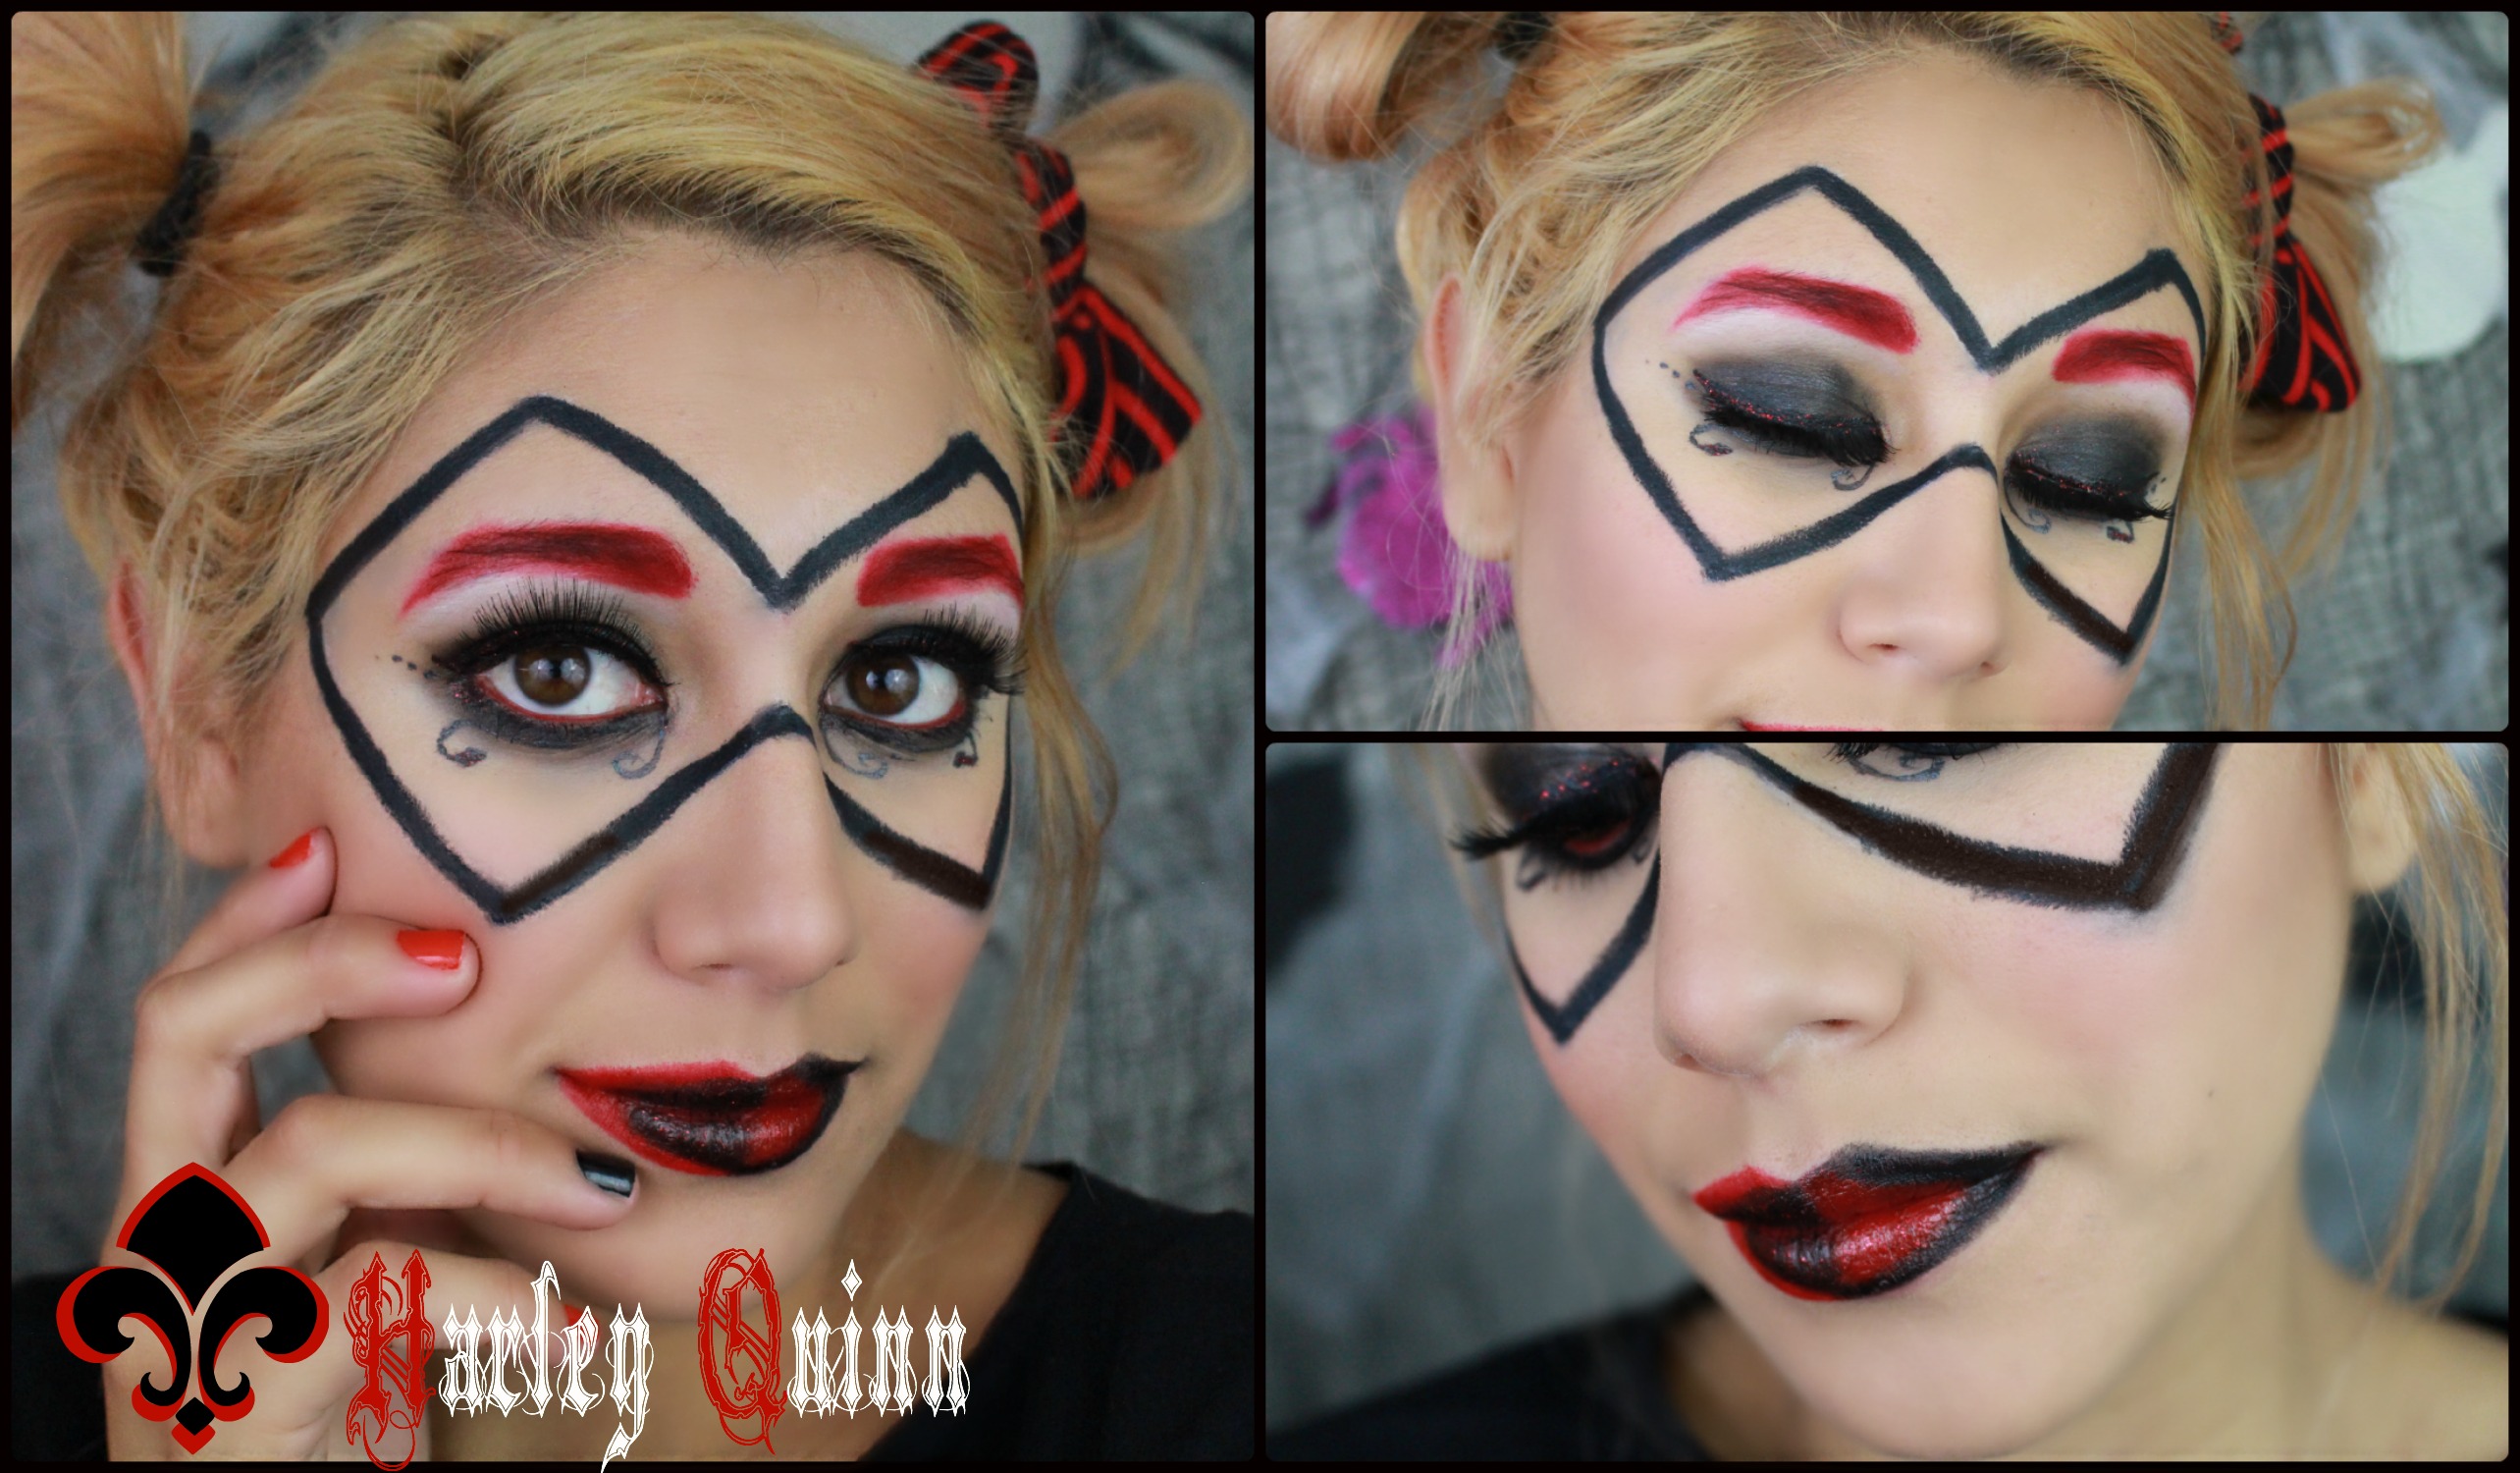
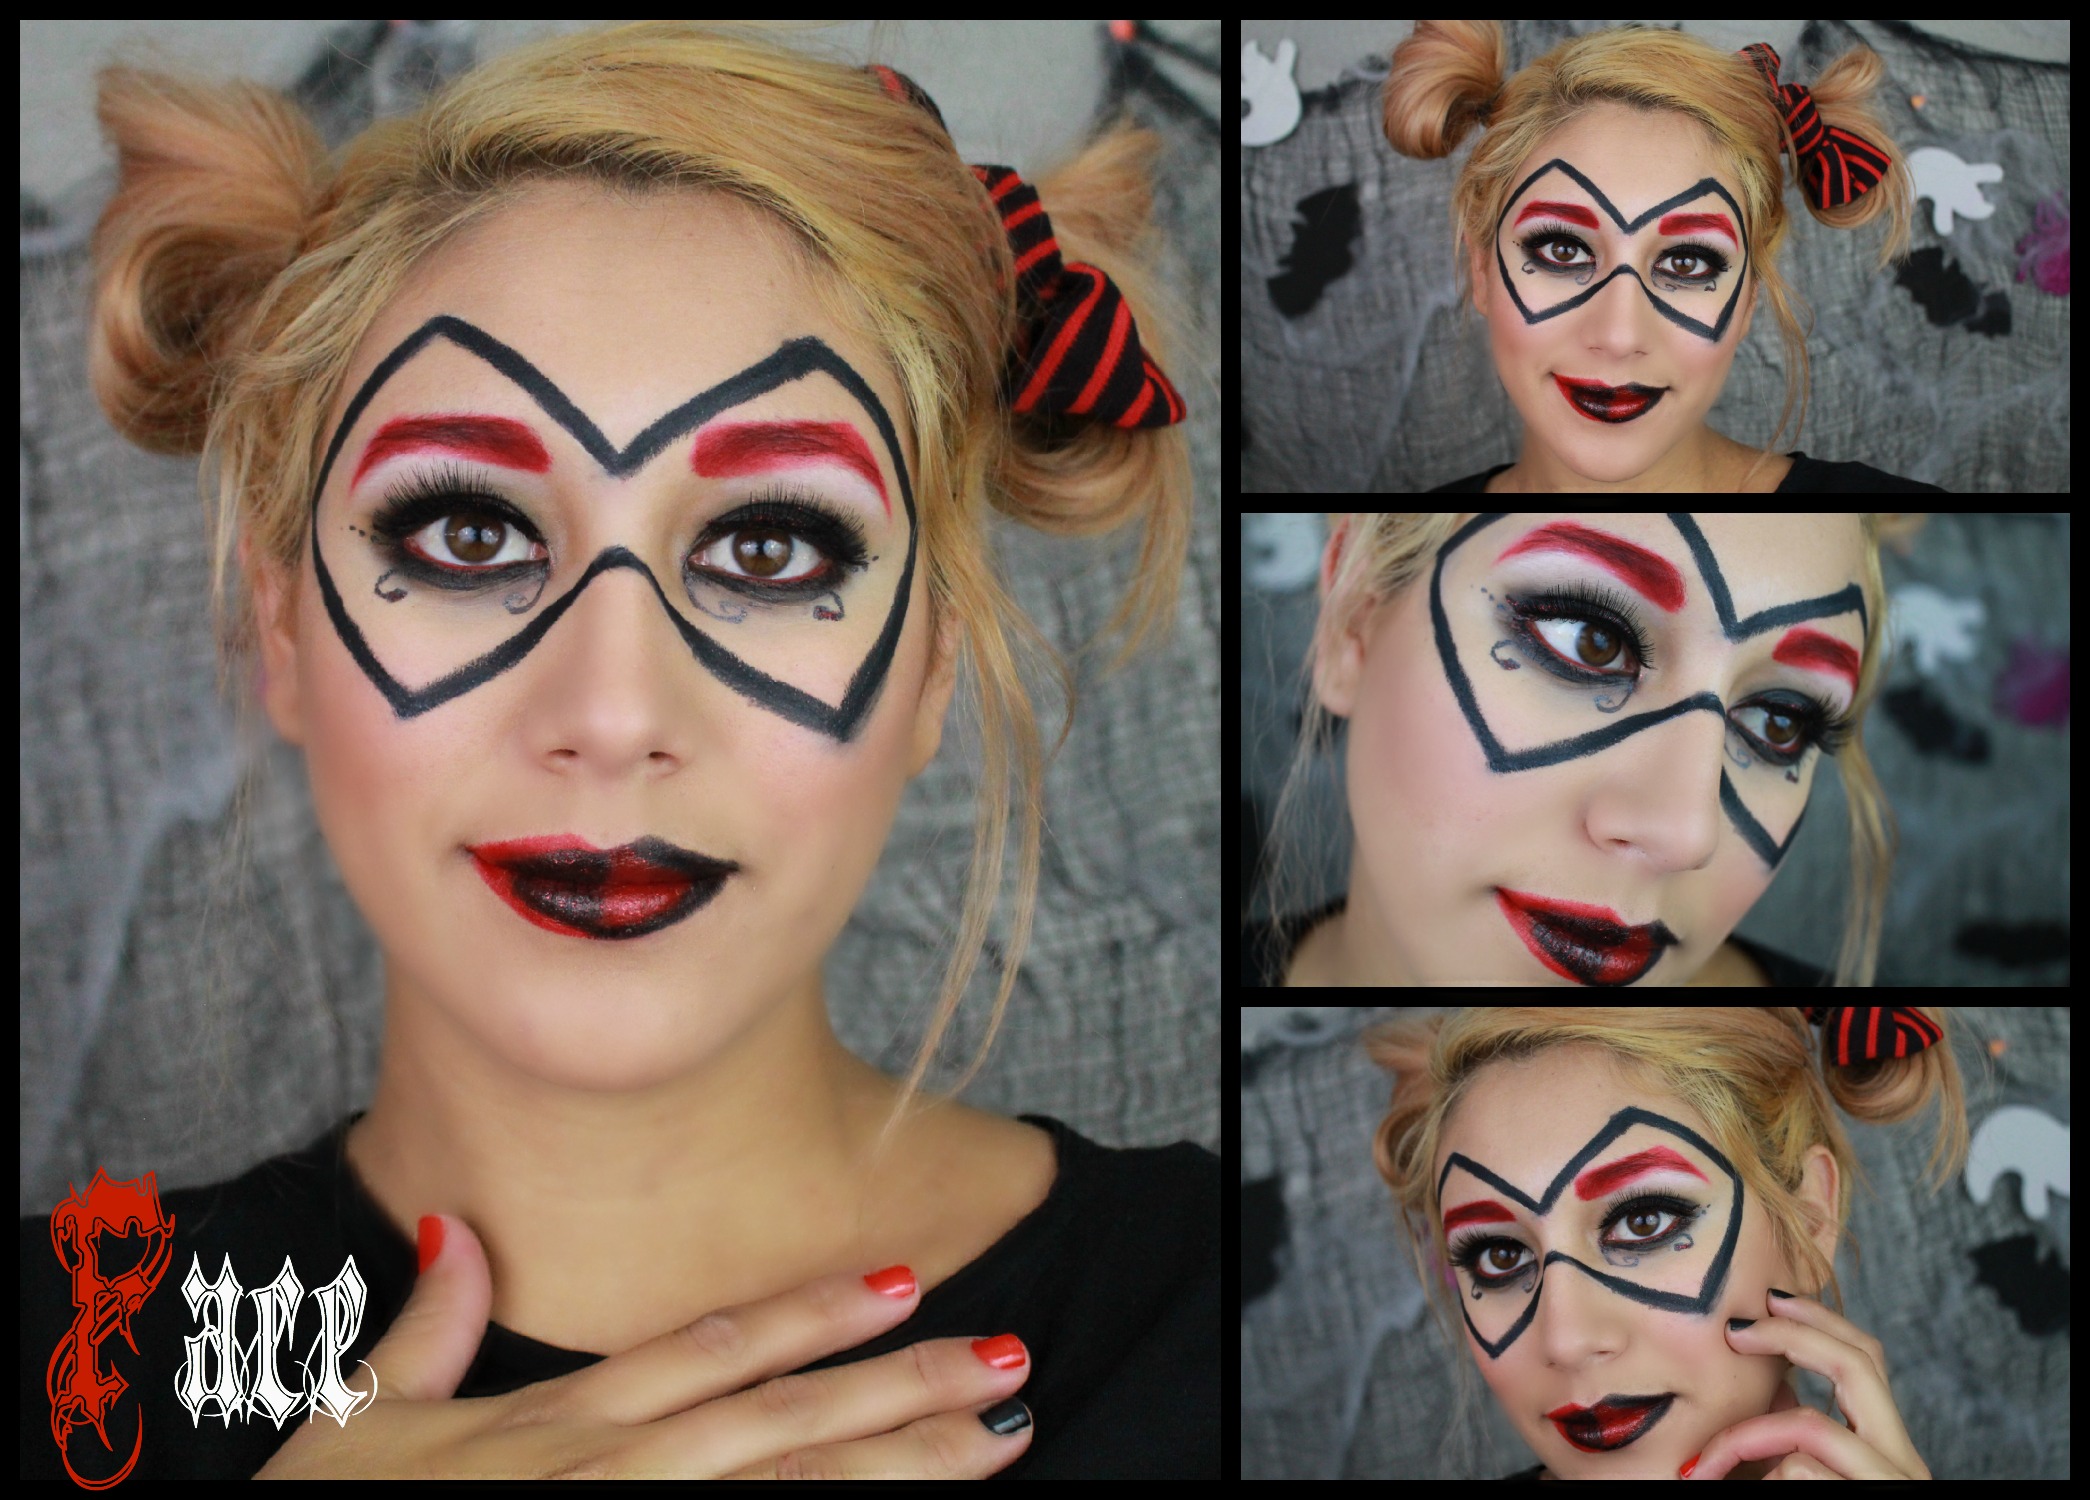
Yes , I am doing another halloween makeup look. This time I am doing a collab with another Beauty Guru on youtube , we decided to each pick a villain from the Batman Comics. I decided to do Harley Quinn and she is doing Poisen Ivy. I am so excited I loved the Batman Comics as a kid and still do , last year I did do a cat woman Halloween look too. A video is so much easier to do for this because of all the steps.
I hope you enjoyed the tutorial. This was actually a pretty easy look to do it just took a few steps ; but I felt like it turned out great.
For the face I decided to use my reg ular foundation and concealer rather than a white face paint. I really wanted Harley Quinn to still have her pretty look rather than look ugly. So all I did was apply my concealer & foundation, then I used a red blush on the cheeks.
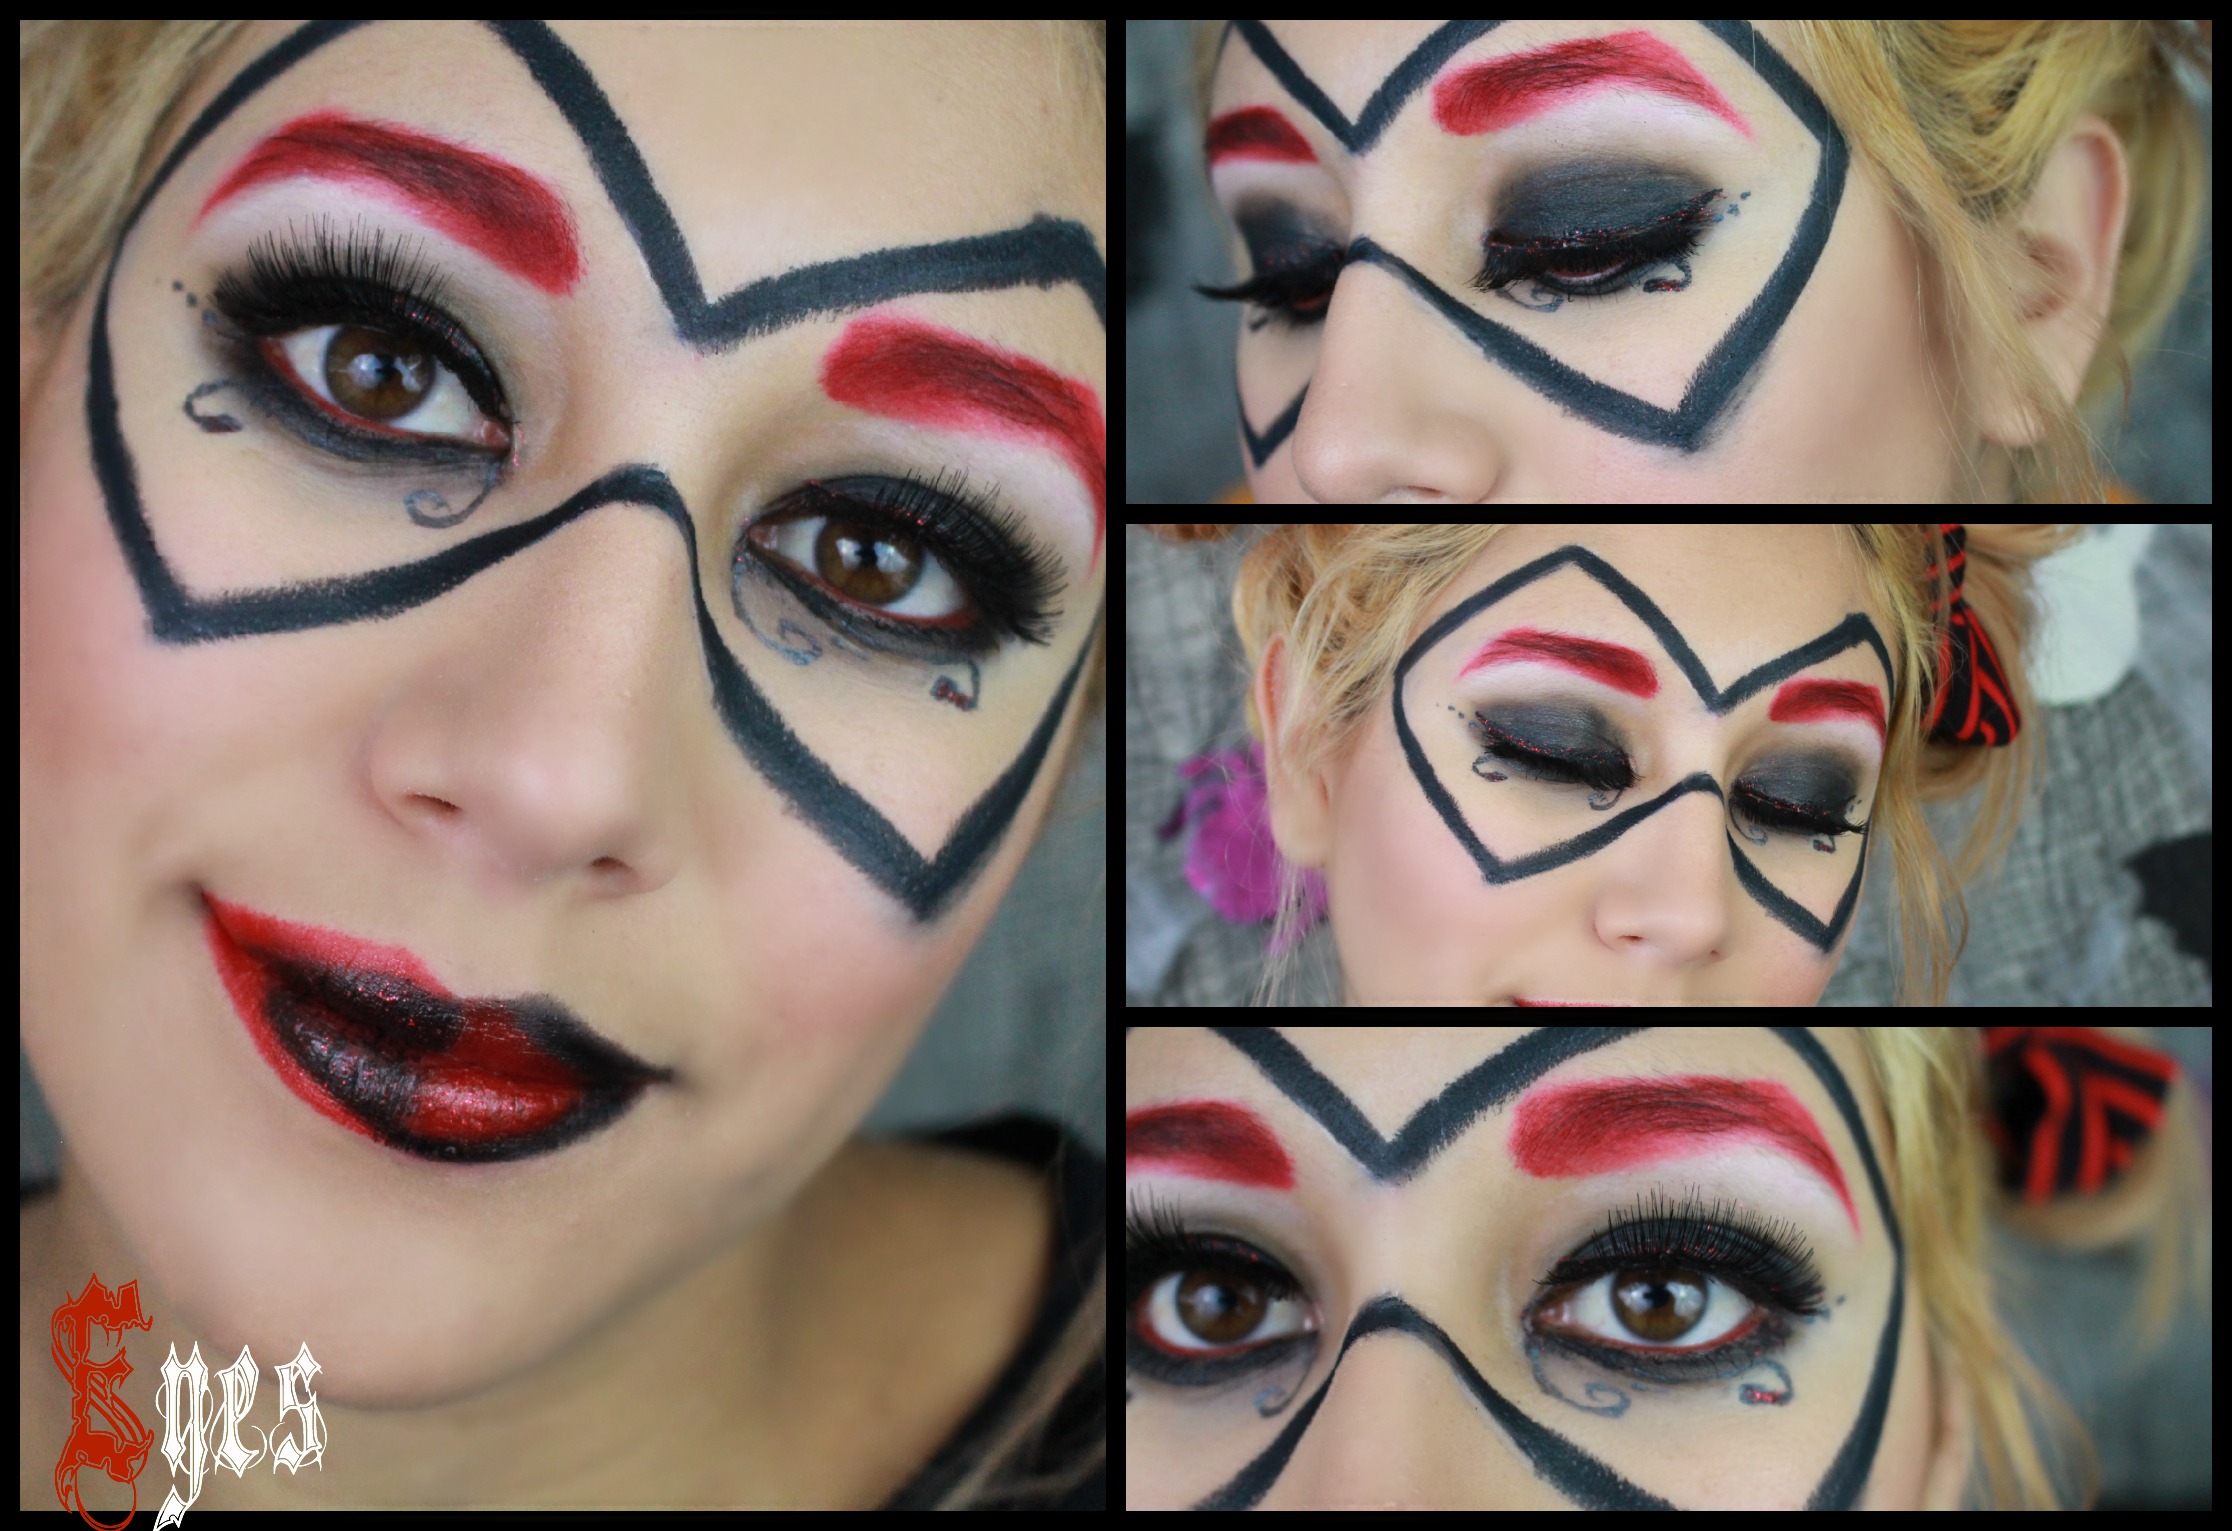
The eyes are a little bit more complicated. I decided to do a black smokey eye on and smudge black eyeliner on the lower lid. Harley Quinn’s costume is half black and half red so I decided to incorporate the red in with the eyebrows. I just used a Lipliner and then applied red shadow on top to make it more long lasting. I did notice that my lashes got lost in all the black so falsies are definitely going to be your friend with this look. I think that all the curvy lines and dots really added to her look and made it seem more like her.I did decided to do a winged eyeliner on the upper lash line & fill in the waterline with a red lipliner. (Any time you use lipliner make sure to top of with red eyeshadow.) I also went onto of my winged liner with a glittery eyeshadow to add some sparkle and red into the eye look.
The mask was pretty easy to do with an eyeliner, if it is easier for you just map out your lines with a white or nude eyeliner first. I really wanted to keep the diamond trend going on the face because her costume has lots of diamonds on it. So thats why I made my mask look more like diamonds.
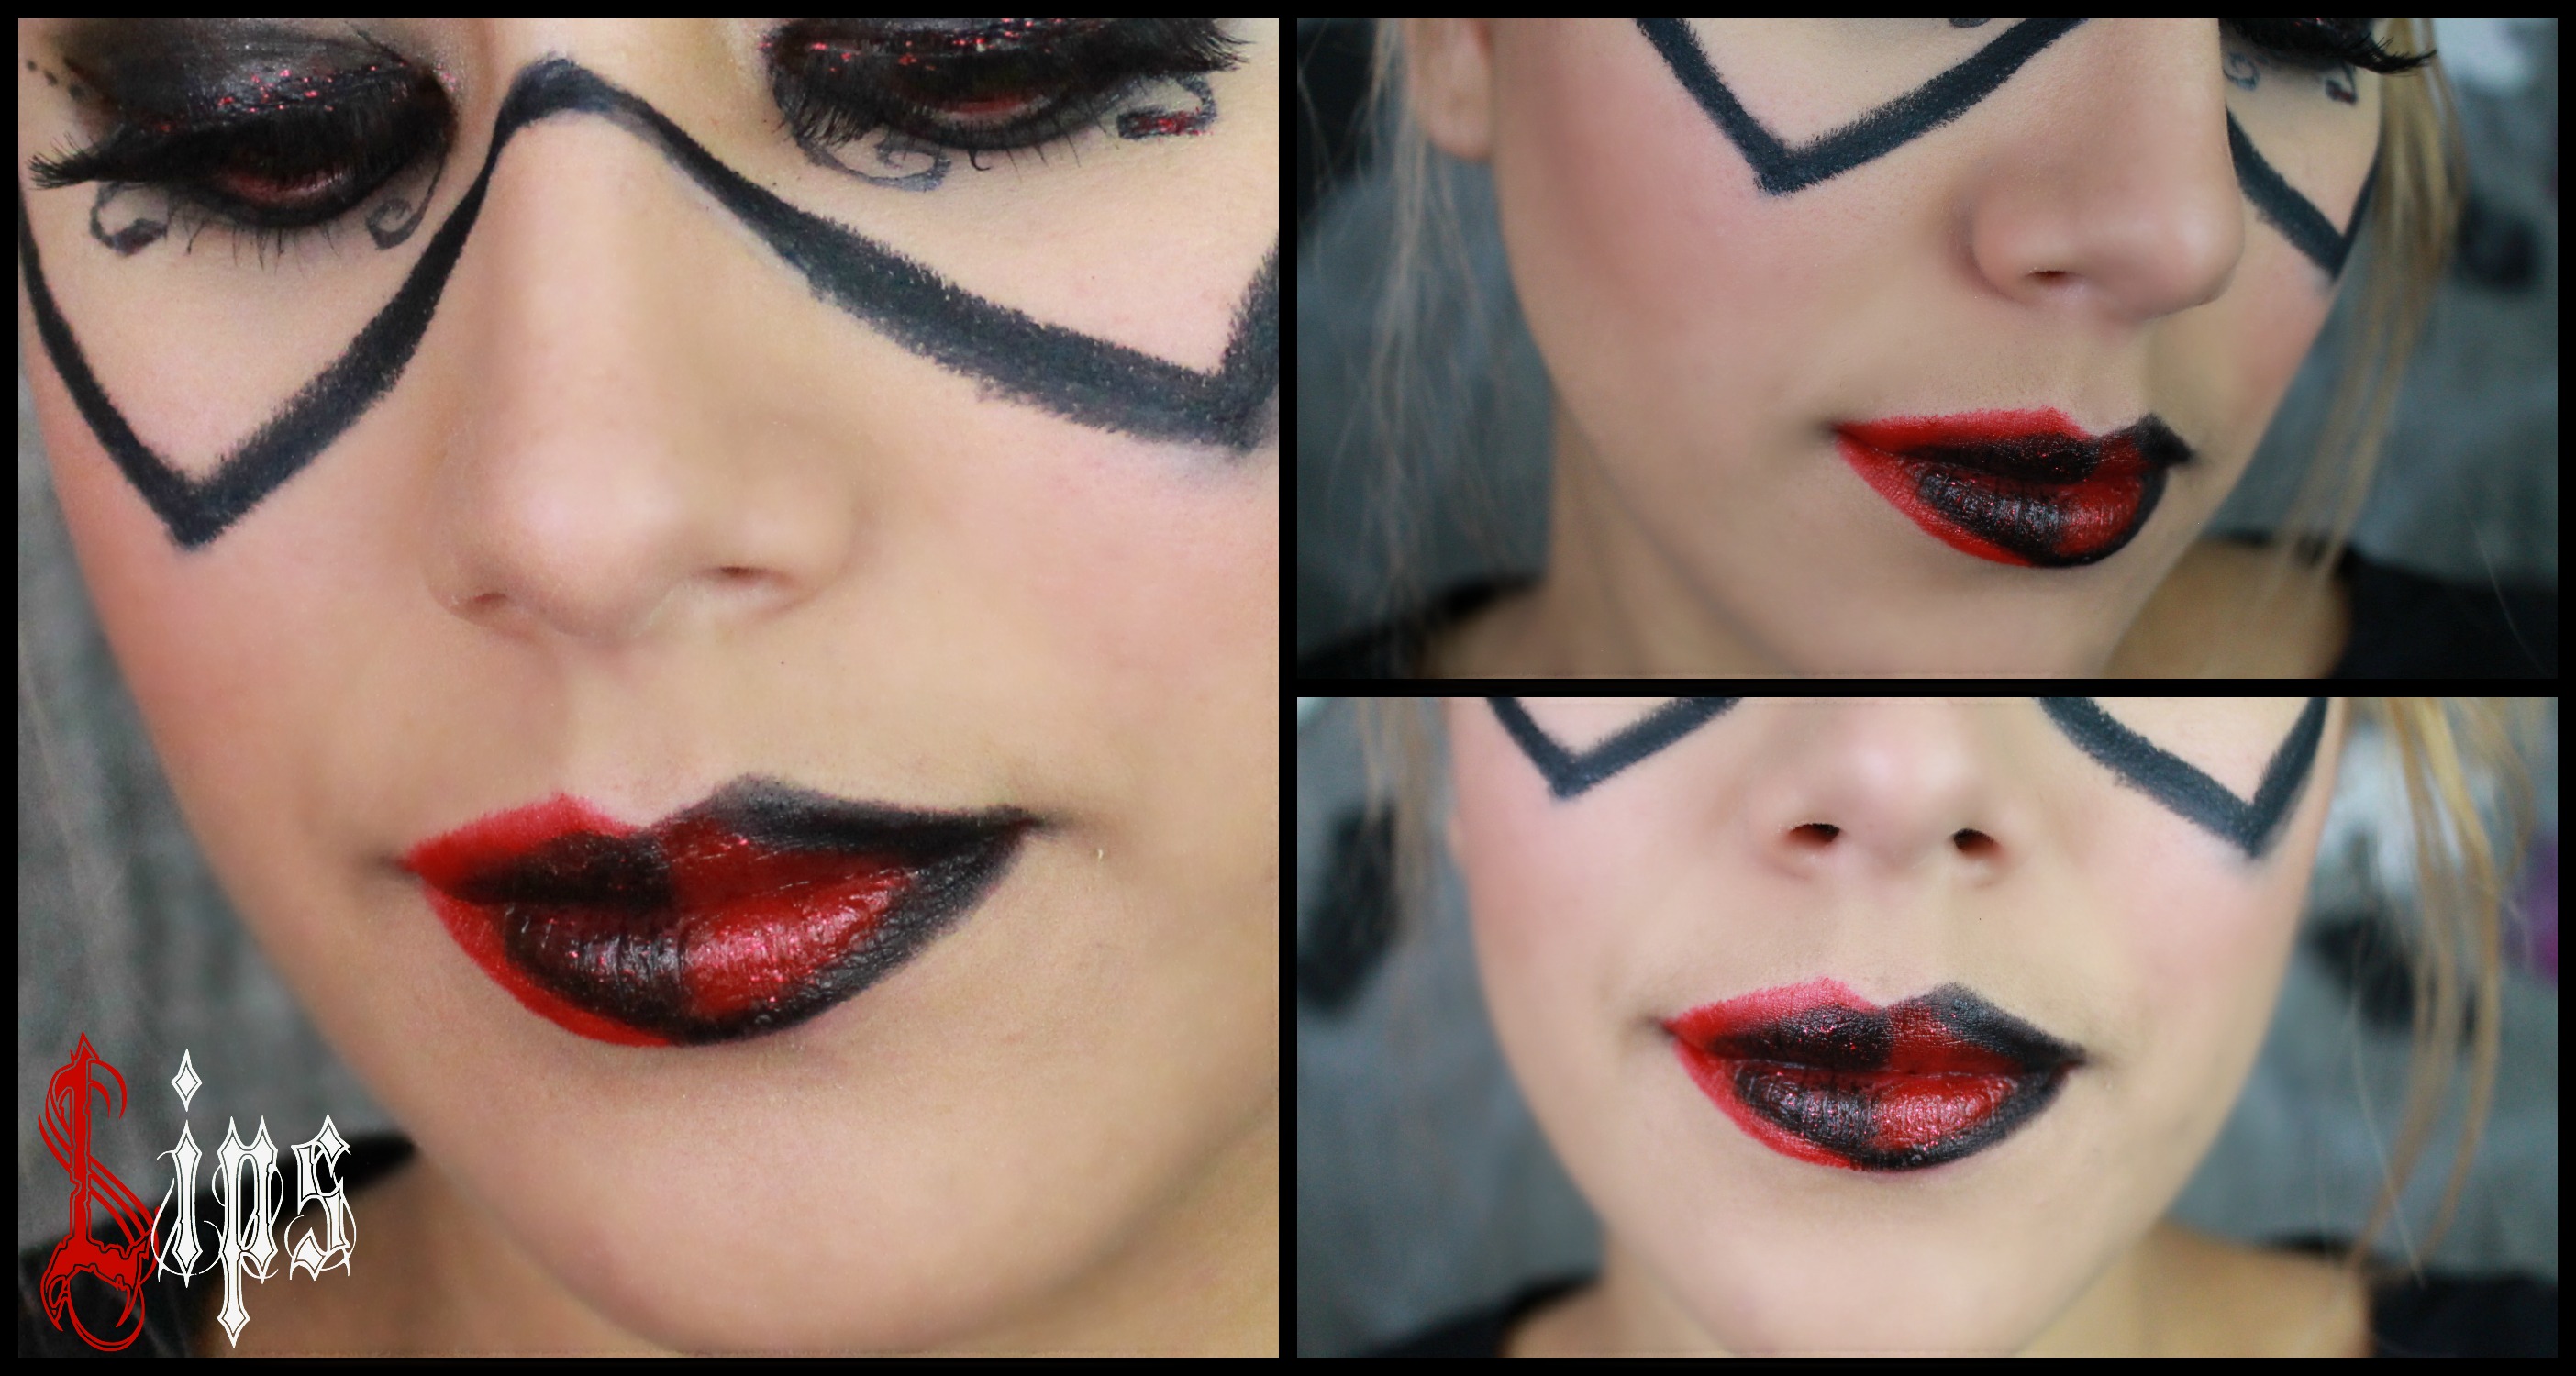
I wanted the Lips to be a big eye opener so I decided to do a diamond in the center of the lips but make it half black and half red. Then on the outside of the lips I used the opposite colors. I did decided to make my lips more pointy and a little thicker than my actual lips to play up the costume.
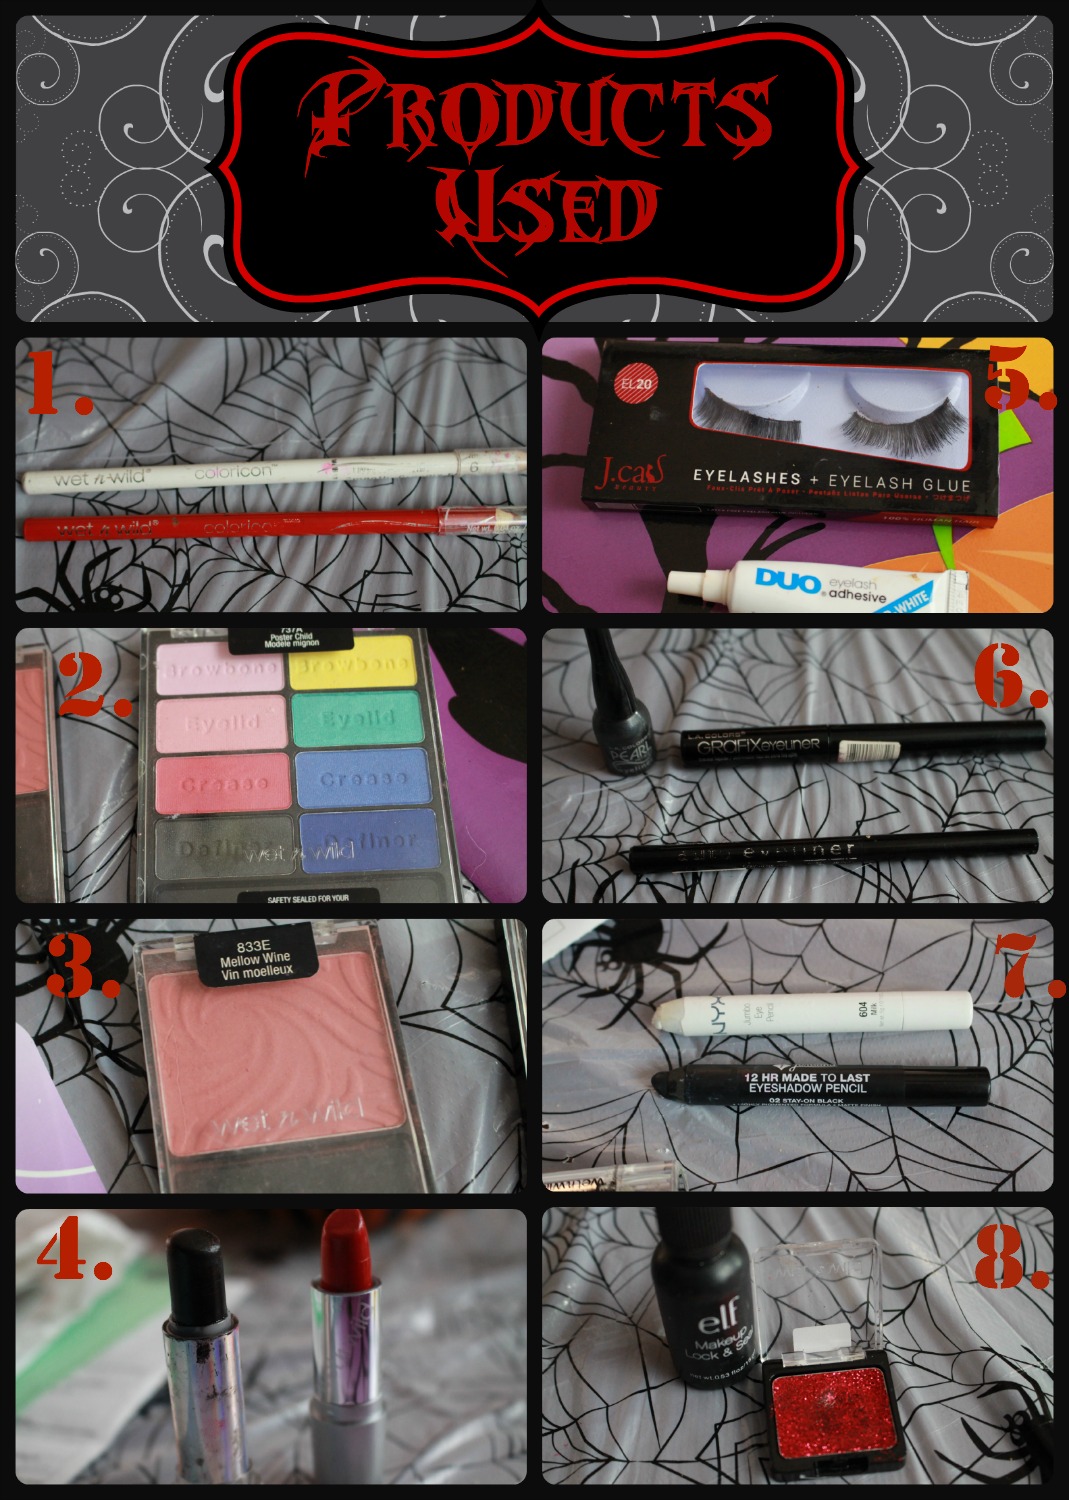
Wet N Wild Eyeliner : White , Wet N Wild Lipliner: Berry Red
Wet N Wild Palette: Poster Child (Red & black)
Wet N Wild Blusher: Mellow Wine
Wet N Wild Lipstick: Cherry Frost 514a , Wet N Wild Fantasy Lipstick: Black
J Cat Beauty Lashes: EL20 , Duo Lash Glue: Clear
LA Colors Pearl Eyeliner, LA Colors Grafix Eyeliner, LA Colors Automatic Eyeliner
Jordana 12 hr Eyeshadow Pencil: Stay on Black , Nyx Jumbo Pencil : Milk
Elf Makeup lock & Seal, Wet N Wild Single Glitter Eyeshadow: Vices
I hope you guys enjoyed this Halloween Look, I had so much fun doing this collab with Gemma! Make sure to subscribe for my youtube for more videos & like my Facebook Page!
Don’t forget Beauty Comes from Within so let yours Shine!
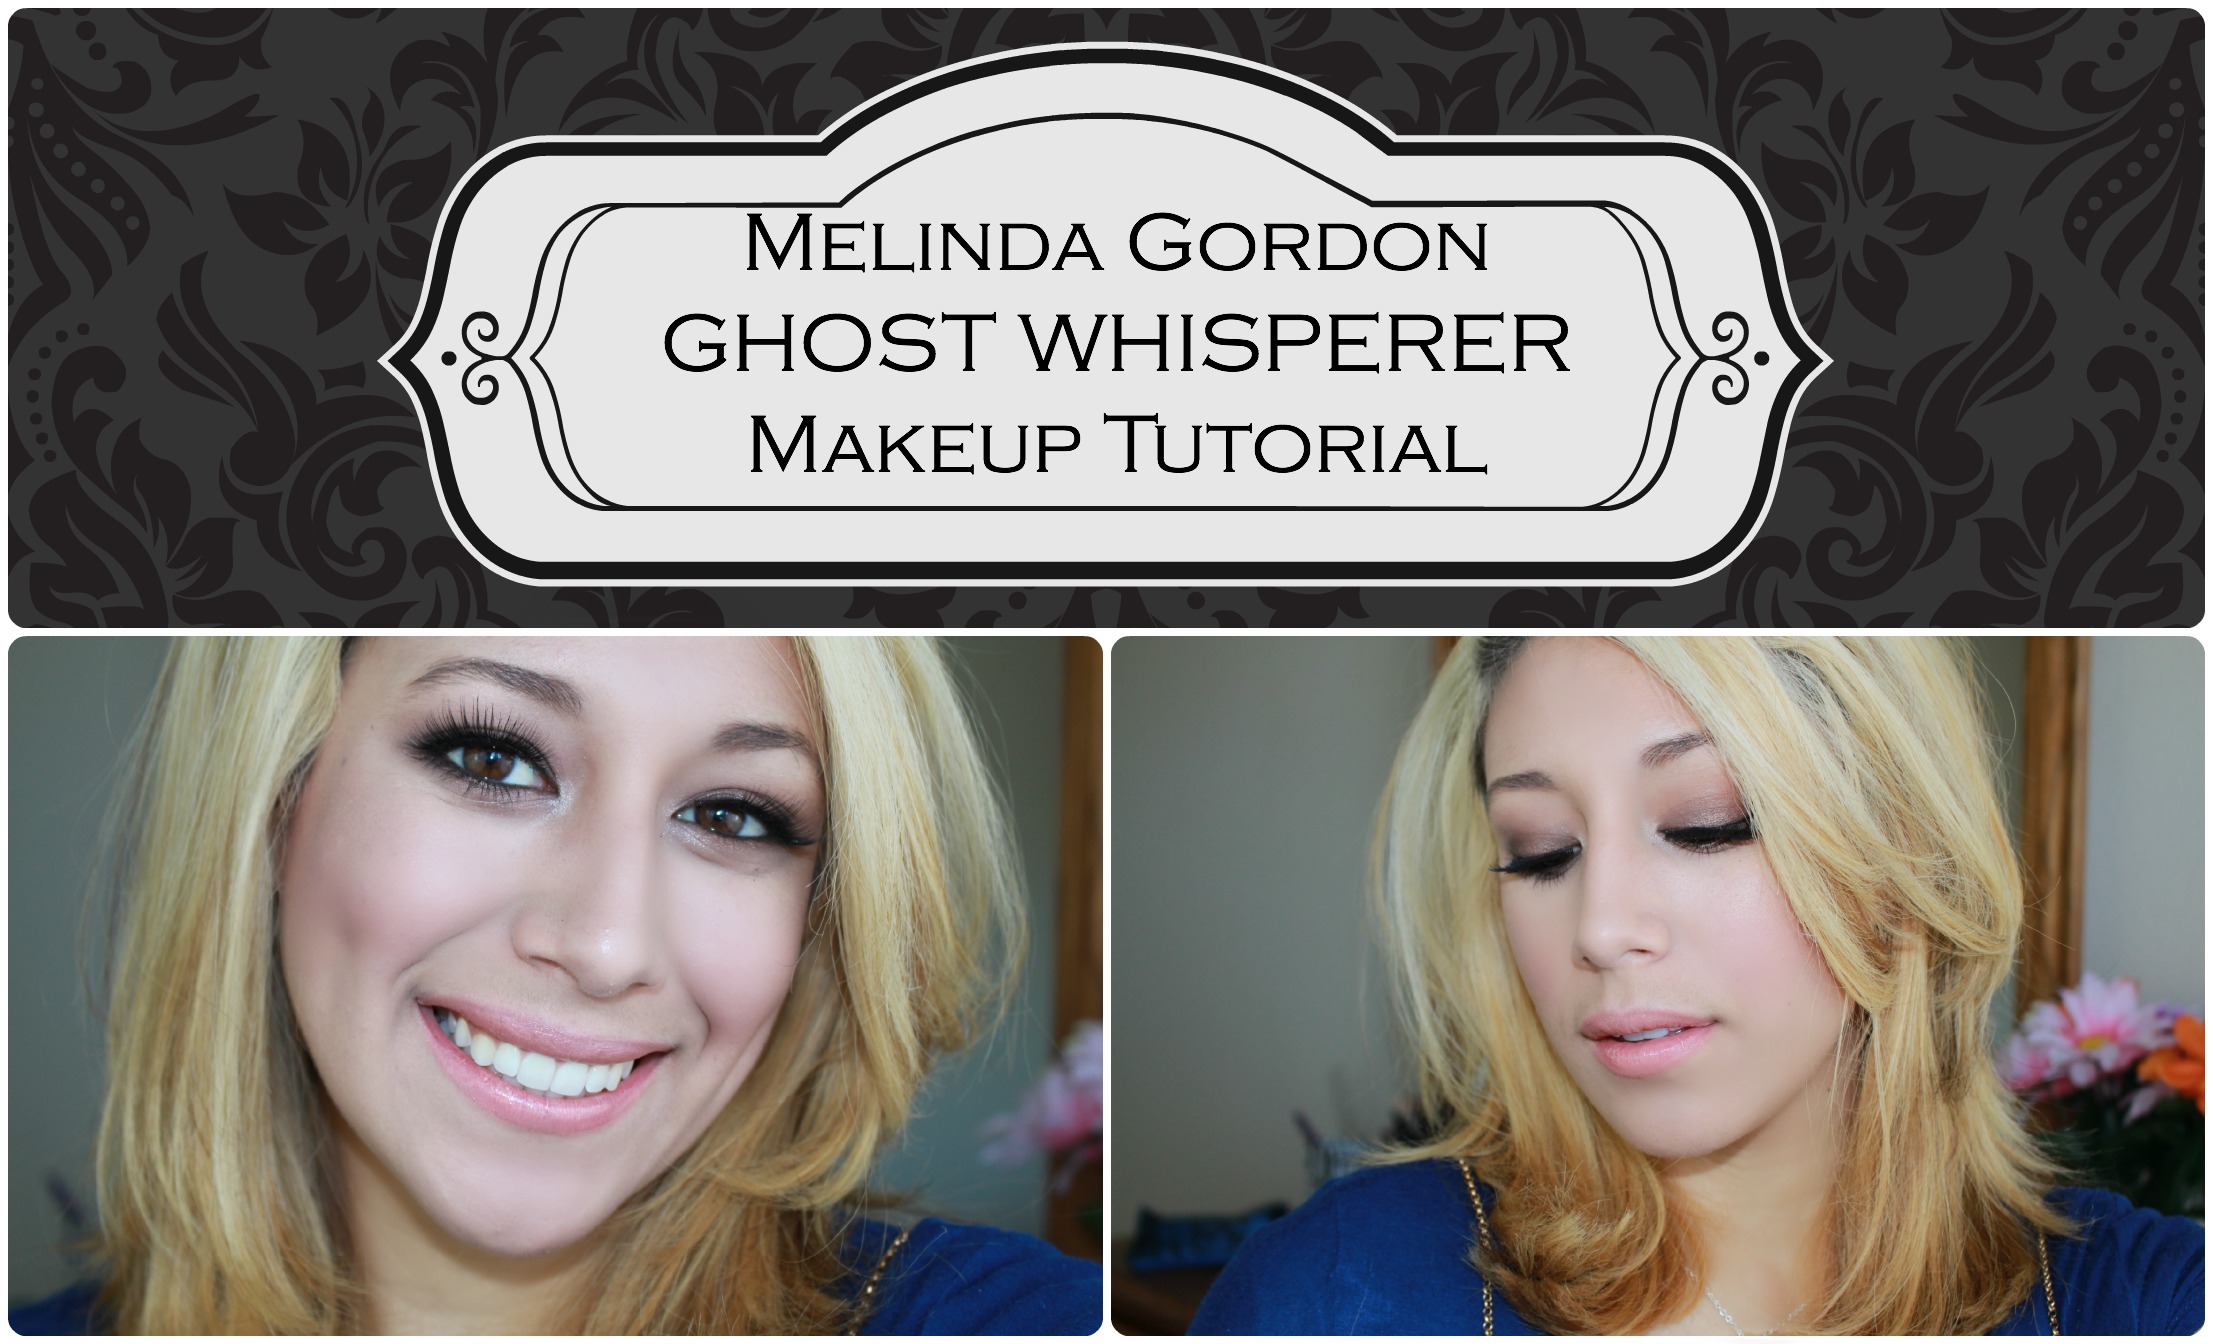
I am sorry I have been gone for a couple months , but I am back and I have been itching to show you guys how to recreate Melinda Gordons famous Brown Smokey eye! If you want to see what look that was exactly then click here.
Like always I did do a video tutorial for you guys , but I also decided to take real detailed pictures for you guys to pin for later or for you to do right now!!!
If you guys like my videos then make sure to subscribe to my youtube channel!
Ok so lets get started with the makeup. (List of the products used will be at the end)
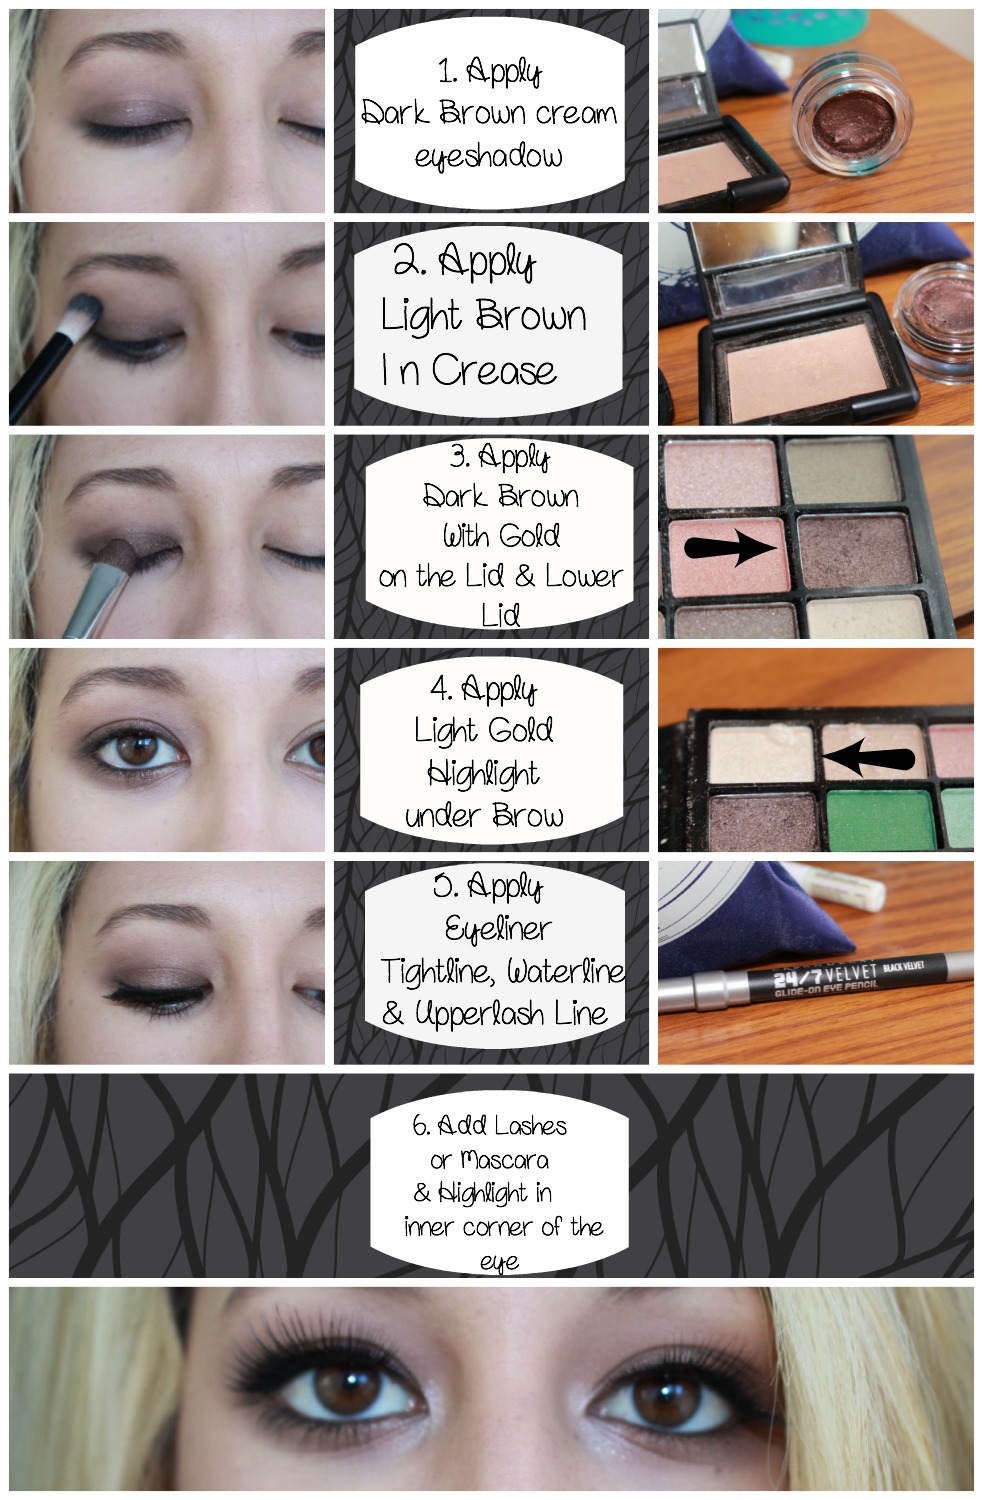
* She is almost always rocking this Dark golden brown smokey eye & of course you can’t forget her fake lashes that make her eyes look doe eyed! Its actually super simple to recreate.
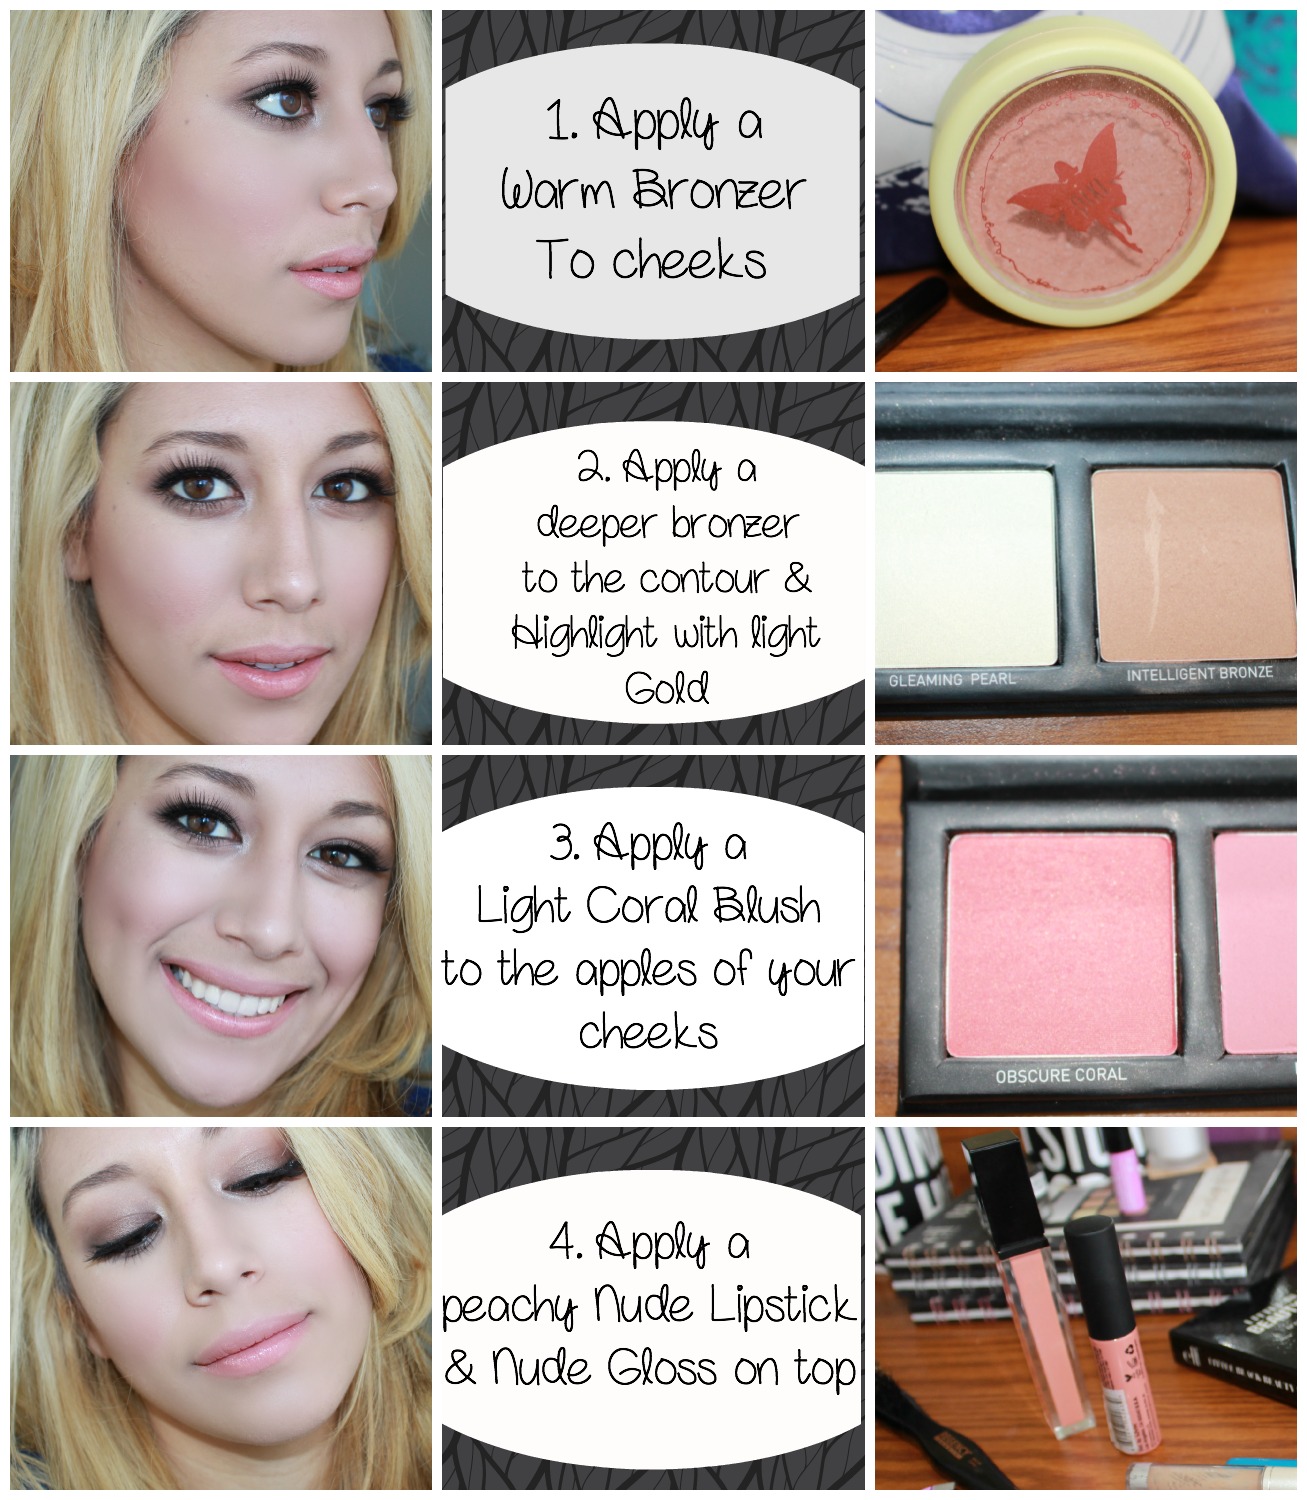
*For her face she kept it simple. She warmed up her complexion and added a very soft coral blush. She does always contour her cheeks & highlights to bring out her bone structure. Then for her lips she used a nude or a slightly natural pink lipstick & gloss.
So thats it, as you can see it is pretty simple. I tried to use more affordable products , the only high end product is the face palette.
So usually I only go shopping once a year around spring time. Enless of course I am pregnant or something like that ; which I am not! So I did some damage at Ross this past week and if you have one near you ; check it out! They have some really cute spring and summer cloths out right now!
So If you haven’t guessed Ross is my favorite clothing store , because everything is affordable but very Cute! So if you want to see what I got check out the video above!
So this is my makeup look for today! This Shirt I got at from Forever 21 I believe just in case you are wondering and my Nailpolish is Broadway Nails in the shade Waterproof (Dollar General).
Blush: Pixi Bronzer – Subtly suntouched
Lips : Elf Moisturizing Lipstick: wink Pink ( one of my favorite matte lipsticks!) + Wet N Wild Balm Stain – Rico Mauve ( such a great long lasting combination)
Eyes: Naked Palette ( Which is the best neutral palette out there)
So what is the color of your favorite spring shirt? Thank you guys for all your support if you have any type of blog posts you like the best and want to see more of let me know! I am currently moving to North Carolina thats is why I have not done any full blog post makeup step by step tutorials ; but expect those soon!
Remember, Beauty Comes From Within, So let It ShINE!
So I am super excited, just like all of you, for the Divergent movie! When I heard that Sephora released a LIMITED EDITION Divergent Makeup Kit I was too excited and I purchased it right away. I have had it for a little over a week now and I am ready to tell you what I think, Show you swatches & Show you how to do this Dauntless Smokey eye look I created. So if you want to get it for yourself then just click here. (If it is out of stock then check your local sephora near you , or wait for it to come in stock again!)
* I was not paid or asked to do this, I just am really excited and want all of you Divergent Fans to know about this!
If you want to see swatches, my thoughts & How to do a smokey eye using this kit then click below.
So this kit cost me $59.50 , It comes with three eye palettes, a face palette, four lip glosses and a double ended brush.
It even Comes with little cards that help you create a Dauntless, Erudite, or Abnegation Day & Night look. First off the Packaging is great it is a strong card board material that doesn’t give at all! Not only that but I know that us girls want cute packaging on our stuff and this has it! So lets see what all this stuff looks like..
The Cheek Palette is called the Divergent Cheek Palette. It comes with a blowy coral blush, a matte rose blush , a champagne highlight & a matte warm bronzer. All these are so creamy and pigmented. They feel nice and I was really impressed with how nice they wear on the face as well. I love that It has a matte and a Glowy/shimmer blush.
The Three eye palettes are the Abnegation palette,Erudite palette, and Dauntless palette. All these shadows except for the transformer shades are really pigmented they feel silky soft and the color pay off is amazing. I find myself being super gentle when I dip my brush in and when I apply it . These feel to me like Urban decay quality shadows, they are worth every bit of the money I spent on this kit. If you have a chance to go to sephora and swatch them , they are seriously really good quality. The transformer shades are the first eyeshadow shades in each palette. With exception to the Dauntless palette transformer shade, they are not pigmented. They are used to add shimmer but no color. If you use them wet though they do add a great highlight to your look and it picks up a lot better. ( They are made to be used wet)
Last are the four lip glosses and double ended brush.
The brush is really soft and I feel like it does a great job blending . It feels like a higher end blush so I was pleased with it. The only thing is that because it is double ended I have to store it horizontal if you don’t like to do that then you won’t like this brush.
The glosses are sheer with a subtle tint of color , as you can see on my arm. They feel really soft and silk , not stick or tacky. I personally don’t like sticky gloss and I was really happy to see that these are not that way. These smell minty but they don’t tingle, so they are not plumping or anything like that. The shade from top to bottom are: Fear not, Natural Virtue, Supreme Ritual , and Temptations Choice.
So this is the look I came up with , this is actually what I picture a Dauntless woman to look like when I read the book. It is a very smokey eye with some mahogany color in it as well. This is super easy to recreate !
add a black base close to the lashes and blend onto the lid.
Apply Radiant Initiation (Erudite Palette) into the crease as a transition shade and blend really well.
Put Serene Vanilla (Dauntless Palette) underneath the brow for a matte highlight.
Apply Burnt Mahogany (Erudite palette) All over the lid and up towards the crease but not passed it. blend with some of the Radiant initiation shade and a blending brush. Also blend it in the lower lashes.
apply Dauntless Ink (Dauntless palette) Very close to the lash line and smoke it out so that it looks like there is an easy transition from the mahogany to the black.
Apply Choose wet in the inner corner of the tear duct for a glowing effect.
Apply a liquid eyeliner to the upper lashes , with a subtle wing.
Apply a black pencil in-between upper lashes and tight line.
apply a skin tone liner on the waterline.
Apply mascara and you are good to go.
For the Face I applied the bronzer as a contour shade , I used the highlighter on my cheek bones for a highlight , and I used Misty rose on the apples of my cheeks.
For my hair I curled my hair with a 1 ½ inch curling wand then I teased the root of my crown area. Next I made three twists and I pinned them with bobby pins. Super easy hairstyle again a perfect Dauntless hair look. Its easy to do but yet it looks fierce.
Thanks you guys for taking the time to support me and to check out all my posts and videos! I hope you guys enjoyed this and let me know if you have seen the movie yet and what you think!?
Till Next time,
Remember, Beauty Comes From Within so let yours SHINE!
<3 Love, Bondbeautyful
Happy thursday, today I’m going to show you how to do a very spring/day appropriate makeup look. Spring is right around the corner, for some of us its here already so lets celebrate. I am using all the things I got in my March Ipsy today if you want to sign up for yourself then click here.
So I did do a video for you so if thats easier then just click the video below if not then keep reading…
So here are the things I got in my March Ipsy plus some of the main products I used to create todays spring inspired look…
I was really impressed with this months IPSY Bag.. If you don’t know what Ipsy is it is a subscription service that cost $10.00 a month, they send you deluxe sample products plus a glam bag. * I am subscribed and I pay every month with my own money. I love it and I like to show you what I get and how to create a look with what I got…
So this is the makeup look I came up with.
Eyes: I used the Be a Bombshell Bora Bora Palette…
Taupe: In the crease & Outer V also in the lower outer half of lower lash line.
Gold: In the inner half of the lid + Inner part of the lower lash line
Copper: blended it in the outer half of the lid and the middle of the lower lash line… Make sure to blend
Teal: Used this smudged on top of all the other shade on the lower lash line (make sure to blend) Add a green eyeliner to lower lash line to help blend it all together..
L.A. Colors Pearl eyeliner for the winged out liner..
Its So Big Mascara for the lashes
L.A. Colors Auto Eyeliner in Black on tight-line & In between Lashes..
Face:
Perfect BB Cream all over the face , blend with your fingers
ELF Brightening Concealer : underneath the eyes to brighten it up.. Blend with a foundation brush or finger
Elf Cream Bronzer: St Lucia used my finger to apply then blended with a contouring brush
Profusion Eye Brightening palette 06: mixed all together for a blush
Rimmel stay matte powder to top it all off and prevent oiliness..
Lips:
Bareminerals Lipstick : Moxie which is absolutely gorgeous and very creamy
Rush Lipgloss: Slice of Heaven to top it off with some beautiful shine!
Thats it simple as that and you have a spring beautiful look.
I did curl my hair with the Cortex Curling wand , I used the reverse barrel and used different size sections curling away from my face.
If you recreate this I would love to see , you can tag me on instagram, or Facebook!
So what pop of color are you going to be modeling this spring & summer?!
I am really loving teal right now!
Till Next time,
Remember, Beauty Comes From Within SO let yours SHINE!
So today I am quickly doing a what I ate Wednesday Post. So basically I vlogged what I ate today and I really tried to eat healthy stuff so come check it out!
So Like I said earlier I tried to eat healthy. For breakfast I basically ate oatmeal which I usually have toast so that was a good healthy choice for me.
For Lunch my husband came home for lunch so I made a Pita inspired chalupa thing . It was super easy to make I got greek bread from cisco and grilled some chicken.
For Dinner my mom brought me some mollijita soup (Chicken) because I was feeling pretty sick.
I hope you guys had a happy Wednesday, till next time..
What did you have for dinner?
Remember, Beauty comes from within so let yours shine!
So today I am doing another fashion related post. A few weeks ago I did a post on how to determine your body shape If you haven’t read that then check it out here Find your Body Shape.
Today I am going to continue on and talk about the Inverted Triangle Shape and how to dress your best if this is your body shape. I will be doing the rest of the shapes so stay tuned for that! So here we go ..
So we are going to talk about what an it means to have and Inverted Triangle shaped body and what types of clothing look flattering on you. So why is it important to know what your body shape is? Knowing your body shape helps you to pick cloths that will look the absolute best on your body type.
Inverted Tirangle basically means that you have broad shoulders and a slimmer waist & hip area. So your a bigger upper body. Now because this is the case you really want the focus to go to your lower body to balance out the broad shoulders. The goal is to balance your shape out with the clothing that you wear.
So , a good way to balance out your body is to wear bright bottoms. Skinny jeans are a no no endless you have bright colored skinny jeans , then they are ok. So stick with brighter bottoms or even textured pants.
This is a really good example of textured bottoms. Another great thing about this outfit is that the skirt has a little bit of a flared out piece which is perfect because it gives the illusion that you are proportional.
You really want to try to make an extra effort to accentuate your waist , so a belt is perfect. Shirts that Flare out near the hip area are also perfect for your body shape. You can see here that I also have boot cut or wide leg jeans on which also make me look very proportional.
So thats pretty simple I hope ! Comment down below if you have any questions! If you like my videos then make sure to subscribe ! If you don’t know what your body shape is then check the video out below!
Now here is my makeup look for today! My top is from forever 21 and my blazer is also from forever 21! Thank you guys for watching make sure to insert your email if you want to stay updated with my blog posts!
So what Body Shape are you? I am actually the Inverted Triangle Shape!
Till Next time,
Remember Beauty Comes from Within so Let yours SHINE!


