BondBeautYful

Find Your Beauty From Within

Menu

Skip to content
  • About
  • Beauty
  • Bondbeautyful LIfe
  • My Foundations Shade Matches

Category Archives: How To: 101

Cartoon Liner Meet Bronze Goddess

6 / 23 / 176 / 22 / 17

File_002

Hello My Bondbeautys,

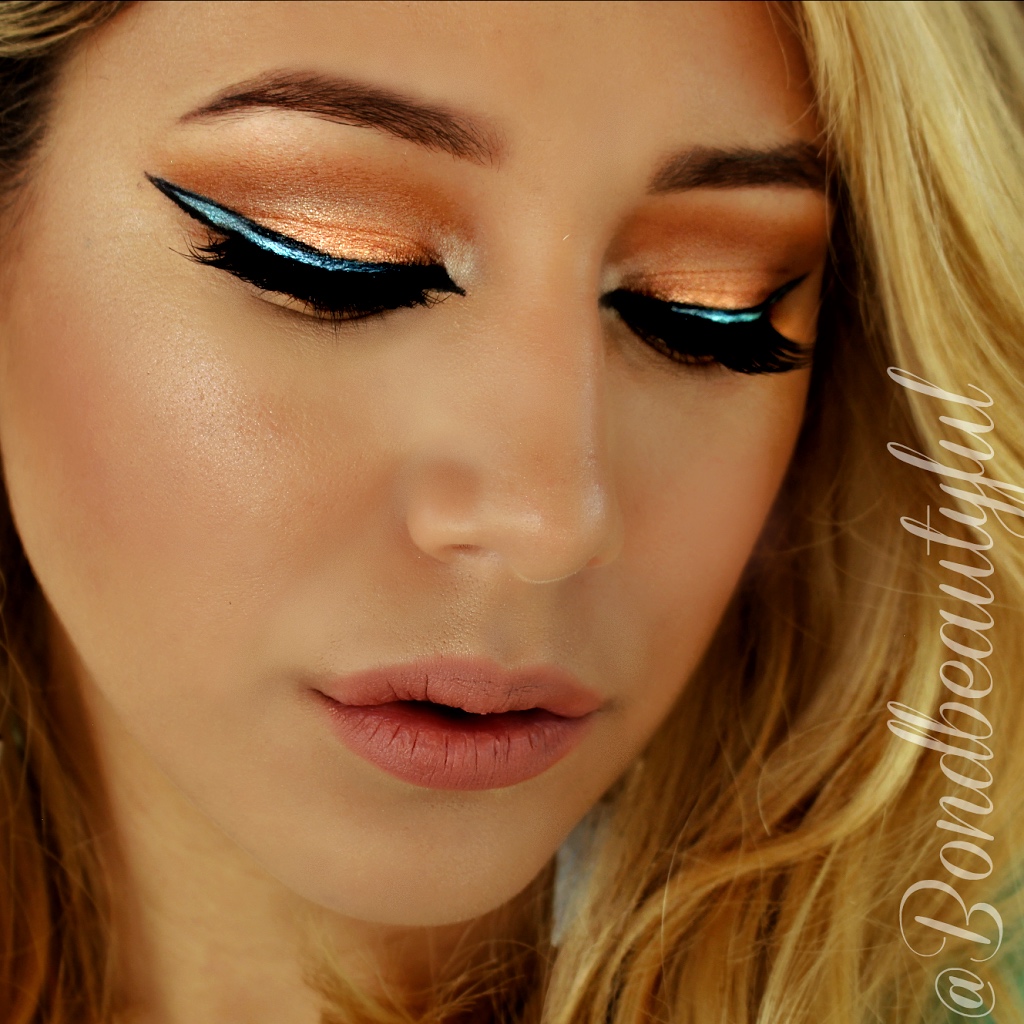
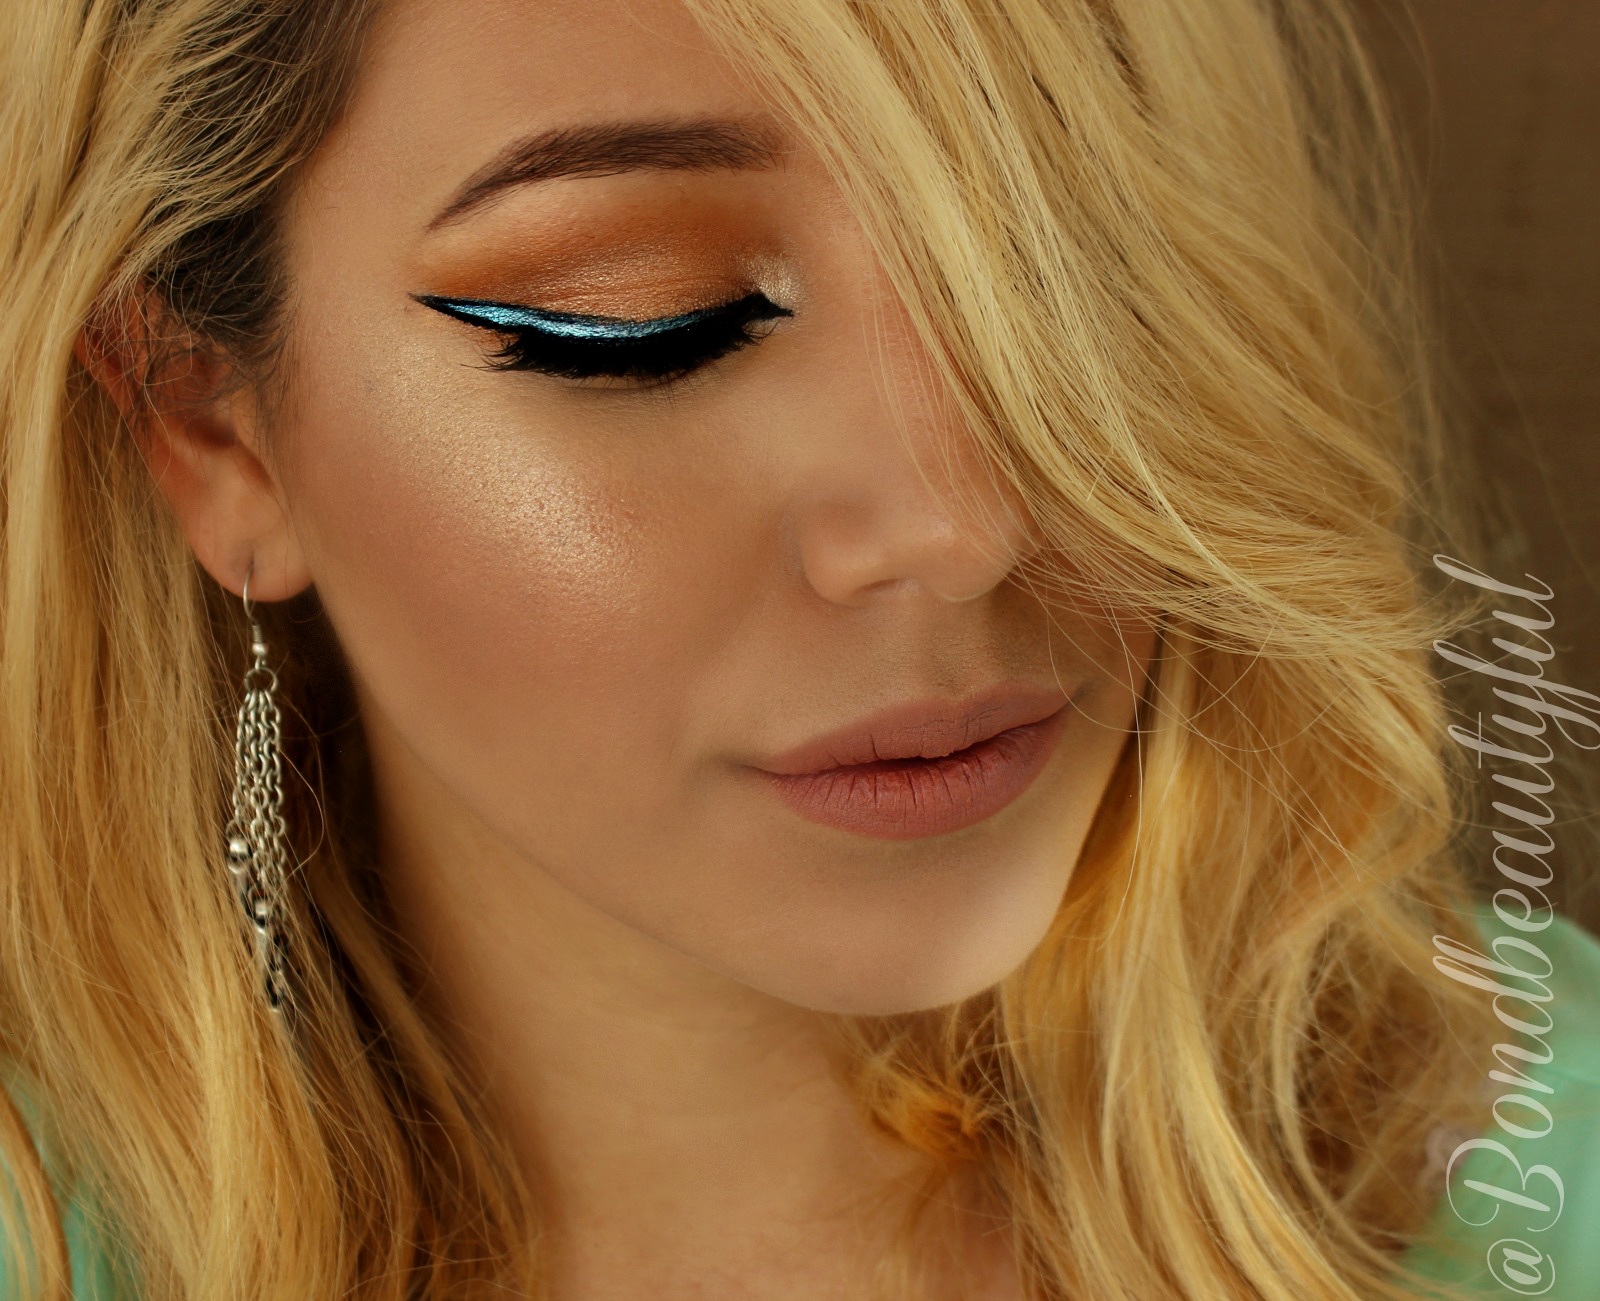
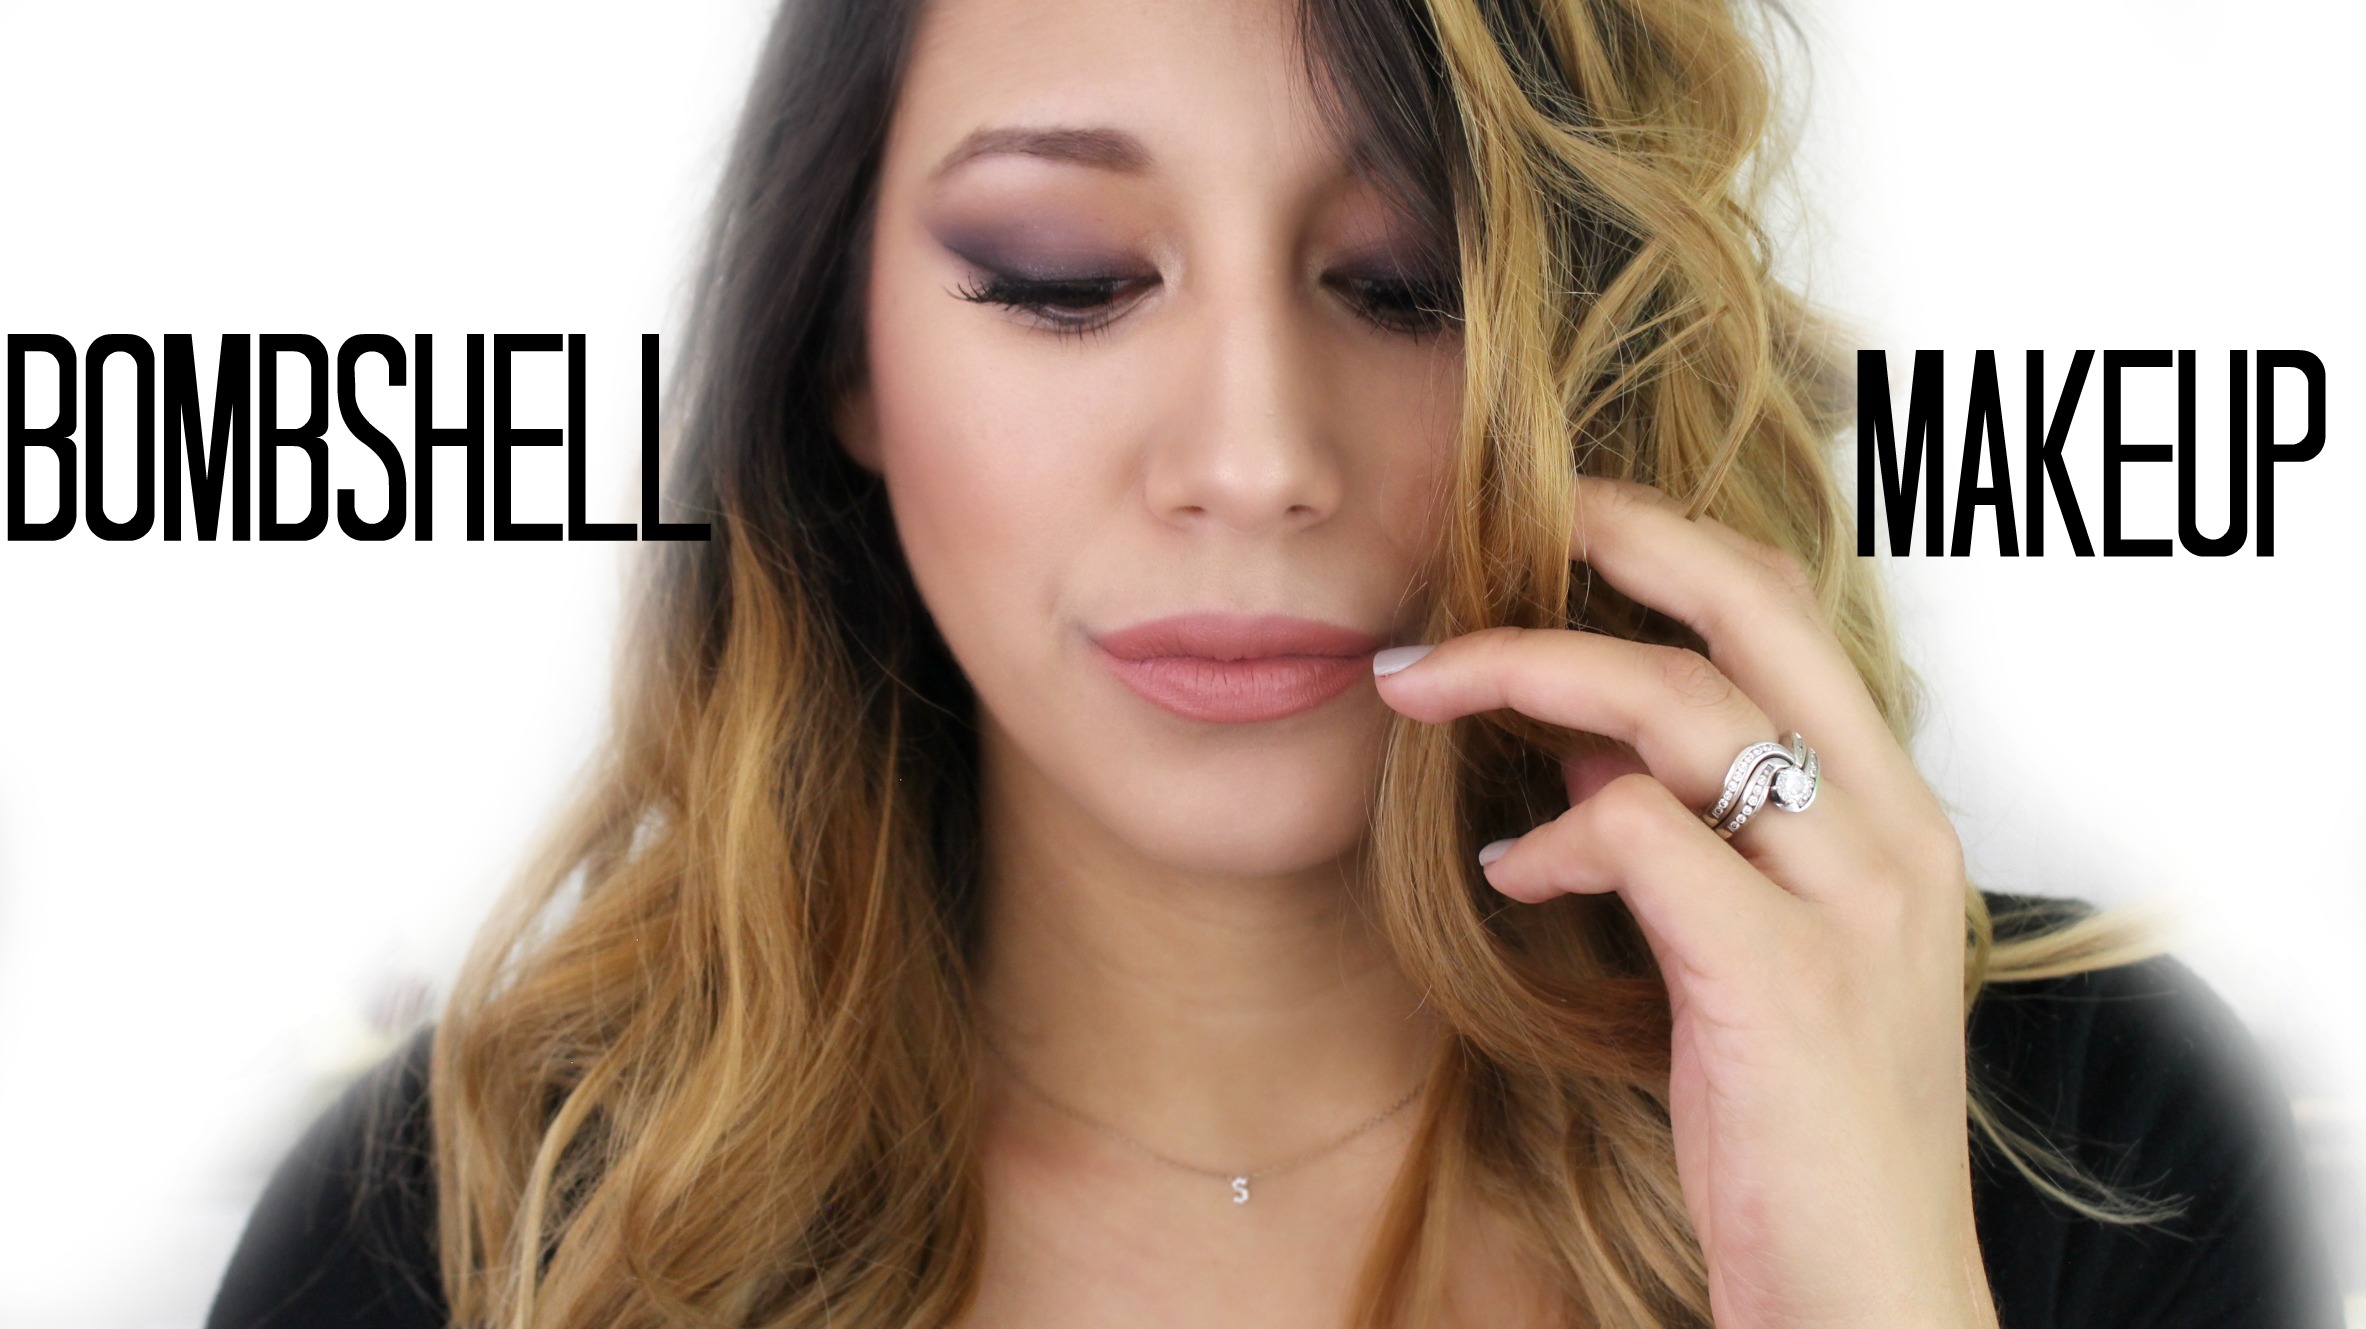
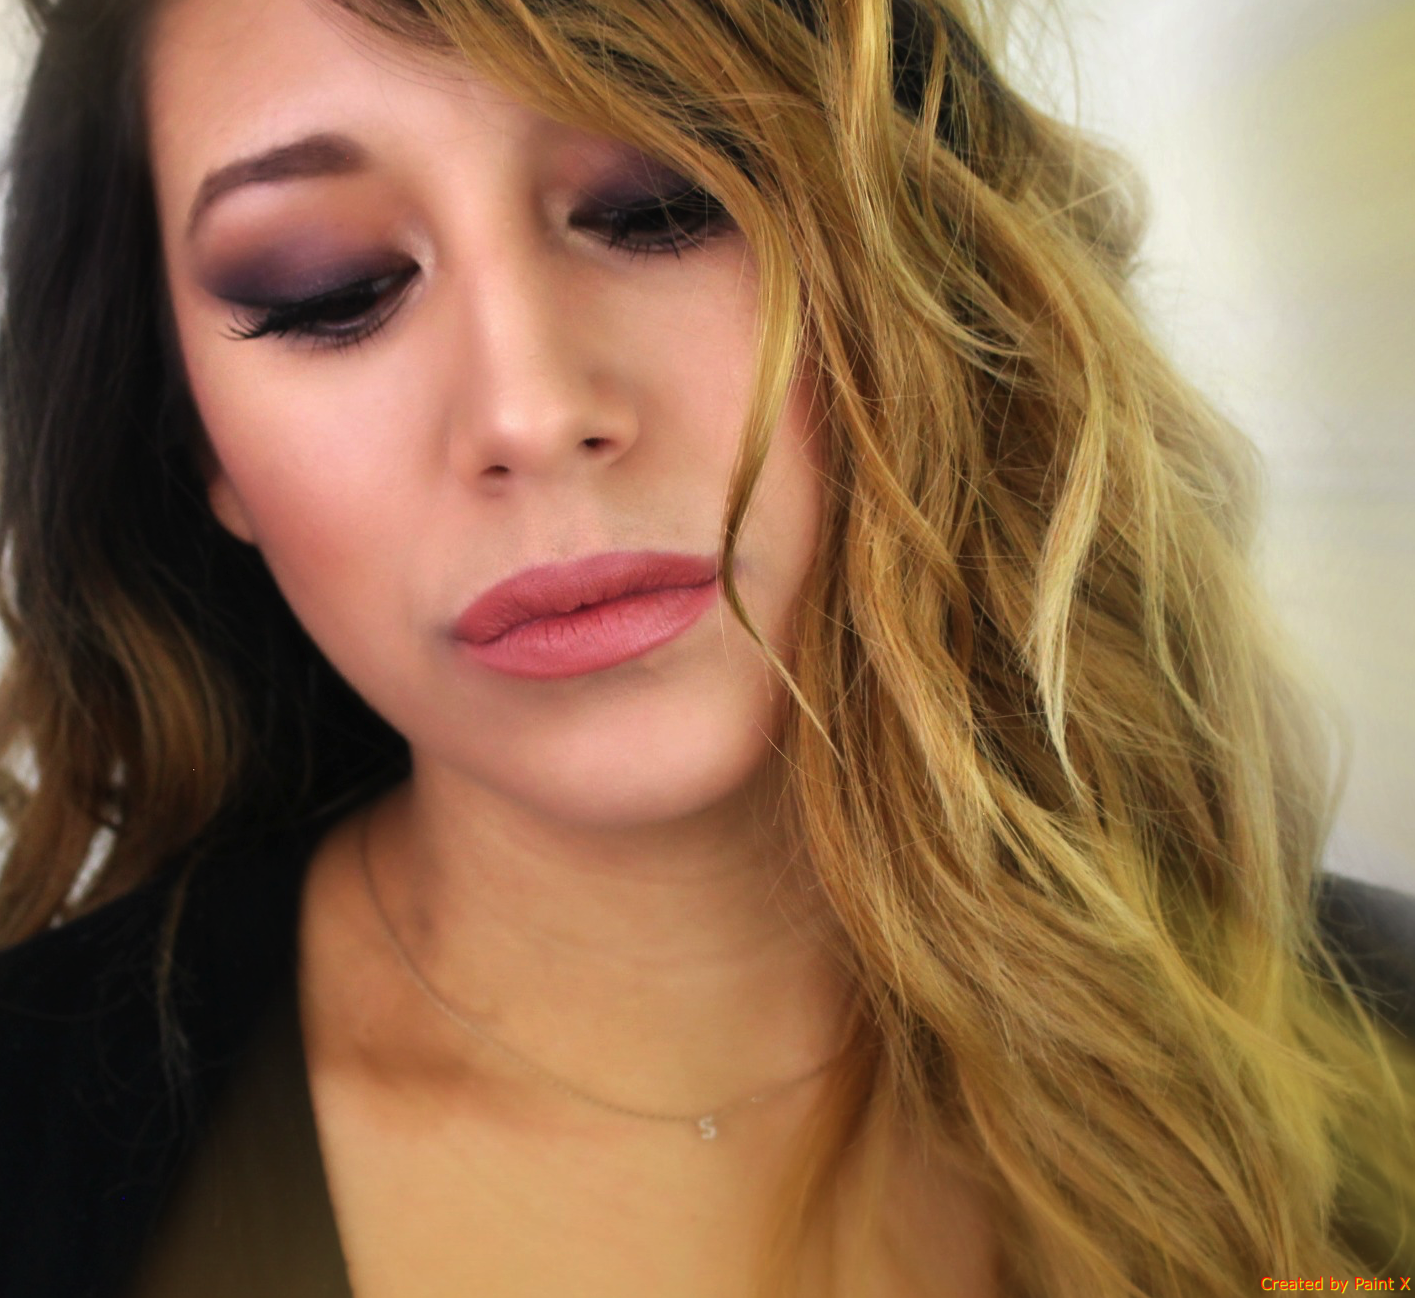
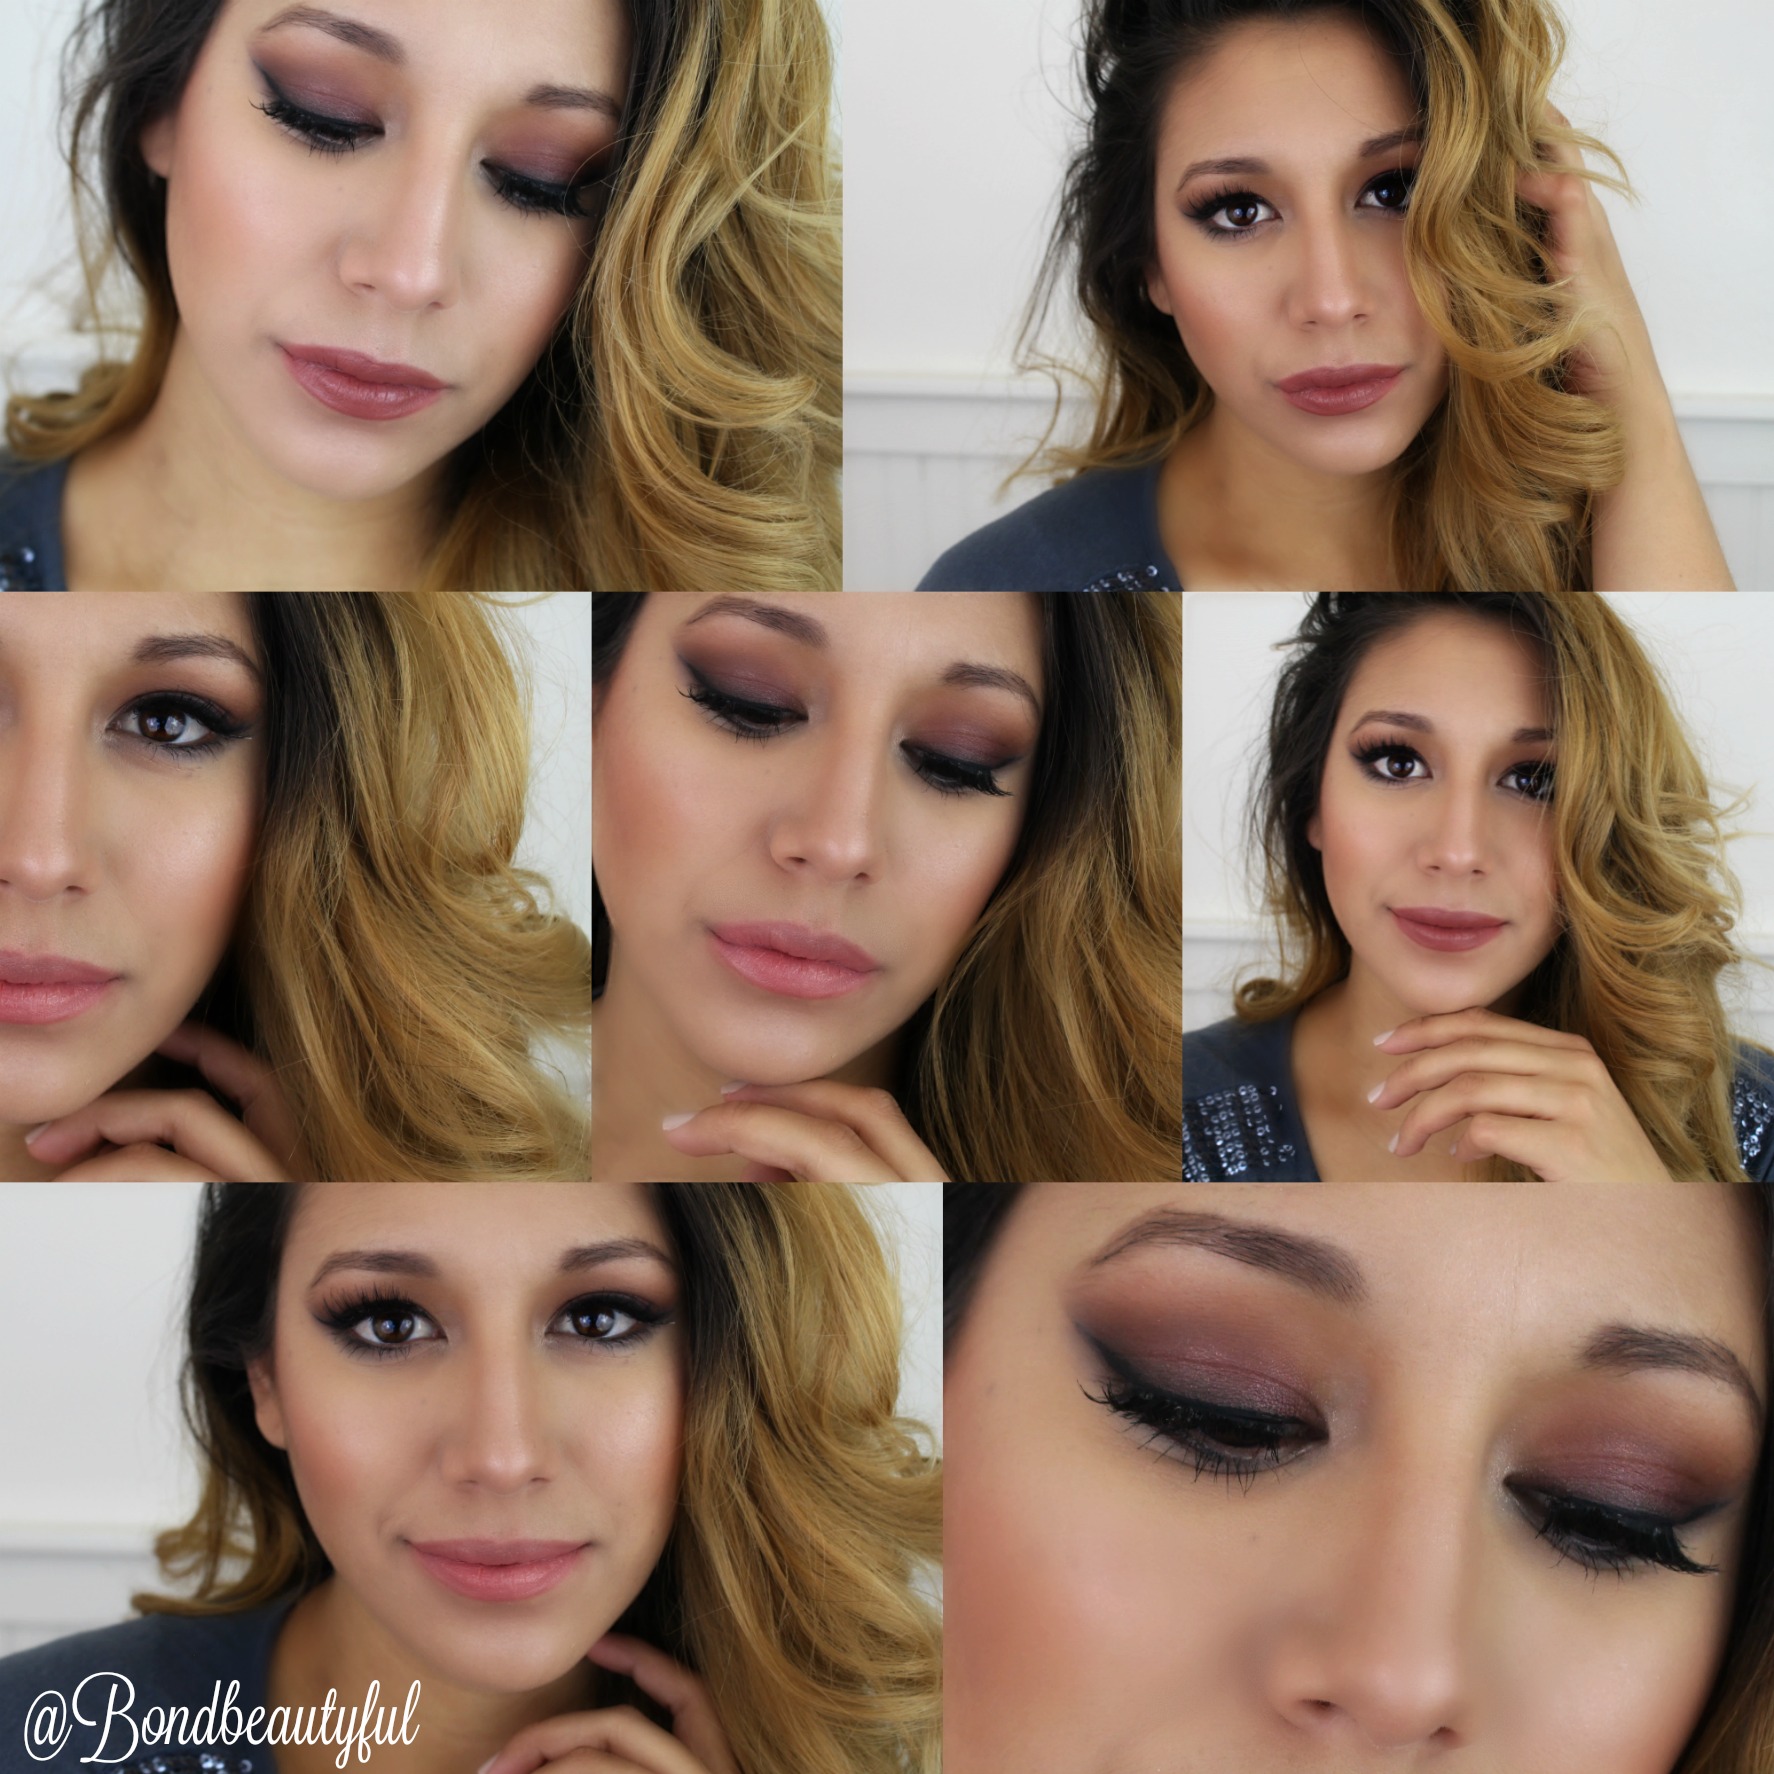
Another beautiful Friday and I’m ready to share this fun, trendy makeup look with you! Im going to cut down on chit chat and lets just get started. I have been obsessing over the Cartoon Eyeliner Trend that has been taking over Instagram. I wanted to recreate a summer bronzey look & combine it with Cartoon Liner. I love how it turned out and I know you will too. (Full Tutorial Below)

File_000

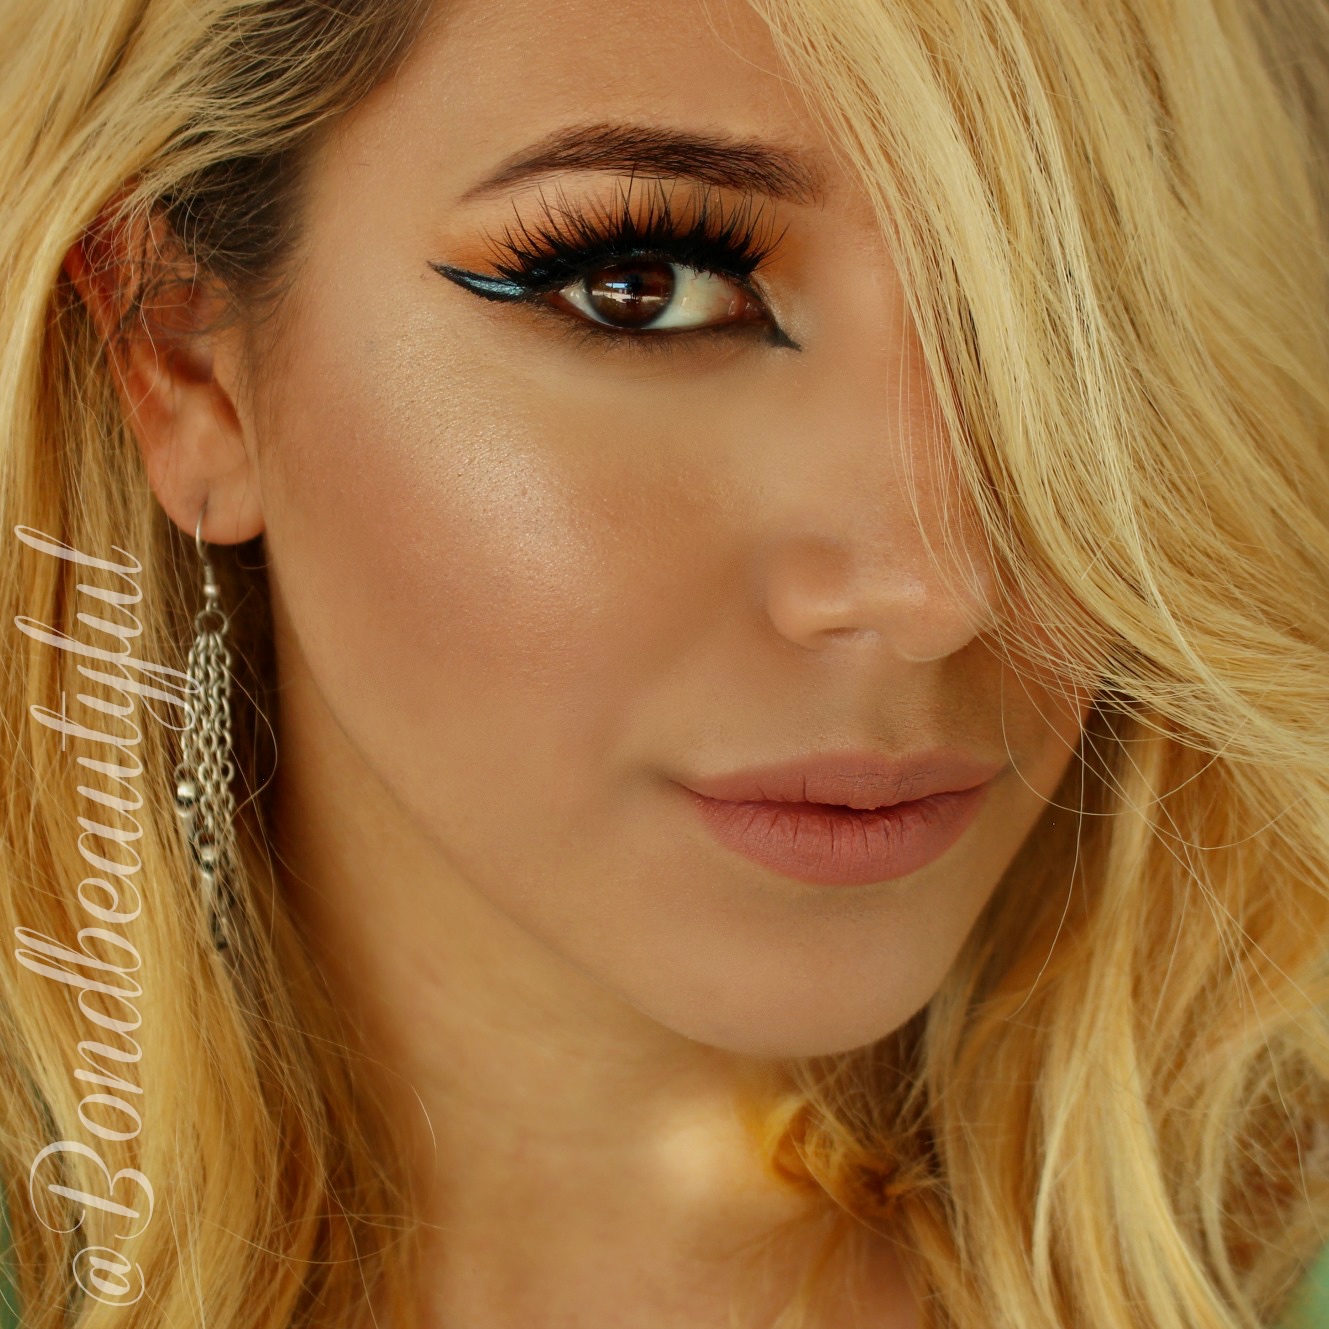
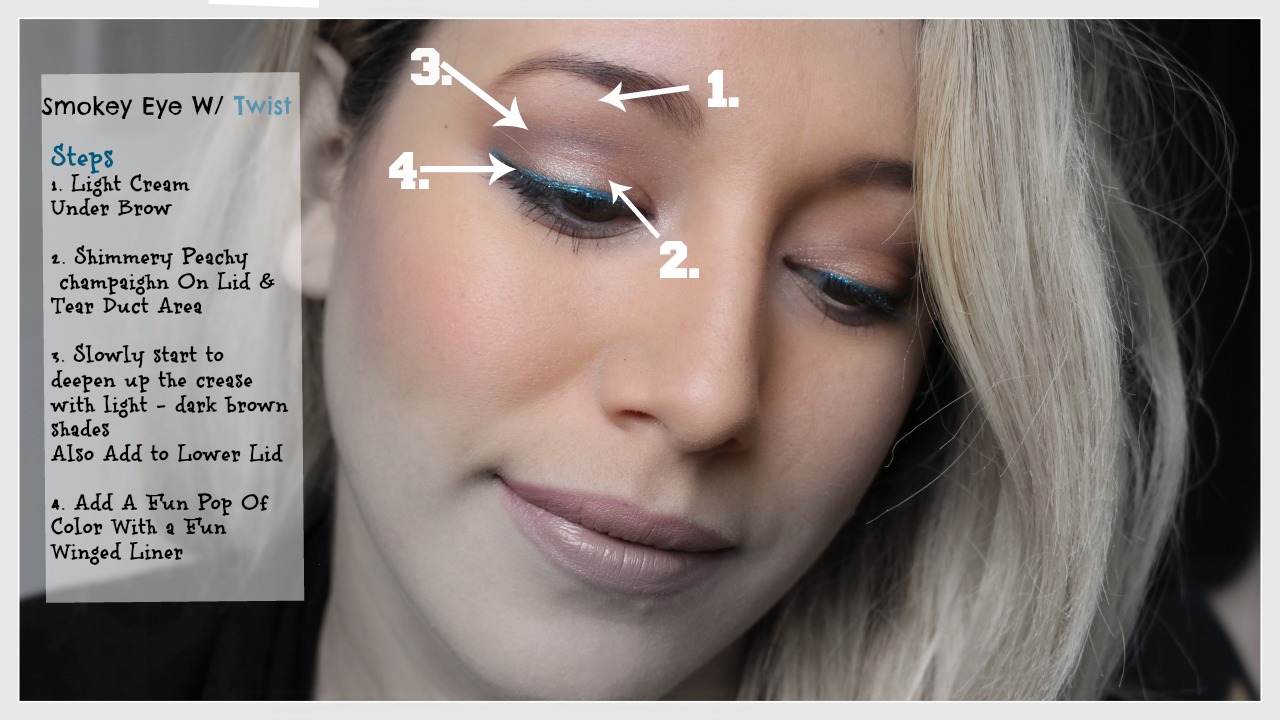
I started out with a Gold Bronzey Eyeshadow look and added a pop of color with the liner. Surprisingly Cartoon liner is really simple! I just made a super bold cat eye shape with Teal Gel Liner. Then I outlined it with a black eyeliner. It took time and patience but it was worth it. Take your time, its ok if its not perfect. In the tutorial below I show you how I to fix the lines if they arn’t as straight as you would like them to be.

File_003


Heres a list of the products I used for this makeup Look.

  • Too Faced Bronzer Wheel- Summer Love Bronzer & Pink Leopard
  • Ulta Cheek Color : Flushed
  • No7 Lift & luminate foundation
  • Morphe X Kathleen Lights Palette (Use any warm bronzey, gold shades you have!)
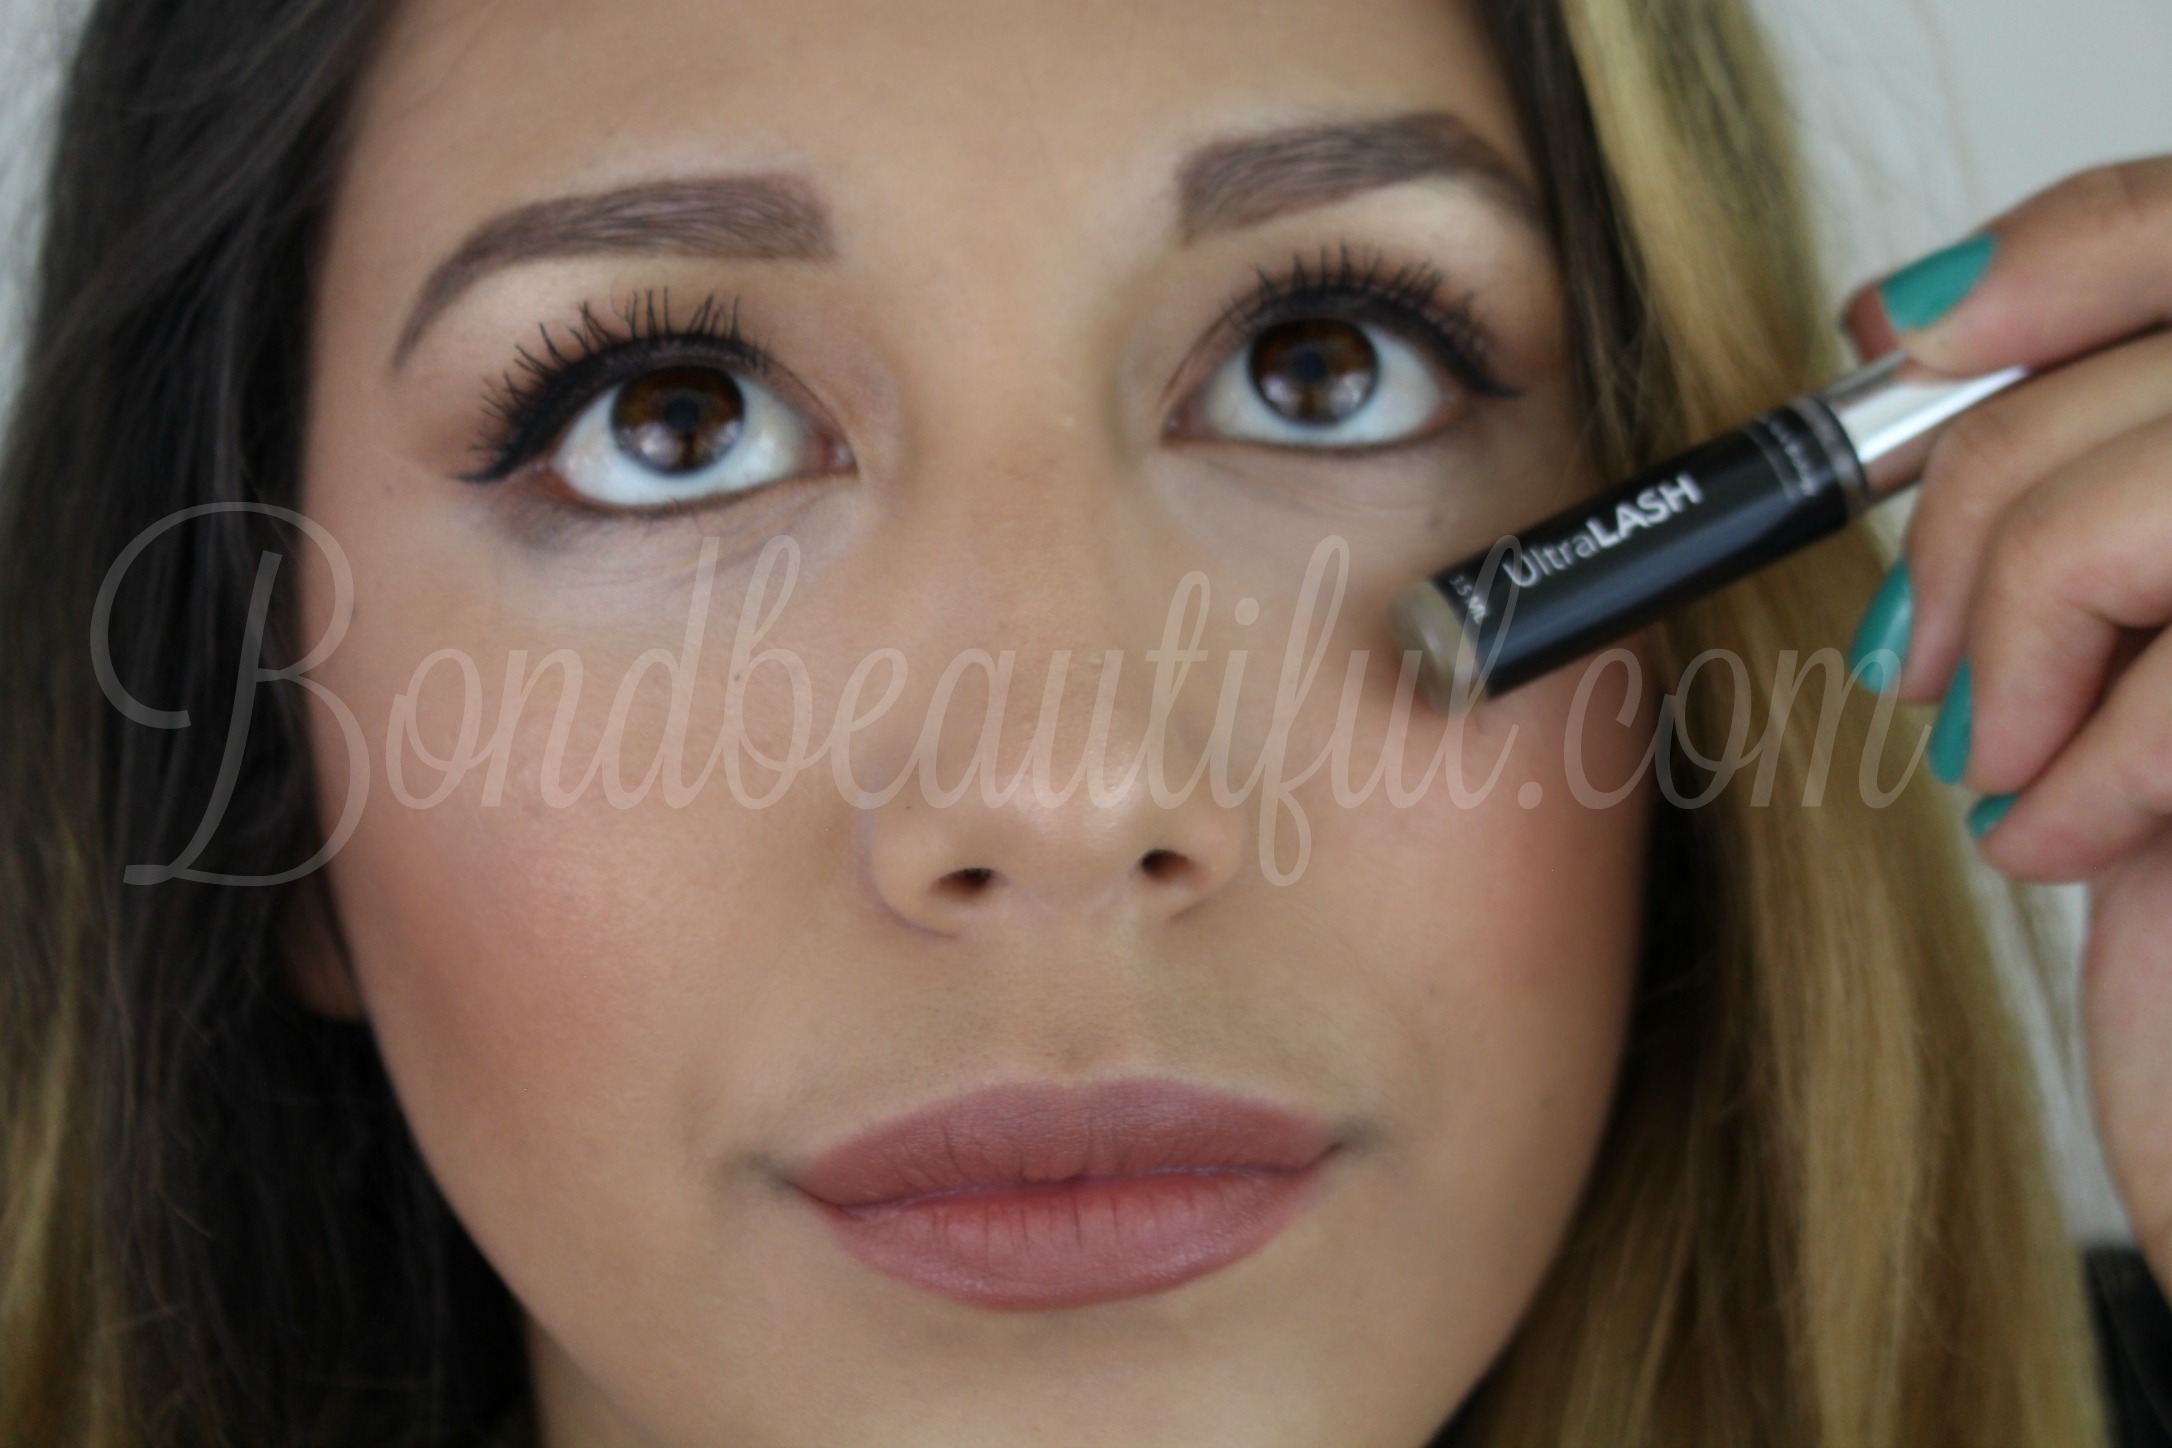
  • L’OREAL Infallible Gel Liner Black
  • Hua Mian LI Waterproof Liner 11: Wish APP ( Nyx Liners are good too!)
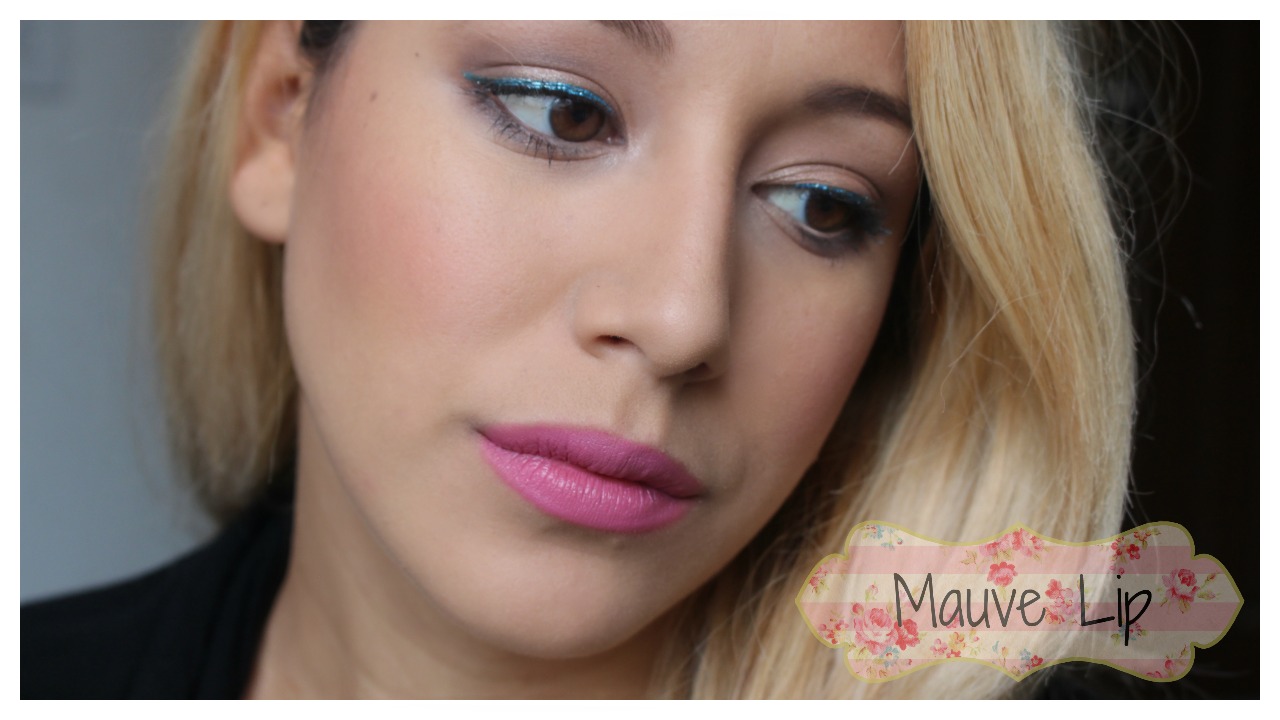
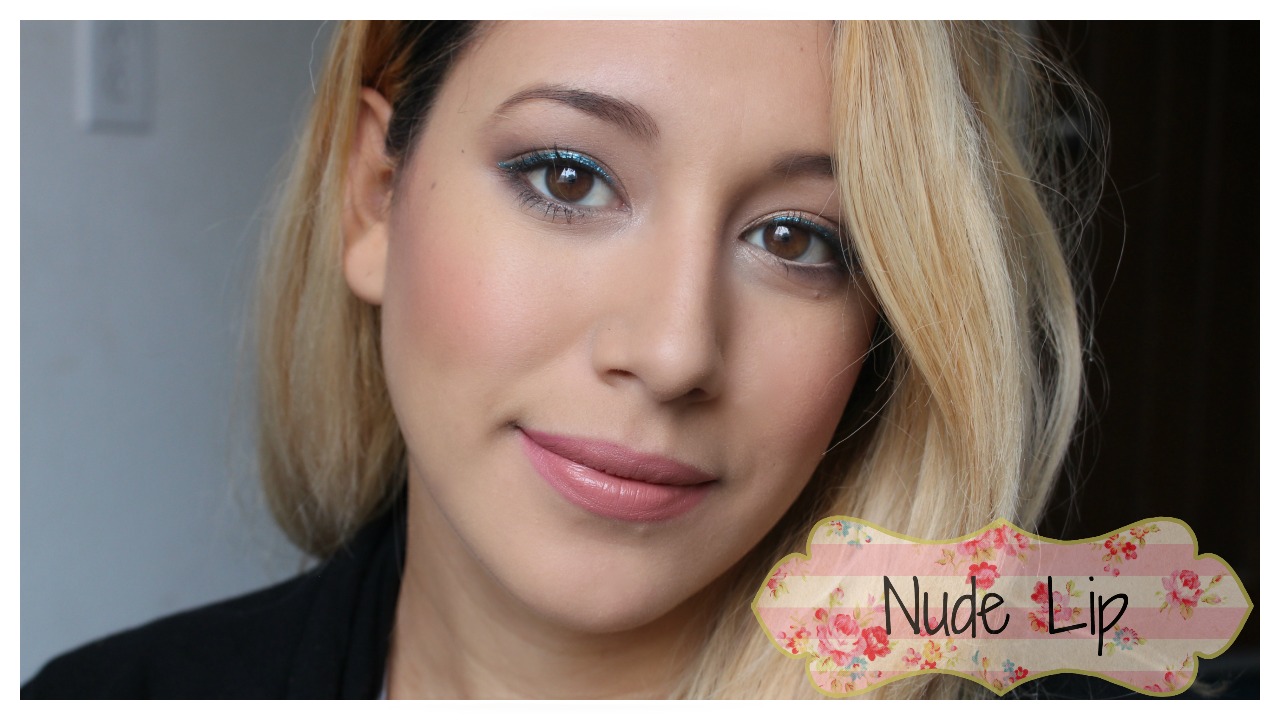
  • Milani Lipstick Matte Naked
  • Becca Skin Perfecter OPAL
  • WetnWild Contour Stick Where’s Walnut
  • NYX Micro Brow Pencil Ash Brown

Don’t forget to see the tutorial below

File_001

Also there is a GIVEAWAY GOING ON. Im giving away a Asavea Gold Titanium Curling Wand All you have to do is click Here to enter. Its free and it going on until July 1st.

So tell me whats your favorite Makeup Trend of the moment? COMMENT BELOW and lets get a fun conversation going!

my signature


Leave a comment

How to make short lashes look longer

8 / 22 / 168 / 21 / 16

Hello my Bondbeautys,
Im excited to talk to you today about some tips & tricks to making your lashes appear longer! This is honestly my mascara/ lash routine!
These steps are so simple and they just take a little longer than just applying regular mascara; but they truly make all the difference! I have a full video for those who are visual learners so check it out down below!

before & after

Step 1: Apply a lash serum before bed. The one I use is the Newyorkbiology Lash & Brow Serum. All you need to do is apply to lash line every night before bed. This helps your natural lashes actually grow and thicken! (it really works!)

Untitled

Step 2: Curling your lashes! There is a trick to this guys. First , use a good lash curler. Mine is from ELF it only cost me $2 but it still is amazing! It fits my eye shape well and doesn’t tug lashes! It also has a beautiful even curl. I like to curl my lashes 3 times before applying mascara. The first two times I curl it straight on and the third I will bend the curler upwards so it is at a 90 degree angle to my cheek! (See video for demo)

Step 3: MASCARA I love using a Fiber Mascara to really get my lashes looking thicker & longer! The mascara I love for this is the Limelight mascara. Unlike other fiber mascaras this one has enough product to really adhere the fibers onto your lashes. I don’t have any problems with the fibers being loose or flaking off into my eye! (And I have sensitive eyes) This one has really made a difference (full review on this mascara coming soon)

So I apply 3 thin coats of mascara. I know it seems like a lot but it really isn’t! You can do just 2 if you want. The last coat is the key to making your lashes look longer though! On the last coat you are just going to dab at the very tips of your lashes so that the fibers can really grab the tips making them look noticeably longer!

Step 4: Last curl your lashes one more time once your mascara is completely dry! This is where you need to be careful not to break your lashes or tug any out! Its so important to wait until your lashes are DRY! Then when curling make sure to only have curl them DO NOT clamp down all the way!

TIPS:  MAKE sure to slowly clamp down & release when using a lash curler so as not to pull any lashes out!

Here is the full video with demo footage so you can really see how I do it! I hope you enjoy!
https://youtu.be/MM4tjE1b2BU
So Now YOU TELL ME.. What is your favorite mascara? I love seeing your comments so make sure to give me mascara suggestions below! Also share & subscribe its FREE and you will get posts sent right to your email!

my signature

Leave a comment

1 Brand Makeup Tutorial: Bombshell Makeup

6 / 17 / 166 / 18 / 16

thumb 2

Hello my Bondbeautys,

Today I am so excited to bring to you this tutorial because this is a collaboration with two other beauty you tubers! I am collaborating with Piper Hampton & Velmalee.  They are amazing & talented. Plus they are also very entertaining which is why we make videos right? Any ways we are each doing a one brand tutorial using a drugstore brand. I decided to do Wet N Wild because of how CHEAP they are. I rarely use the word cheap to describe a brand, but I wanted to get my point across. They are so affordable that sometimes they get looked over because of it. Just because they are CHEAP doesn’t mean they are CHEAP. Their products are amazing and to prove it I went all out glam with this Bombshell look; using only their products.

bombshell collab thumb

This look is so beautiful and anyone can recreate it, I make it super simple. Its sexy & perfect for a special occasion! (Tutorial down below)

Products Used:

  • Wet N Wild Coverall Foundation & Primer
  • Wet N Wild Megaglo contouring palette contour Dulce De Leche
  • Wet n Wild Coloricon Blush Apri-Cot in the Middle
  • Wet n Wild To Reflect Shimmer Powder Boozy Brunch
  • Wet n Wild Megalast Lipstick Bare it All
  • Wet n Wild Petal Pusher Palette
  • Wet n Wild Single Eyeshadow Nutty
  • Wet n Wild Poster Child Palette (Black)
  • Wet n Wild illuminating concealer pen Posing Nude & A Happy Medium
  • Wet n Wild Color icon eyeliner pencil Mink Brown& Black
  • Wet n Wild H2o Proof Liquid Eyeliner Dark Brown
  • Wet n Wild Lengthening Mascara

thumb

This look is something that I did recently on my 100 days of makeup I am doing on my Instagram. Basically every day for 100 days I am challenging myself to do a different makeup look. I did this on Sunday on Instagram and so I decided to show you how to do this on my youtube today!(The exact picture is down below) If you are interested in all my makeup looks I have done check out my Instagram!

Day 5

(In the Instagram picture I used different products but I recreated the same look using Wet n Wild down below!)

Let me know what makeup tutorials you want to see next!

my signature

Leave a comment

How to do a Basic Smokey Eye for all Ages

7 / 5 / 155 / 24 / 16

Hello my Bondbeautys,

I am super excited about todays post! I have been thinking lately about how I want my blog and videos to be something that anyone can enjoy no matter age. Most of the makeup looks I come up with I think would look good on younger or older women. Sometimes it doesn’t seem that way so to help you see how this makeup look looks on younger or more mature women I invited my mom to join us! Todays makeup tutorial is how to do a basic smokey eye that is perfect for all ages!


This smokey eye is very appropriate for this summer time , in fact it is perfect for anytime of year because it is not too dark. This is also such an easy look to create because I am only using 3 eyeshadows! Obviously when doing makeup on younger skin and older skin there are little tweeks you have to make. For example I am wearing a nude lipstick on my mom I used a light natural pink lipstick. I also used this particular blush because its glowy without being shimmery which is looks great no matter your age!

eye pic of our eye looks


Personally I love this makeup look for date night, special occasions,weddings, pictures things like that . So lets get started with the eyes! ( I recommend starting with the eyes because we will be using black and that can sometimes get everywhere).

eyes collage


For the face makeup I purposely used a blush that has no shimmer but has a beautiful glow because it is more versatile for all ages! This coral blush really warmed up the face for the summer. Now remember everyones skin tone is different so you might need to pick a lipstick that fits your undertone and skin shade better. For my mom I picked a Pink lipstick from Elf -Mink Pink and I think it looked better than the nude lipstick that I am wearing.

face final2

Products Used

Face:

  • NYC Loose Powder Translucent
  • Loreal True Match Lumi Foundation W6 Sun Beige
  • Maybelline Instant Age Rewind Eraser For Dark Under Eye Circles: Neutralizer
  • Elf Blush & Bronzer Duo: Fiji Matte
  • Elf Mineral Blush Cabo Cabana

Eyes:

  • Coastal Scents Revealed 2  Palette (Light Pink for Under the Brows & Black)
  • NYC 24 Hr Eye Primer
  • Elf Smudge Pot: Aint that Sweet
  • Elf Single Eyeshadow: Pink Ice
  • Nyc Liquid Liner Black
  • BH Cosmetic Brushes

I hope you guys found this tutorial helpful and easy to follow. If you do recreate this look I hope you will use the hashtag #Bondbeautyslook so I can take a look at what you did! You guys are so awesome and beautiful! I challenge you to try this smokey eye out this weekend or whenever!

Bondbeautyful Signature


Leave a comment

How to do a Summer Smokey Eye With a TWIST

6 / 25 / 155 / 24 / 16


Hello My Bondbeautys,

Today I wanted to show you guys this beautiful summer appropriate Smokey eye. Its really easy and it has a fun pop of blue eyeliner to finish it off. Some of you may want something a little more toned down than this bright eyeliner with the mauve lip so I give you a nude lip option that really makes it more wearable.

mauve lip option pic

Personally I love Smokey eyes and I will even rock Smokey eyes in the summer! Date night is a Smokey eye night, its romantic, mysterious  and perfect for a night out.  So this weekend when you are heading out why not try out this look! So enough blab and let me show you how I did it!


Products Used:
Hardcandy Natural Eyes Palette
Wet N Wild Megalast Lipstick Mauve Outta Here 
Wet N Wild Megalast lipstick Bare It all
Coastal Scents Forever Blush Enchanting 
NickAk Newyork Shimmer Eyeliner : Blue
Elf Baked Blush Maui 
Loreal Infallible Foundation
Maybelline Instant Age Rewind Concealer Neutralizer 
Elf Blush & Bronzer Duo: Fiji Matte

*All Links Are Affiliate Links

IMG_3753

I personally Love this look for t
Summer I think it looks amazing and Is a fun look to do! If the Mauve is too much color then try the nude lip option. I personally love these Wet N Wild Megalast Lipsticks because they are Matte and they feel very comfortable on the lips!

Nude Lip Option

I wanted to make this eye look as simple as possible , If you want more detail and see the eyeshadows I used check out the video above. Here are the four easy steps I used and you can use which ever eyeshadows you love!

Step By Step Eyes

If you like my videos then Subscribe to my Youtube channel! If you like my blog posts and want to see more make sure to enter your email above! What type of looks do you want to see this summer ? Pops of color or natural?

Bondbeautyful Signature

Leave a comment

Highlighting 101

1 / 13 / 14

Highlighting 101 Thumb


Hello My Beautiful friends,

It is a beautiful monday & I thought what a better day then to learn something new! So today Im going to be telling you all about highlighting! Im going to be answering some simple questions: what is highlighting? What kinds of highlighters are there? Why should I highlight? How do I apply it & Where? What brushes do I need? So lets begin…


H 1Products Talked About:

  • ELF Shimmering facial whip: Lilac petal
  • Bare Minerals Face & Body Color: Geniune Jade
  • Smashbox Face & Body Palette: Gold Mine
  • Elf Glow Bronzing Powder: Sunkissed
  • Color Institute Twist Up Blush Stick
  • Neutrogena Concealer: Fair

1. Whats Highlighting?

I know we all look at bridal magazines or celebrity magazines & it always looks like the light hits there cheeks & nose at just the right angle! Well thats not the case , they give that illusion using makeup , specifically a highlighter! So if you want to have that glow effect then keep reading!

Ha 2

Its A makeup product , it can be a powder , liquid or cream product That you apply to your face to add a glow or to extenuate certain features! (gives you a glow also known as bridal glow or flawless appearance) I wasn’t even outside when I took this picture but yet the sun managed to hit me right above my cheek bones! 😀 Its all about the highlighter!

2. What can be used to highlight with?

Well You can use a powder, cream or liquid that has a light shimmer or that is just lighter than your skin tone.. Usually they have a champagne color, pinky color, or gold tone to it!

3. Where do you highlight on your face?

H4So you can highlight on top of your cheek bones, bridge of your nose, cupids bow, center of fore head, underneath your brow, right above your brow & even on your chin (highlight areas you want people to notice on your face , & places you want the sun to hit just right)… You do not have to highlight on all of those areas but as you can see I did on most of those & it looks pretty good! … Usually women highlight on there cheek bones & Nose.

So I hope this was helpful .. For more information don’t forget to watch the video above! So here is my complete look for the day..

H3H3 I went with a very natural eye look & Nude pink lip & A very Glowy highlight…

  • Highlight :Color Institute Twist Up Blush Stick
  • Highlight: (To set the cream highlight) Smashbox Highlight: Gold Mine
  • Lips: Elf Matte Lip Color Natural
  • LipGloss: holiday Hugs Lipgloss by Philosophy
  • Cheeks: Wet N Wild Mellow Wine Blusher

Thank You for watching & Reading! Don’t forget to like my Facebook page!! ->

So what are you doing this monday morning? Till Next Time..

Remember, Beauty Comes From Within

<3 Love, Bondbeautyful


Leave a comment

How to Not look Grungy In Glasses

11 / 14 / 13

1

Hello My Beautyful Friends!

So I have glasses, and I know that sometimes glasses are NOT cute! THey can sometimes make you look grungy and a little too casual. Well today I have put together some tips to help you not look GRUNGY in your Glasses!2

Tips:

  • do your hair: actually curl your hair or if your hair is straight curl the ends DO NOT put you hair in a pony tail! (fancy yourself up a little more than usual)Photo Nov 14, 9 52 58 AM
  • Do your nails: you don’t want to have chipped nails !
  • Apply concealer: you need to look flawless so apply concealer on your problem areas & especially underneath your EYES!
  • Apply foundation: You will look more ready for the day & not grungy if your face looks flawless (foundation will make you look more professional as well )
  • Apply powder: there is nothing more that yells grungy than a girl with glasses & an oily face
  • CONTOUR: Get ready more than usual contour your face, glasses can sometimes make you look like you have a rounder face so contouring will help with that
  • APPLY EYESHADOW: do a darker eye than usual and yes still apply eyeshadow this will help your eyes pop through your glasses instead of being hid by your glasses (Rimmel Glam Eyes HD: Green Park)Photo Nov 14, 10 04 22 AM
  • Glowing Blush: Adds color & a beautiful Glow (Milani: Rose D’oro)
  • Add a pop of color with your lipstick: try to pick something other than a nude to bring some color to your lips (revlon balm stain: Romantic)

Check out the Video Below for more tips….

So what do you do to prevent yourself from looking grungy when you wear glasses?  Till next time…..

Remember , Beauty Comes From Within

<3Love,Bondbeautyful

Leave a comment

Curly Hair 101

9 / 25 / 1310 / 10 / 13

20130925-120628.jpg

Hey Ladies!!!!

Im reaching out to all you naturally curly haired (or wavy) Girls!!!

Some Girls say curly hair is a curse… I say its a blessing! So imbrace your curls… How? Let me tell you all about it.. check out the video below…

Products Talked About

20130925-120659.jpg

  • Conair Ion Shine Blow Dryer With Diffuser
  • Macadamia Hair Mask (Target $20)
  • Macadamia Nourishing Leave In Conditioner
  • BedHead Moisture Maniac Shampoo & Conditioner (Cosco $20)
  • EverStraight Brazilian Keratin Therapy Flat Iron Spray
  • BioSilk Silk therapy
  • Design Essentials Silk Essentials
  • Suave Professional Sleek Anti Frizz Cream
  • Herbal Essences totally twisted curl boosting mousse

TIPS

  • Wash Your Hair as few times as possible
  • Use a conditioning mask
  • Use a leave in conditioner
  • Use a heat protectant spray of some sort
  • Use a diffuser on low heat Never High heat
  • Drink lots of fluids to help your hair stay healthy…

Whats do you love about your curly hair? Do you have a favorite curly hair trick or tip? Let US KNOW!!!!

*Dont forget to check my look of the day/outfit of the day blog post!…….


Intill Next Time….

-BondBeautyful


Leave a comment

Face Makeup: For Beginners

9 / 16 / 1310 / 10 / 13

20130916-104304.jpg

Listen up ladies , you don’t have to be a makeup artist to look good!!

Even Beginners can look Flawless, Let me show you how to apply your face makeup the easiest way possible, and still look flawless!I also have some great tips to share!…

Tip#1 Match your foundation shade with your neck

Tip #2 Swatch your foundation on your jawline to check if its a match

Tip #3 Blend Blend Blend your foundation down to your neck

Tip#4 when Blending Concealer Use your ring finger for a soft touch

Tip #5 When Concealing a blemish blend around blemish not on top of blemish

Tip #6 Use a Light hand when applying powder to prevent cakeyness

Tip #7 Make a fishy face to expose your cheek bones when you contour

Tip #8 Blend your bronzer all the way to hairline

Tip #9 Smile when applying blush to expose your apples(the fattest part of your cheek)

Tip #10 Blend From your apples to your ears when applying blush

So tell me what are your secret tips when doing your face makeup?! SPILL….

Now that you know all my the tips see how to apply below !….


Schools out! Hopefully this helps you beginners apply face makeup flawlessly..

_BondBeautyful


Products:

  • Maybelline Fit Me Foundation
  • Elf Tinted Moisturizer
  • L’Oreal True Match
  • L’Oreal Magic Nude Liquid Powder Foundation
  • Rimmel Stay Matte Powder
  • L’Oreal True Match Pressed Powder
  • Elf Studio Blush(Tickled Pink)
  • Elf Warm Bronzer
  • Nyx Cream Blush(Hot Pink)
  • Bh Cosmetics Synthetic Stippling Brush
  • Bh Cosmetics Duo Fiber Stippling Brush
  • Elf Blush Brush
  • Elf Total Face Brush
  • Elf Powder Brush
  • Elf Foundation Brush

20130916-104312.jpg

Todays Look….

Nails: Sally Hanson’s Hard as nails xtreme wear nail polish :Grey area

Lips: Jordana Twist & Shine Balm Stain (Check out my review )Honey Love http://bondbeautyful.com/twist/

Fashion: Earrings -Forever21, Heart Ring -Forever21,Moccasin Booties-Target,Jeans-Ross,Shirt-Forever21


20130916-104319.jpg

Leave a comment

Naked smokey eye (Look Of The Day)

9 / 10 / 139 / 10 / 13

1

Hey Ladies… Fall is right around the corner, for many of you its here… Here is my look of the day as well as how to get this smokey eye.. which is Perfect for Fall!

Outfit:

Shirt -Ross

Jeans- Ross

Bow: I made myself .. check out my DIY Bow Clip Video…

Earings: Forever 21

Nails: China Glaze Sea Spray & First Mate

20130910-174156.jpg

Makeup:

Naked Palette By Urban Decay

Jordana Fabuliner Bold

Lancome Kohl Pencil: Gris Noir

Flamed Out Mascara : CoverGIrl

Jordana Twist & Shine Balm Stain: Honey Love

Elf Warm Bronzer

L’Oreal Magic Liquid Powder Foundation Shade 320

Rimmel Stay Matte Powder
Smash Box Gold Mine Palette (Highlighter)

So how Do you do a smokey Eye .. Well Let me tell you its super easy !

20130910-174222.jpg1.Elf Cream Shadow for Base

2. Gunmetal Shadow All over the Lid with a eyeshadow Brush

3.Add Sin On the center of the Lid (for some shine)

4. Add Gunmetal in the crease with a crease brush

5. Blend with Naked shadow & Blending Brush… BLEND BLEND BLEND

6. Add A shimmer highlight (Virgin Shadow) Underneath Brow

THATS IT! EASY AS THAT… If you would like you can add a liquid liner like I did…

I used Fabuliner BOLD on the top lash line, Lancome Liner in the waterline, And a little bit of gunmetal on the lower lid…

For the face I went pretty simple because of the dramatic eye..

I Used the New L’oreal Magic Liquid Powder Foundation, Topped it off with Rimmel Stay Matte Powder..

For the cheeks I made a fishy face and contoured along my cheek bones..

Then I Used the BLush shade in the Elf Warm Bronzer on the cheeks,

Last I highlighted The tops of my Cheek Bones with Smashbox Highlighter..

But for a look to be complete you cant forget about the LIPS!! lips will make or break you every time..

I chose to go with a deep nude Balm Stain By Jordana … For $2.99 Its a steal…

Thats It The looks complete and you look fabulous and ready for a date night!

Give this look a try! You may think that you cant pull a look like this off , but so did I until i tried it and now its my favorite date night look…If you do try this post it on Instagram & Tag me I would love to see it!

GOOD LUCK LADIES

-BondBeautyful

Whats Your favorite Products for a smokey eye??

Leave a comment

Posts navigation

1 2 Next Page

About

Hi Im Bondbeautyful, I’m a mom of 4 Boys. I like to share my thoughts on makeup & beauty as well as other tidbits. I’m a proud American/Latina beauty influencer & youtuber. I love sharing what I know and have learned with you.

Subscribe Via Email

Recent Posts

  • Green Fun Summer Dress Outfit
  • How to get rid of dry patches on your skin
  • JOAH Truly Yours Natural Finish Foundation Drops Review Swatches Dry Skin
  • Dior Backstage Face & Body Foundation
  • Foundation Week | 7 Days of Foundation

Archives

Pages

  • About
  • BlogBeautyful
  • Disclaimer Page
  • Home
  • My Foundations Shade Matches
Site made with ♥ by Angie Makes
Angie Makes Feminine WordPress Themes
InstagramInstagramInstagramInstagramInstagramInstagram