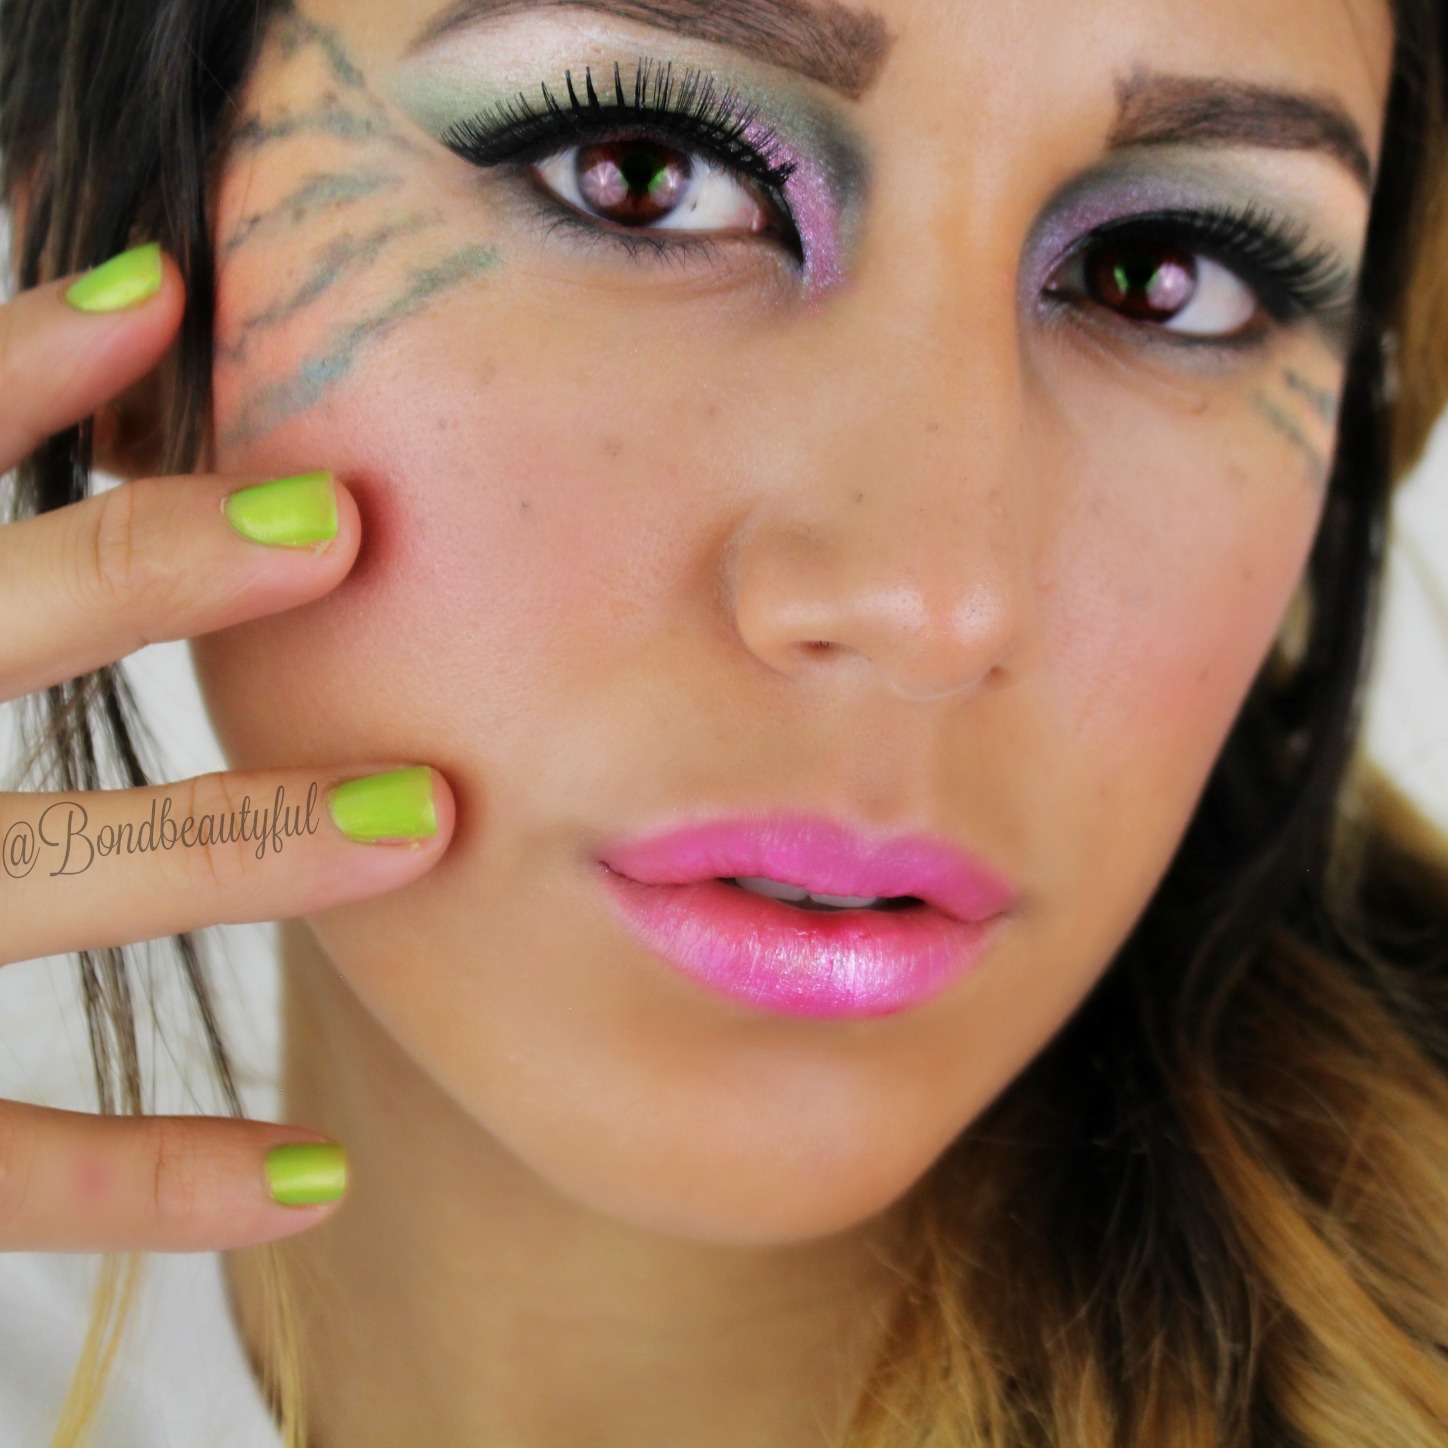
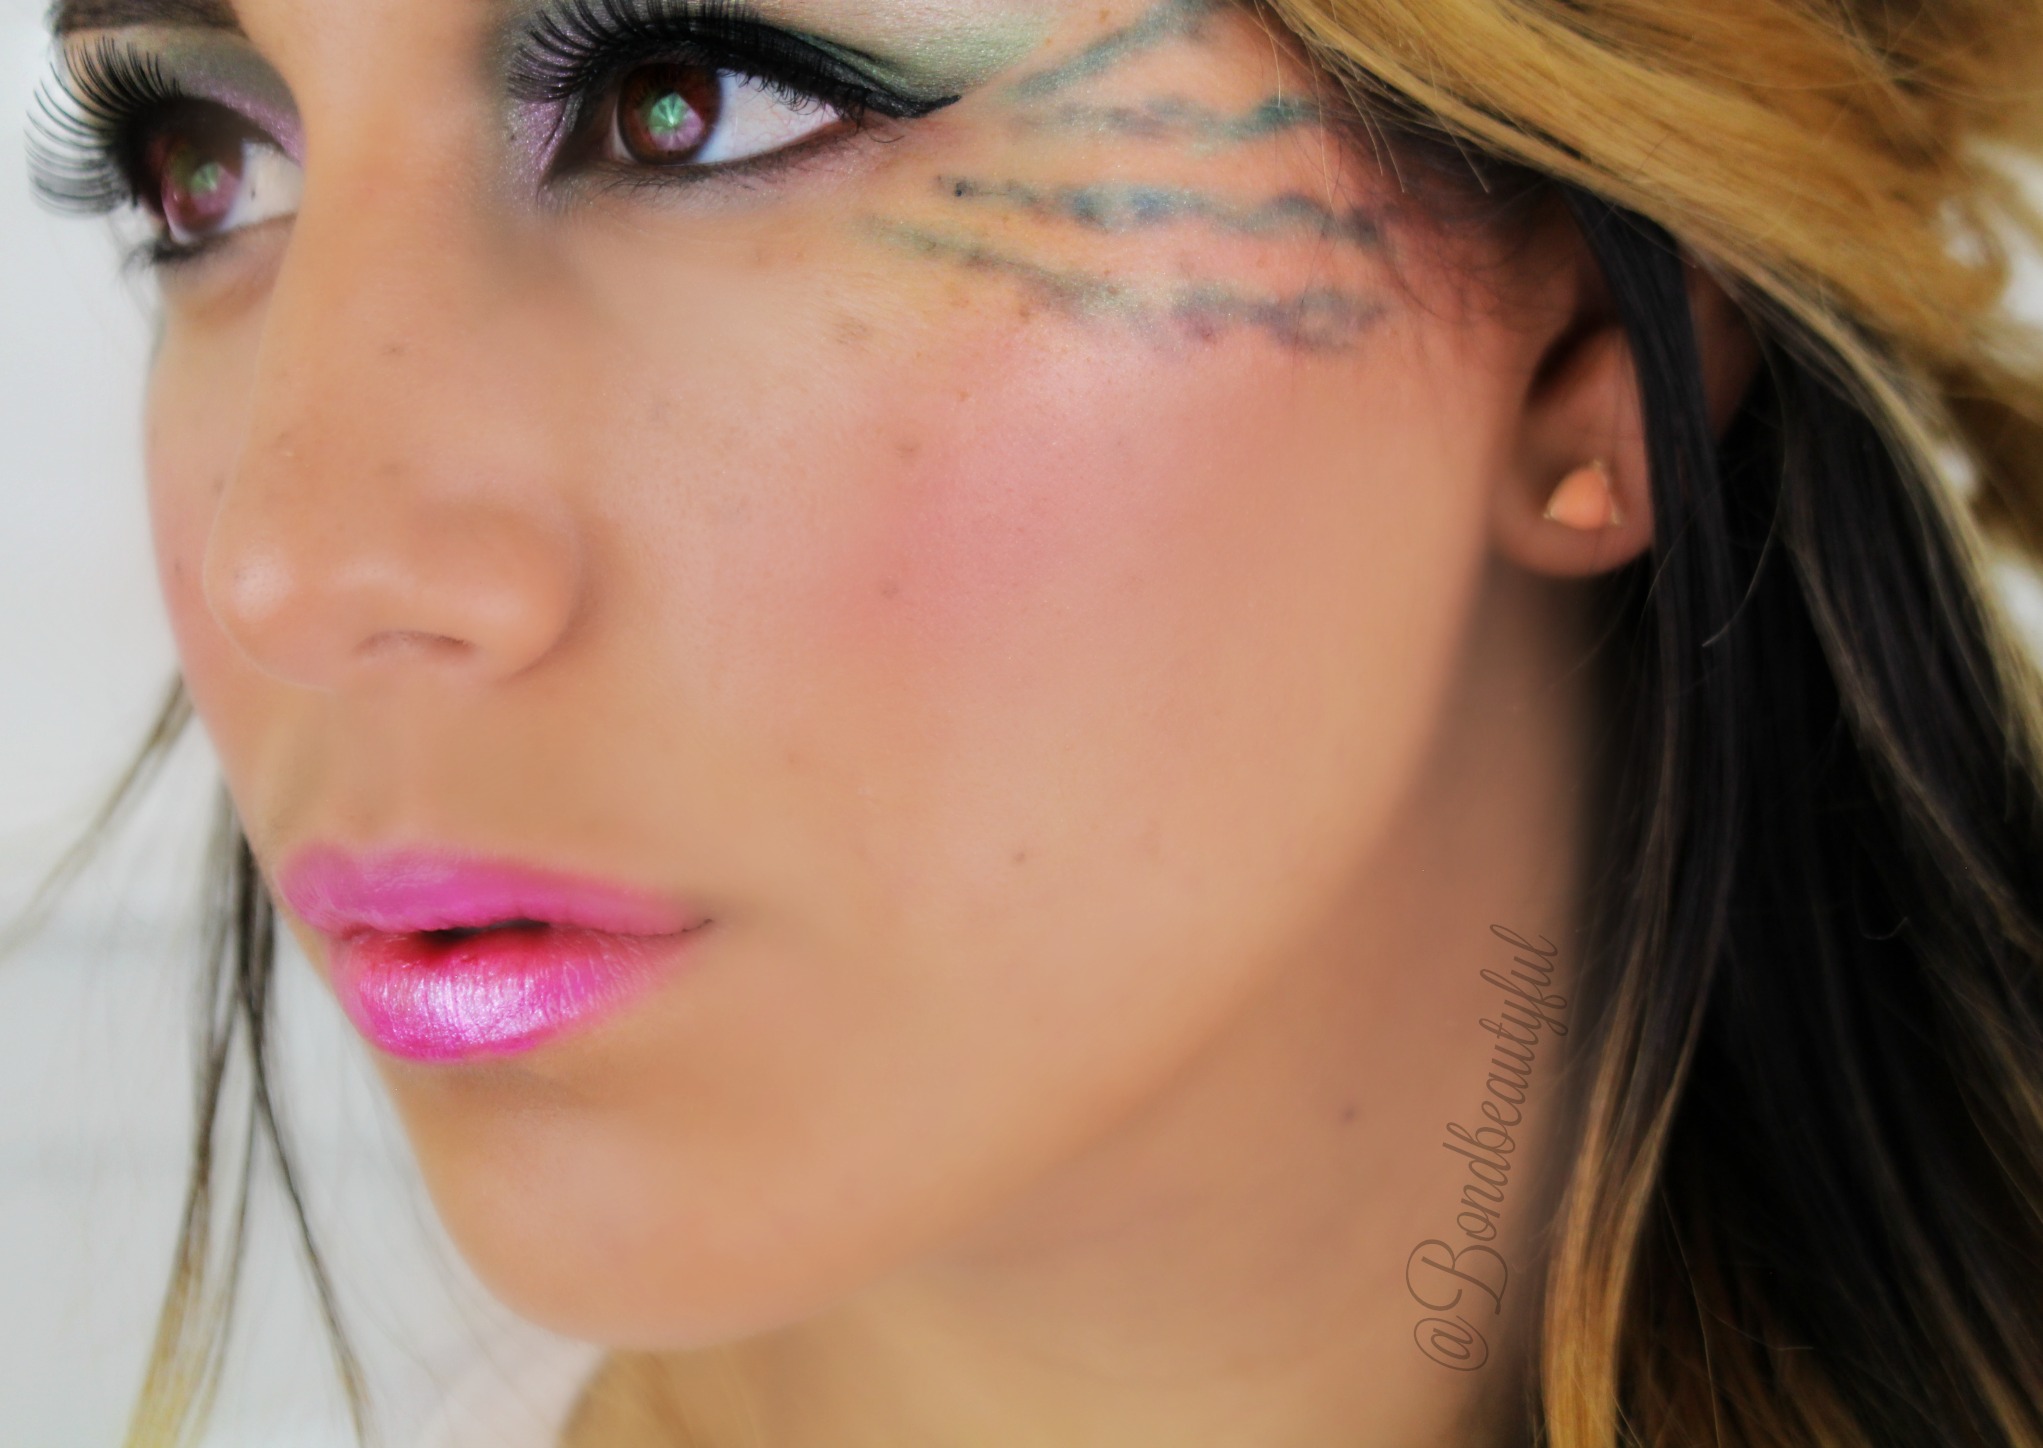
Today I am doing the Dollar Tree Makeup Challenge! Basically you can only use makeup from the Dollar Tree to create a look! I decided to do something out of the ordinary and fun. For some reason my favorite fruit of the moment is watermelon so I decided to do a watermelon inspired look! I have been doing more editorial type of makeup pictures lately on my Instagram and so I thought why not on youtube?
Here is the whole challenge video for you to see for yourself how it turned out! It was definitely very difficult, but as you can see from the Instagram pictures it worked out great!
If your not subscribed to my youtube SUBSCRIBE! It is completely free and easy! I love posting up makeup videos and I regularly post 3 up a week! Here are how the pictures turned out on Instagram!
What do you think? Should I do more tutorials where I show you how to do my Instagram editorial style looks? Let me know in the comments!
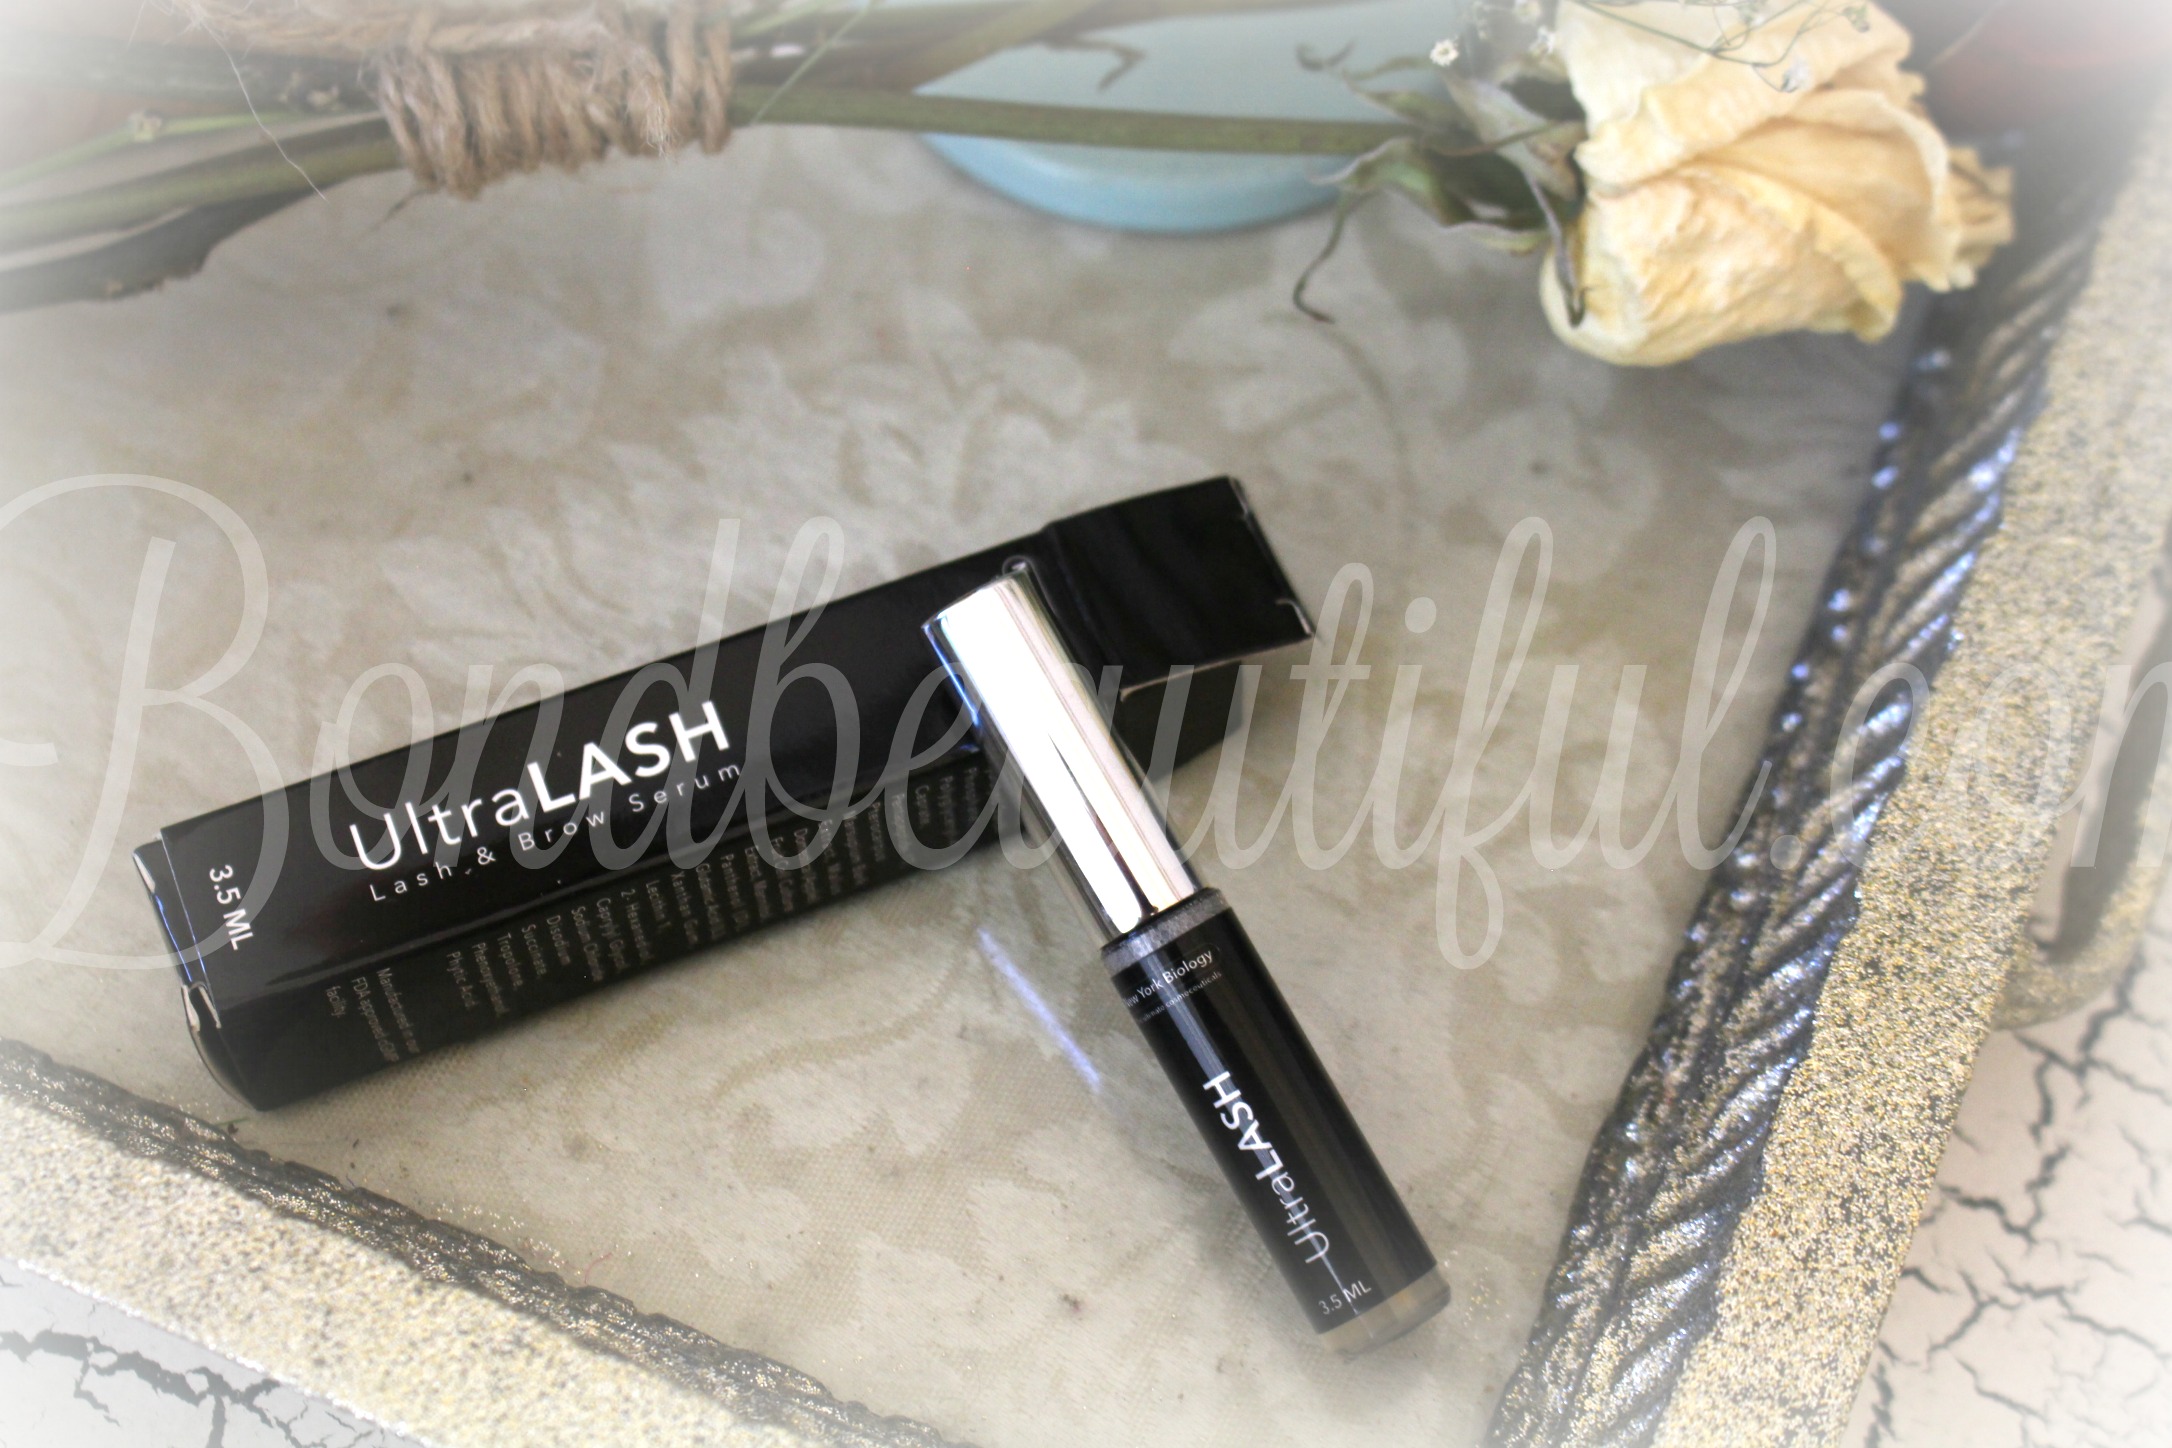
Last week I talked about the New York Biology Eye Gel. Today I wanted to talk about The New York Biology Lash & Brow Serum. I have been trying this out for about a month now. I want to tell you guys about this product because I am very surprised and impressed! Last month I was really into waterproof mascara, which dried my lashes and broke most of them off. As you guys probably already know waterproof mascara isn’t the best thing to use when you want your natural lashes to be long & beautiful.
So lets talk about what the claims are:
Irritation- free & Allergy- free
Add Volume
Lengthen
Grow faster
Darken Lashes or brows
thickens brows
What does it really do? (after 30 days of use)
Helps your lashes grow faster
Lengthens
thicken brows
brows hairs grow
Pros?
Cruelty free
alcohol, paraben, & chemical free
Great for sensitive eyes or contact wearers because it doesn’t irritate at all
Cons?
It does not have a stopper so it if it tips when its open the product will spill out
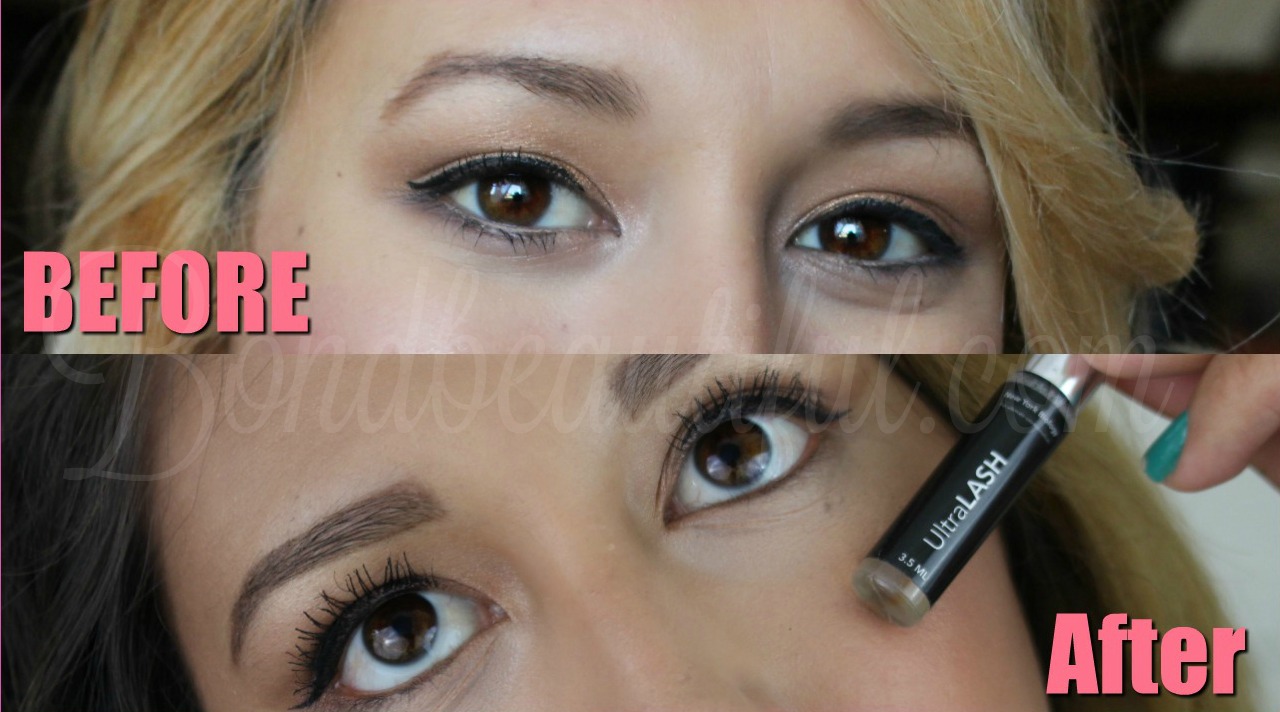
Does it work? Yes , because of the nutrients and vitamins it contains it really helps your lashes & eyebrows grow faster than they would by themselves. Like any product it takes time so that is what I noticed after 30 days. This is a product for someone who is patient because it isn’t going to make your lashes really long and voluminous after one use.
Here are my results after 30 days.
I will continue to use this and update you in another month to see how much volume & length I have after two months.
I am super excited about todays post! I have been thinking lately about how I want my blog and videos to be something that anyone can enjoy no matter age. Most of the makeup looks I come up with I think would look good on younger or older women. Sometimes it doesn’t seem that way so to help you see how this makeup look looks on younger or more mature women I invited my mom to join us! Todays makeup tutorial is how to do a basic smokey eye that is perfect for all ages!
This smokey eye is very appropriate for this summer time , in fact it is perfect for anytime of year because it is not too dark. This is also such an easy look to create because I am only using 3 eyeshadows! Obviously when doing makeup on younger skin and older skin there are little tweeks you have to make. For example I am wearing a nude lipstick on my mom I used a light natural pink lipstick. I also used this particular blush because its glowy without being shimmery which is looks great no matter your age!
Personally I love this makeup look for date night, special occasions,weddings, pictures things like that . So lets get started with the eyes! ( I recommend starting with the eyes because we will be using black and that can sometimes get everywhere).
For the face makeup I purposely used a blush that has no shimmer but has a beautiful glow because it is more versatile for all ages! This coral blush really warmed up the face for the summer. Now remember everyones skin tone is different so you might need to pick a lipstick that fits your undertone and skin shade better. For my mom I picked a Pink lipstick from Elf -Mink Pink and I think it looked better than the nude lipstick that I am wearing.
Products Used
Face:
NYC Loose Powder Translucent
Loreal True Match Lumi Foundation W6 Sun Beige
Maybelline Instant Age Rewind Eraser For Dark Under Eye Circles: Neutralizer
Elf Blush & Bronzer Duo: Fiji Matte
Elf Mineral Blush Cabo Cabana
Eyes:
Coastal Scents Revealed 2 Palette (Light Pink for Under the Brows & Black)
NYC 24 Hr Eye Primer
Elf Smudge Pot: Aint that Sweet
Elf Single Eyeshadow: Pink Ice
Nyc Liquid Liner Black
BH Cosmetic Brushes
I hope you guys found this tutorial helpful and easy to follow. If you do recreate this look I hope you will use the hashtag #Bondbeautyslook so I can take a look at what you did! You guys are so awesome and beautiful! I challenge you to try this smokey eye out this weekend or whenever!
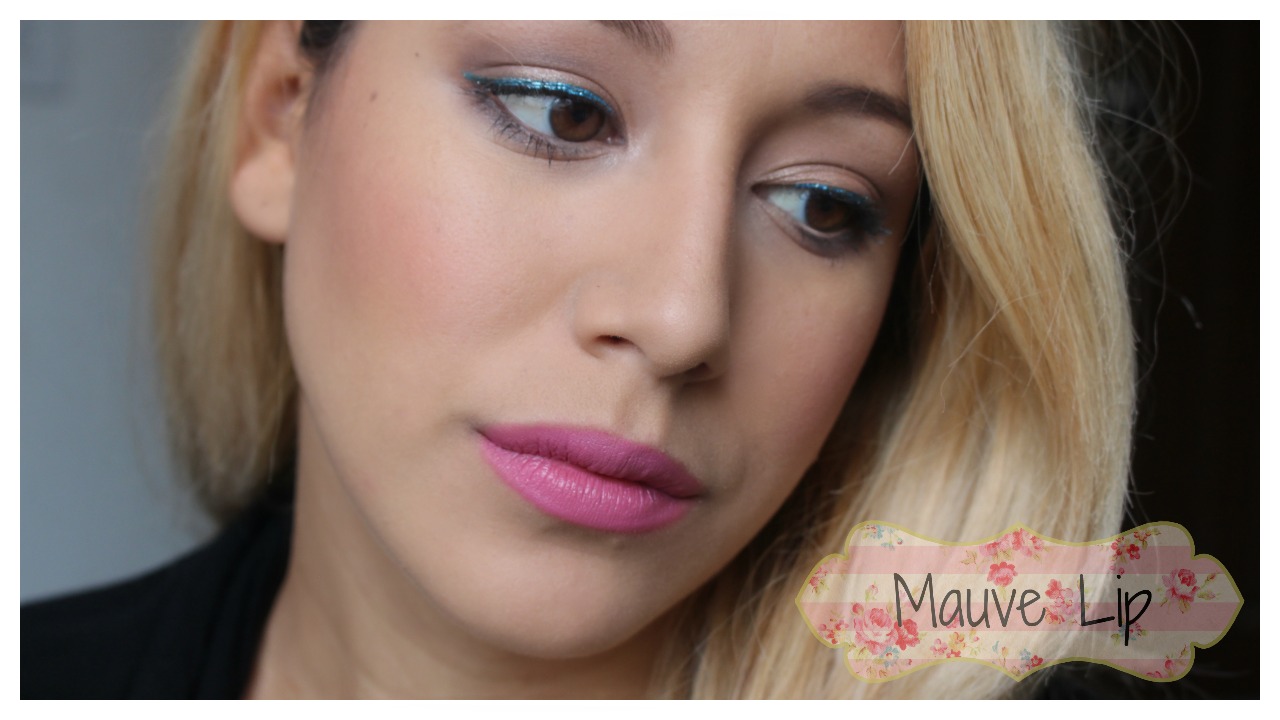
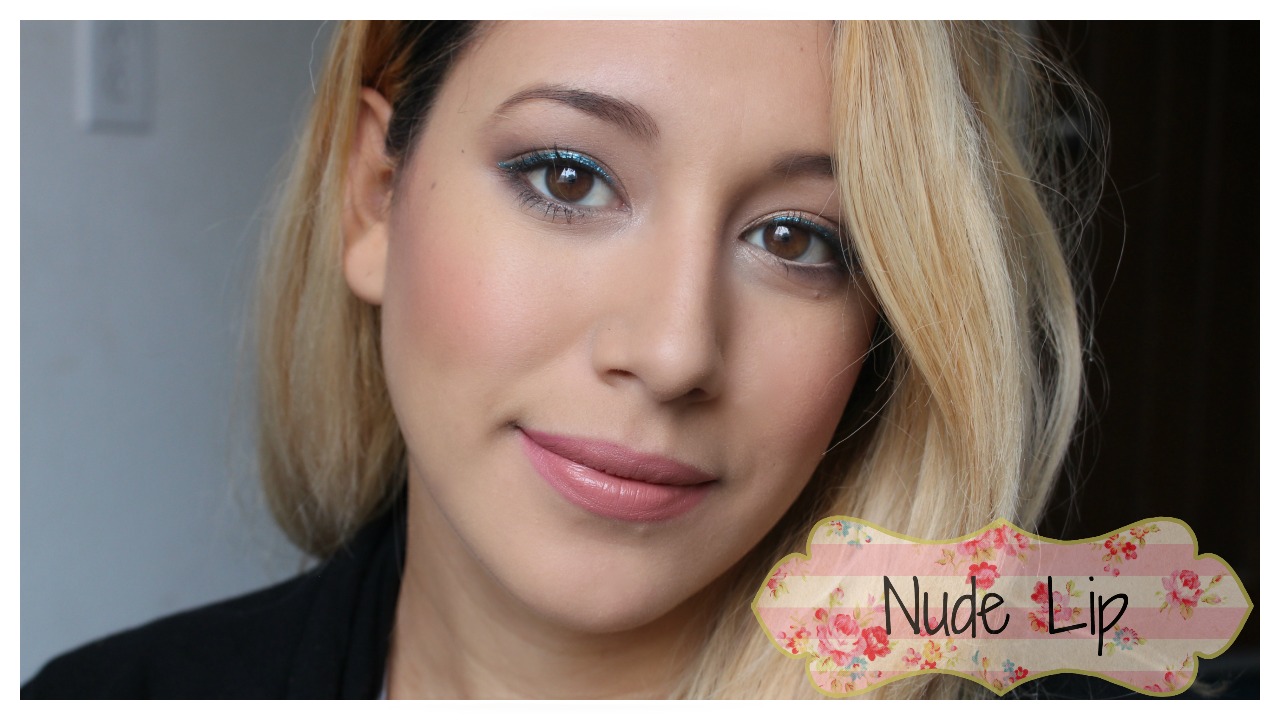
Today I wanted to show you guys this beautiful summer appropriate Smokey eye. Its really easy and it has a fun pop of blue eyeliner to finish it off. Some of you may want something a little more toned down than this bright eyeliner with the mauve lip so I give you a nude lip option that really makes it more wearable.
Personally I love Smokey eyes and I will even rock Smokey eyes in the summer! Date night is a Smokey eye night, its romantic, mysterious and perfect for a night out. So this weekend when you are heading out why not try out this look! So enough blab and let me show you how I did it!
I personally Love this look for t Summer I think it looks amazing and Is a fun look to do! If the Mauve is too much color then try the nude lip option. I personally love these Wet N Wild Megalast Lipsticks because they are Matte and they feel very comfortable on the lips!
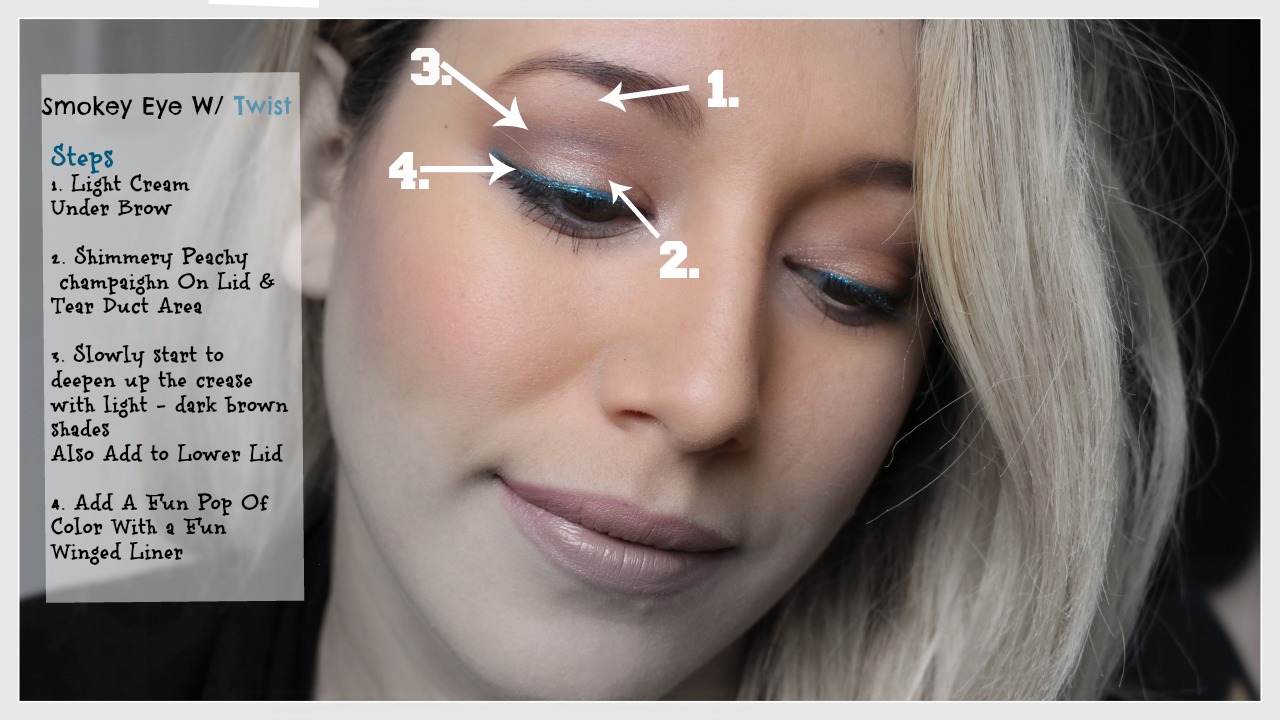
I wanted to make this eye look as simple as possible , If you want more detail and see the eyeshadows I used check out the video above. Here are the four easy steps I used and you can use which ever eyeshadows you love!
If you like my videos then Subscribe to my Youtube channel! If you like my blog posts and want to see more make sure to enter your email above! What type of looks do you want to see this summer ? Pops of color or natural?
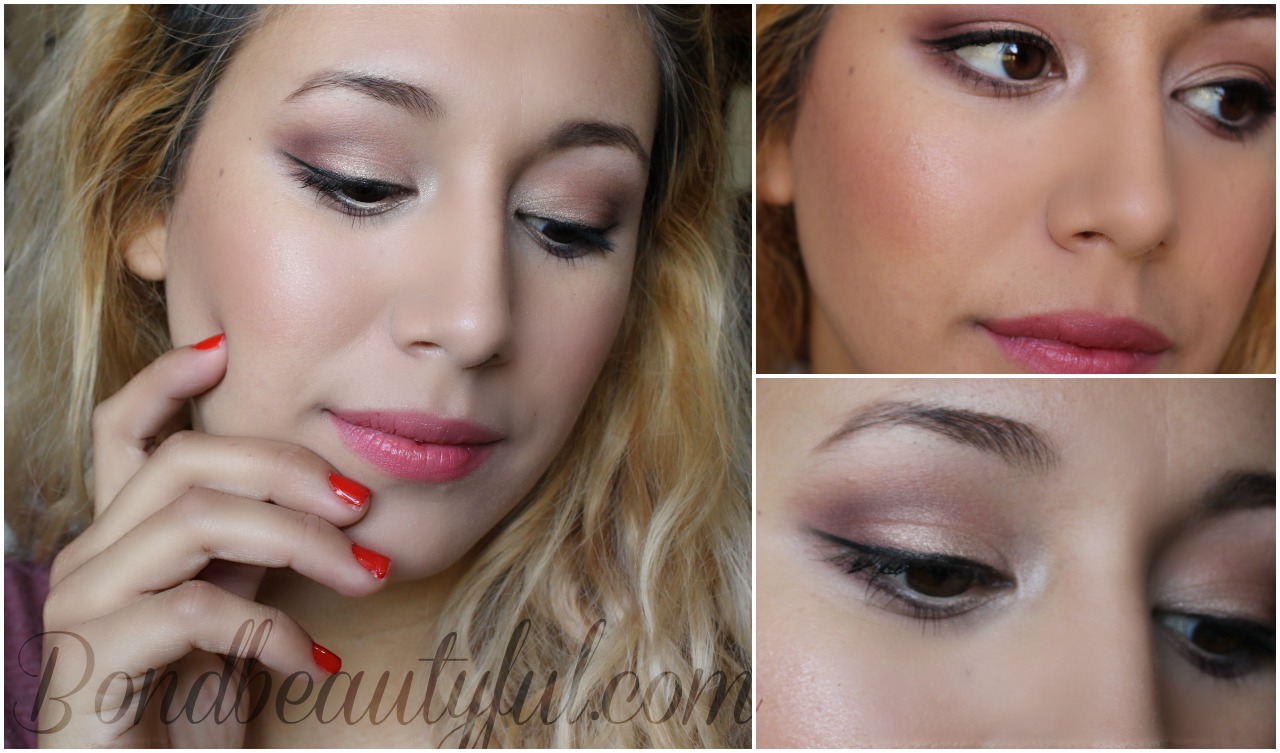
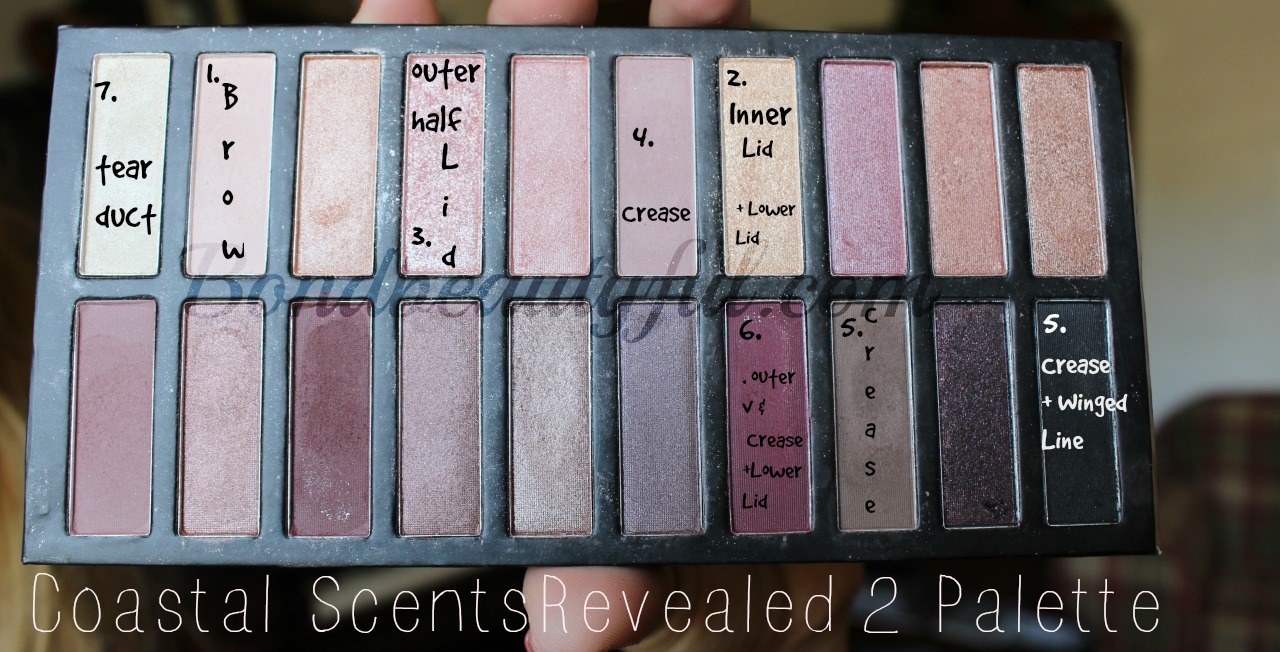
Todays post is a how to of sorts. This last month I have been really experimenting with the Coastal Scents revealed 2 eyeshadow palette. I came up with a look that I consider to be Romantic & my favorite with this palette so far. So today Im going to show you how to do this Romantic Eye!
This look is actually very simple as in there really is no special technique.
Eyes:
Prep- Prime the lids with a primer , then add a base (elf smudge pot, to help the colors really pop & last all day)
Put the Light Pink underneath the brow (to highlight that part of the eye) with a eyeshadow brush.
But this gold in the inner 1/2 of the lid & the inner 1/3 of the lower lid
Add this pink to the outer half of the lid & blend it with the gold we added first.
Put the Fiji Matte Bronzer shade (a matte medium brown) into the crease with a blending brush using wind wiper motions. Then add this light purple shade in the crease with a crease brush.
Mix the dark brown and black and darken up the crease just a little.
Then use this cranberry shade to darken up crease & make a side ways V on the outer part of the lid and lower lid (make sure to blend)
Then Make a winged line with the black from the palette. And add this light shimmery shade to the tear duct area (this will brighten your eyes up)
That’s it you can add liquid liner to make the winged line more intense or just add mascara and be done with it. I personally did add a nude color eyeliner in the water line & a black in the tight line.
Its time to welcome the new year with open arms! & Its time for me to celebrate My BIRTHDAY! I just had to sneak that in here , today Is my birthday I am officially 23 years old! This isn’t my birthday look though sorry! Today I’m showing you how to do this purple smokey eye that is perfect for welcoming the new year! I used a profusion palette that you can still get at walgreens for only a limited time! So here we go….
All the Products I Used….
Nearly Naked Foundation, Rimmel stay matte powder, kirkland concealer, elf concealer honey,Elf blush berry merry, elf shimmering facial whip lilac petal, neo peele eyeshadow Profusion, Jordana 12 hr made to last eyeshadow pencil,jordana fabuliner bold, jordana balm stain honey love, cover girl famed out mascara & Its so big mascara, Starlooks gem pencil amethyst, & Last Sally hansen magnetic nail polish ionic indigo!
For the Eyes :
Step 1: Apply shade 1 underneath the brow
Step 2: Apply shade 2 all over the lid & blend
Step 3: Apply shade 3 on top of the black & in the crease & lower lash line
Step 4: Apply Shade 4 into the crease & Blend out the harsh line from the deep purple & Black
Step 5: Apply shades 5 & 1 Onto a blending brush & use it to blend the crease & lid if it is too dark…
Step 6 : Apply shade 6 into the inner corner to brighten up the look!
Step 7: Last apply shade 2 with a smudge brush really close to the lash line , then make a winged line with the jordana fabuliner
Last use the Starlooks silvery pencil in the lower lash line & Lower waterline, Then use a black in the upper waterline , add mascara & Your done with the eyes!
This is a really simple look & it is a fun new spin on a basic smokey eye! I also made sure to use only affordable products! I was really impressed with the profusion palette because it only cost $2 but yet it worked so well, you can see for yourself how pigmented the shadows are! It was seriously a rest buy…
So Like I said its my birthday today and Im vlogging my whole day (keep an eye out for it on wed!) Please Subscribe to my channel you can do so by clicking the button on the right side That way you can stay updated on any new videos I do , Or enter your email -> That way you can stay updated on my new blogs..
So what are you doing for new years? Im probably going to go look at fireworks & make smores! Well Till next Time friends,
Remember, True Beauty Comes from within So let it SHINE!
So today I am going to show you how I like to style my various beanies! Don’t worry I have casual & fancier beanies to show you. Its time to take out your beanies and accessorize your outfits!
Here I have This purple Beanie ,which is more of a casual, hobo looking beanie. I like to wear this beanie with really casual outfits like everyday looks. You can attach it farther away from the forehead for a slump grungy look….The nail polish I’m wearing is Avon Midnight Plum & Revlon Facets Of Fuscia.
TIP: To keep beanies on your head then hot glue a comb into the beanie! (Check out the video below to see what I’m talking about)
This Beanie can still be casual because of the material but is more of a nicer casual. So whats the difference between this one and the purple one? The color, white or cream beanies look more formal and less grungy. This one I would definitely wear on a casual date, or with a dress as a matter of fact. (Its all about the color)
This Beanie is a total different fabric , its more of a crochet fabric. This beanie is a large beanie and I love it because it gives me that jamaican style. I like to wear this an inch back from my hairline . I think this beanie looks the best with my hair to the side, side braid or I also like to tuck all my hair into the Beanie for a more Jamaican look… Because of the fabric this can be super casual (because its so slump in the back) Or with a cute dress.
This beanie is the same crochet fabric except its a white creme color. This is an beanie I would wear on any date . Its more of a fancy beanie that like I said can be wore with a casual or fancier outfit. Its more versatile because of the fabric & color.
want to see how I style my beanies in action? Check out the video below!
So how do you style your beanies? Are you comfortable with beanies? If you do wear a beanie make sure to take a picture and tag me on my social networks I would love to see how you wear your favorite beanies! Till Next Time!
*The Picture On the Right Is The Picture From pinterest that Inspired me, Not My Picture
Smokey Eyes Are So in For the fall, Here is a recreation of a look I saw on Pinterest using drugstore (affordable ) Products.. Enjoy!
Here are the Products I Used Before we get started…
Wet N Wild Trio: Im Getting Sunburned
Wet N Wild Palette: Comfort Zone
Wet N Wild Palette: Blue had me at Hello
Nyx Jumbo Pencil: Pure Gold
CoverGirl Flamed Out Mascara
Elf Mineral Eye Liner: Midnight(for waterline & Top LashLine)
Elf Matte Lip Color: Natural
Burts Bees Lip Shimmer: Caramel
Elf Studio warm Bronzer (For Contour & Blush)
L’Oreal Magic Nude Liquid Powder Foundation 320 Natural Beige
Rimmel Stay Matte Powder
Elf Makeup Mist & Set Spray (Optional For lasting Power)
EYES:
Although the eyes look complicated they really are not ..
1. Applied Nyx Jumbo Pencil On the Center Of lid (For a Base)
2.Add Gold Shadow Ontop of the Base
3. Apply a Matte Black in the crease , From outercorner all the
way to the inner corner of lid… Making the desired V Shape on
the outer corner
4.Use a dark brown eyeshadow to help darken the crease
5. Use a blending brush and a medium brow shadow to blend out the harsh line
6. Use a Lighter shadow underneath brow for a highlight
If you choose..
7. add the dark brown or black to the lower lid
8.Last add a black eyeliner on the waterline & A thin line on the upper lash line (add a black shadow on top for staying power..)
Now all you need is mascara and your eyes are done!
For the face I contoured with the elf warm bronzer, then I swireled my brush in all four shades to create a Glowy blush for the cheeks, I also added the cheek shade soley on the apples of my cheeks for a pop..
Now that the face is Flawless you can add some color to your lips..
Because this look is so dramatic I went with nude lips..
1. Elf matte lip color : Natural
2. Burts Bees Lip Shimmer : Caramel
Now the Look is finished !!
Whats your favorite date night look?? Have you tried this look yet?
Dont be afraid to get out of your shell and try new looks, you never know who you could impress…


